A car garage workshop is a working bay that still parks vehicles between projects, and the difference between one you use and one you abandon is whether you planned around the car’s footprint from day one.
The foldaway workbench you mount at 36 inches, the slatwall panels that keep tools off the floor, the 4-foot LED fixtures spaced four feet apart: every choice competes for the same square footage.
Most builders get this backward, fitting the workshop first and forcing the car to squeeze around it.
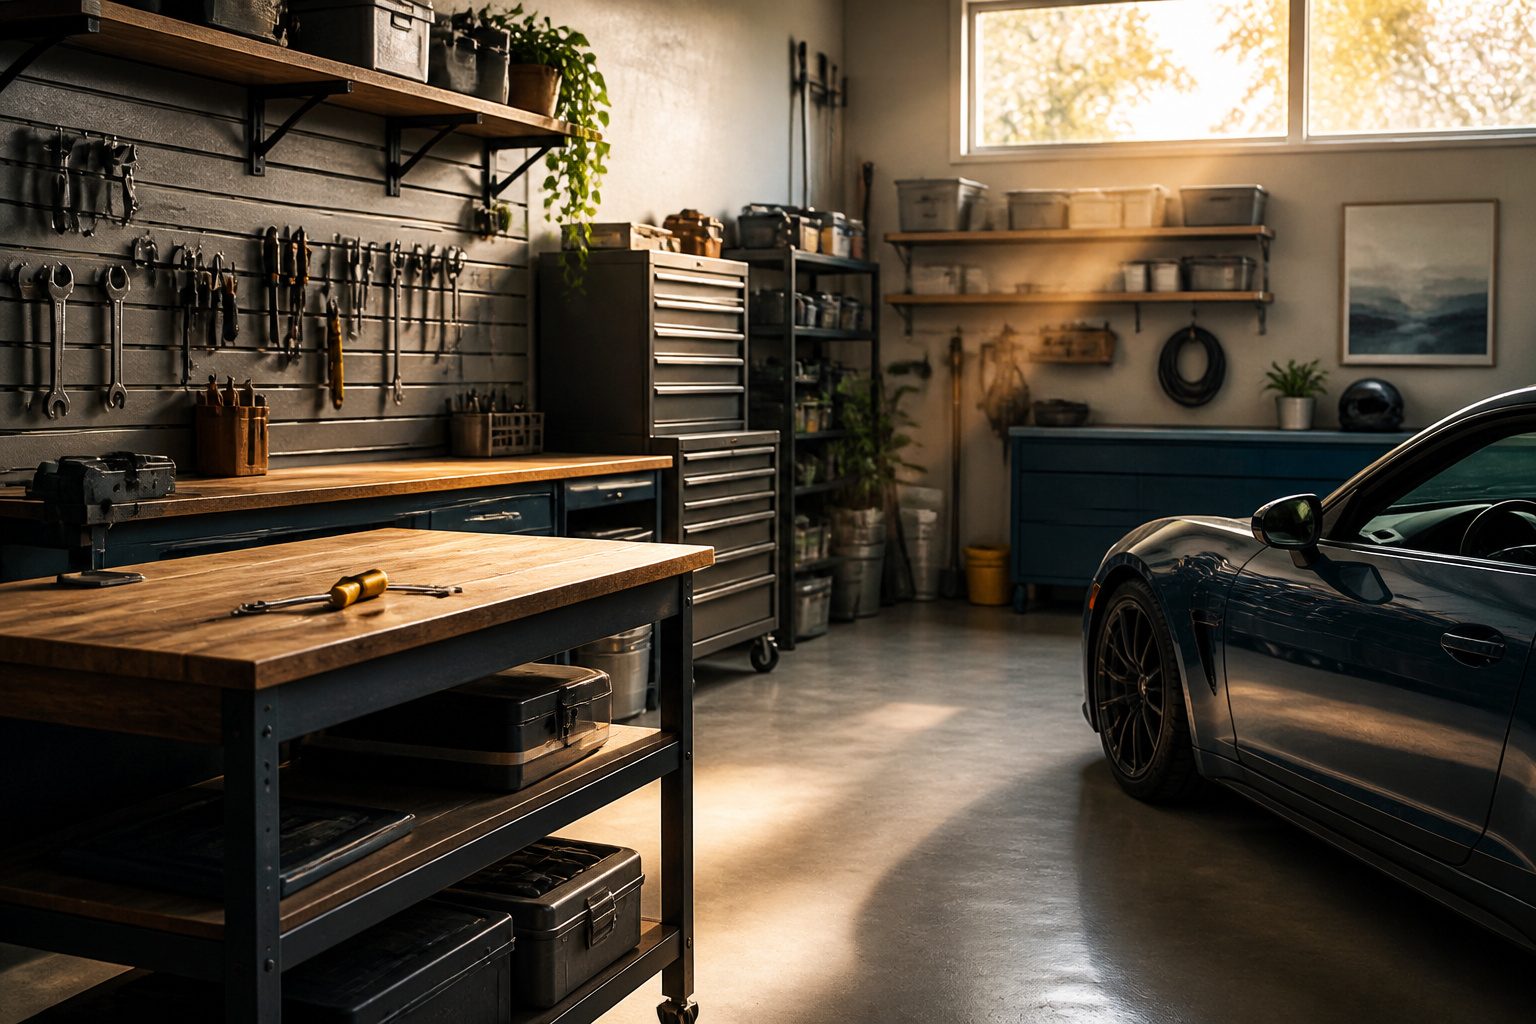
Workbench

A workbench is the nucleus of any car garage workshop, and the dimensions make or break how usable it ends up. Most run 48" to 72" long, 24" to 31" deep, and 32" to 36" high.
That height range matters more than people think. At 32", you are bent over too long and your back pays for it on bigger projects.
I would push toward 36" if you are doing anything that keeps you standing for hours, like sanding or assembly. The trade-off is less leverage for hand-planing or heavy vise work, so match the bench to the work you actually do.
For placement, the back wall is the default, but shallow garages force a side-wall setup.
If you park a left-hand-drive car, the right-side wall wins because the passenger door opens toward the open floor, not into your bench. I would skip the left wall entirely in that layout.
A foldaway workbench is worth considering if you are tight on space. The heavy-duty ones handle up to 400 lbs, and a 1.5" butcher block top on a five-foot model gives you real working surface without permanently sacrificing floor space.
The double-latch safety mechanism matters more than the marketing lets on; a bench that drops unexpectedly is a project-ruiner at best.
I would pick a fixed bench if you work weekly, but the foldaway wins for anyone who needs the bay clear between projects.

【Built for Everyday Projects】Supporting up to 1500 lbs, the reinforced steel frame and solid rubberwood top provide dependable strength for repairs, woodworking, DIY projects and everyday garage tasks.

Super Strong 2000 lbs Load: This sturdy workbench supports up to 2000 lbs (900 kg). Its 61 x 20-inch surface provides ample space for tools and heavy tasks like carving, cutting, drilling, and welding. It can also hold heavy items securely without tipping

Premium Materials: This workbench has a 0.8-inch solid rubberwood tabletop with a wear-resistant finish that resists cracking and cleans easily. Its alloy steel legs offer exceptional load capacity and rust resistance for long-lasting durability
Storage Solutions
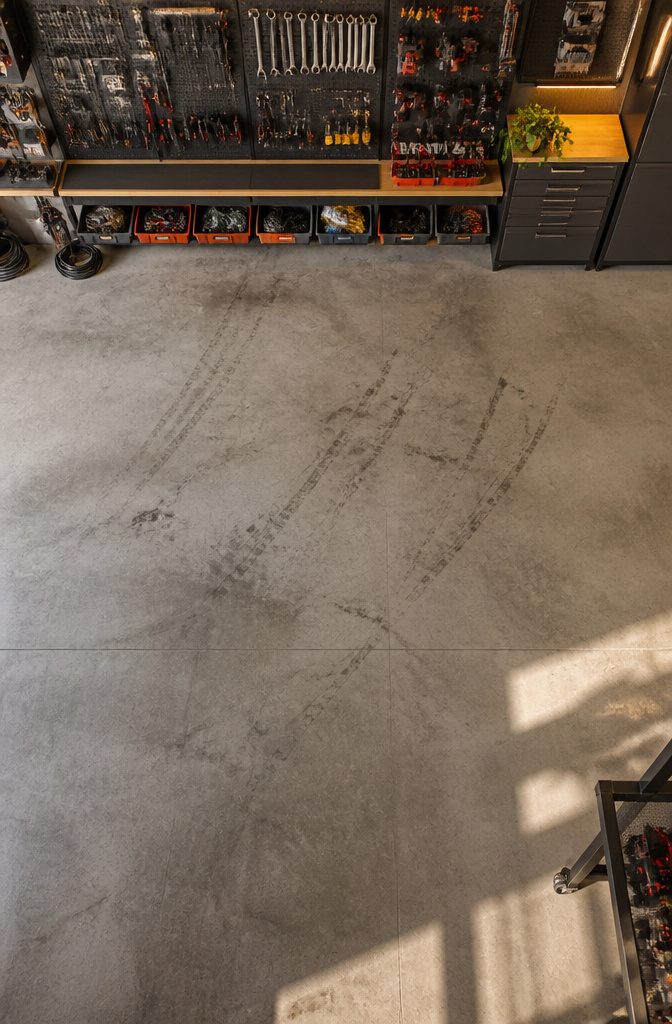
Wall-mounted storage is what keeps a garage workshop from becoming a parking lot with a workbench in the way.
Pegboards handle the tools you reach for every hour: wrenches, screwdrivers, the drill. Slatwall panels step up when you need heavier duty, with hooks for power tools, magnetic bars for small hand tools, and baskets sized for hardware.
I would pick slatwall for the main run because the accessories swap out without tools, but a basic pegboard near the workbench costs less and works fine for lighter gear.
Cabinets and labeled bins belong on the same wall, not the floor. The floor is for the car, the creeper, and maybe a folded miter saw stand you pull out when needed.
Shelves along the passenger-side wall make sense until you remember the door swing and the car doors; keep them shallow enough that opening either does not cost you paint. Under-shelf hooks store clamps and cords without sacrificing depth.
The twenty-minute setup is the goal.
Everything visible, everything within arm’s reach, nothing to trip over when you park. A portable shop vac lives in the closet or on a hook, not in the corner collecting dust.
Wall storage keeps the floor clear, and in a single-car garage, that clearance is the difference between a workshop and a storage unit you happen to park inside.

🥇 What You Get ------ In this kit, You will get 20Pcs 4 Inch Heavy Duty Slatwall Hooks Assortment Kit, Including 20Pcs 4 Inch Slatwall Hooks. Their dimensions are 100 × 24.3 × 74.5 mm / 4 × 0.96 × 2.93 inches (L× W× H). Intotal 20Pcs enough quantity can meet your daily needs, and the combination of different sizes can save your space usage and space planning.

You Will Receive - Our slat wall accessories kit includes a total of 32 baskets and hooks, featuring 4 baskets and 28 hooks!

VALUDED PACKAGE: Our slatwall accessories kit comes with 8pcs multisized slatwall hooks and 2 pack mesh slatwall baskets with large capacity (15”x10.6”x15.7”) which are large enough to organizing toys, sports gear, tools, and garage essentials, providing a strong and versatile solution for organizing bulky items
Lighting

Overhead fixtures set the baseline for any car garage workshop, but the ceiling alone leaves your workbench half-lit and your shadow falling straight across the part you’re trying to read.
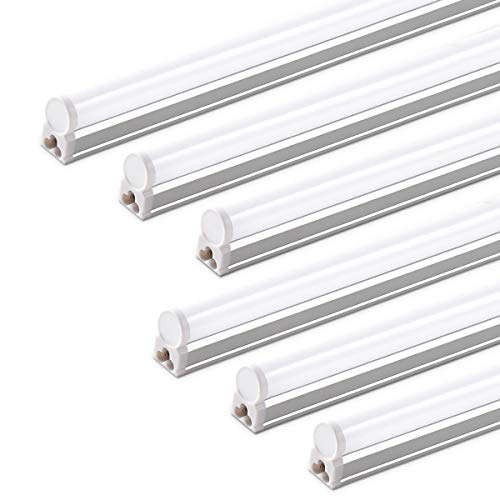
I would run 4-foot LED fixtures spaced 4 feet apart across the full bay, since LED draws 30% less energy than fluorescent for the same output and the bulbs carry a 94,000-hour rating.
The upfront cost gap has narrowed enough that fluorescent only wins if you’re fitting out a space you do not plan to keep.
For ambient garage lighting, opt for 4-foot fluorescent fixtures with electronic ballasts, which give flicker-free light and work well in cold temps. Space them 4 feet apart and use as many as you need to see well at night.
That spacing rule matters more than the bulb type.
What matters more still is a second layer: a dedicated task light at the workbench, and something you can move or aim when you are under a vehicle where the overhead grid throws your own silhouette.
I would mount a fixture to the underside of a shelf above the bench, or use a portable unit with a hook and a magnet. White walls bounce what you have; without them, even a generous grid turns dim.

Wrench Organizer for Round Hole Set: : this package includes 4 sets of pegboard wrench holders, 2 pieces make one full rack; Freely adjust the space between two holders to match wrenches of varying lengths; Keep all hand tools neatly arranged on garage and workshop round hole pegboards

4-Outlet Power Strip:This garage shelf wall mount features an integrated 4-outlet power strip with a 6.5-foot cord for easy charging. Charge your tools directly on the shelf without the hassle of searching for outlets. By combining storage and functionality, this tool rack saves space while ensuring your power tools are always ready for use.

Heavy Duty Construction - The MADD Tools pegboard screwdriver organizer holder and wrench organizer holder set is made for heavy-duty use, providing a reliable and sturdy solution for your pegboard accessories.
Flooring

Bare concrete is where almost every garage workshop starts, and it works until it doesn’t.
Oil soaks in, dust never quite sweeps clean, and a dropped socket leaves a chip that catches your eye for years. Upgrading the floor changes how the whole space feels to use.
Epoxy is the coating I would pick for a workshop that sees real work. It bonds to prepared concrete and forms a surface that resists oil, chemicals, and the stains that bare concrete drinks in.
The finish is smooth enough to sweep sawdust off in one pass, and the decorative flakes you can add during application hide dust between cleanings.
The prep is the pain: concrete must be at least 60 days old, unsealed, and slightly rough for the epoxy to bond.
Splash water on your floor. If it beads, you are stripping sealer before you start anything else.
Interlocking tiles are the other practical route. They install without adhesive, which matters if you rent or might rearrange the space.
They resist chemicals, cushion falls, and reduce fatigue on long projects. The edges lift slightly, which can snag rolling tool chests, and the seams collect grime over time.
Between the two, epoxy wins for permanence and cleanability; tiles win for flexibility and install speed. Either beats bare concrete once you are spending real hours in the space.
Super Bright: More than 2200 lumens output, 20w low power consumption. Please note that we have a brand new upgrade. If you need to connect new and old products, make sure to use the new male-female connector cables. The second generation is designed to be safer, preventing accidental electrical connections caused by human error

Super brightness: 6500K cool daylight white, 4400 lumens of brightness—brighter than 5000K. These 4ft led shop lights only consume 40W while providing the bright illumination with 250W (6 times more than conventional fluorescent lights). It is an amazing LED performance of 110 lm/w, which can save you money on electricity. The clear, comfortable 6500K light is easy on the eyes, so you can work for hours without eye strain.

✅Super Bright Output: This 4FT LED shop light delivers 4400 lumens of bright 5000K Daylight White at only 42W power draw, reaching 105 LM/W high luminous efficiency. An ideal replacement for traditional fluorescent fixtures, it significantly reduces daily power consumption.
Ventilation

Running a gas-powered pressure washer or laying down paint in a sealed garage will leave you lightheaded faster than you’d think.
If the air feels still while you work, it isn’t moving enough. Most attached garages exchange air so poorly that fumes from a single running engine can reach dangerous levels in minutes.
Start with what you have. Open the overhead door and any side door to create a cross-draft, then notice whether you actually feel air moving across the space.
Windows help more than doors alone because you can position them to pull fresh air past your workbench instead of just stirring the center of the room.
If the garage has no windows, an exhaust fan cut through the wall near the ceiling is the single most effective addition.
It pulls the hottest, most contaminated air out and lets cooler replacement air drift in through gaps at the bottom.
Chemical storage matters for the same reason. Paints, solvents, and automotive fluids kept in a garage without airflow will off-gas continuously, and that buildup seeps into the house through shared walls or the attic.
Metal cabinets designed for flammable liquids contain spills and slow vapor release, but they do not replace ventilation. I would run the fan or open the windows before I opened the cabinet, not after I noticed the smell.

Quality: Our Large Labels For Storage Bins are made from synthetic paper and high-quality adhesive, offering durability and water/Oil/Tear Resistants with No Residue. Use our storage labels without worrying about losing them in your storage bins, containers, or buckets.

Versatile Storage Containers: Multi-purpose storage bins are ideal for a variety of places, including under sinks, cabinets, or for garage storage

VERSATILE STORAGE CONTAINERS: Akro-Mils Shelf Bins are great for any space; Use them on shelves, as an under sink organizer, cabinet organizer, or for garage storage; Bins fit with 12", 18", and 24" deep storage shelves, vertical storage, and pick racks
Electrical Outlets
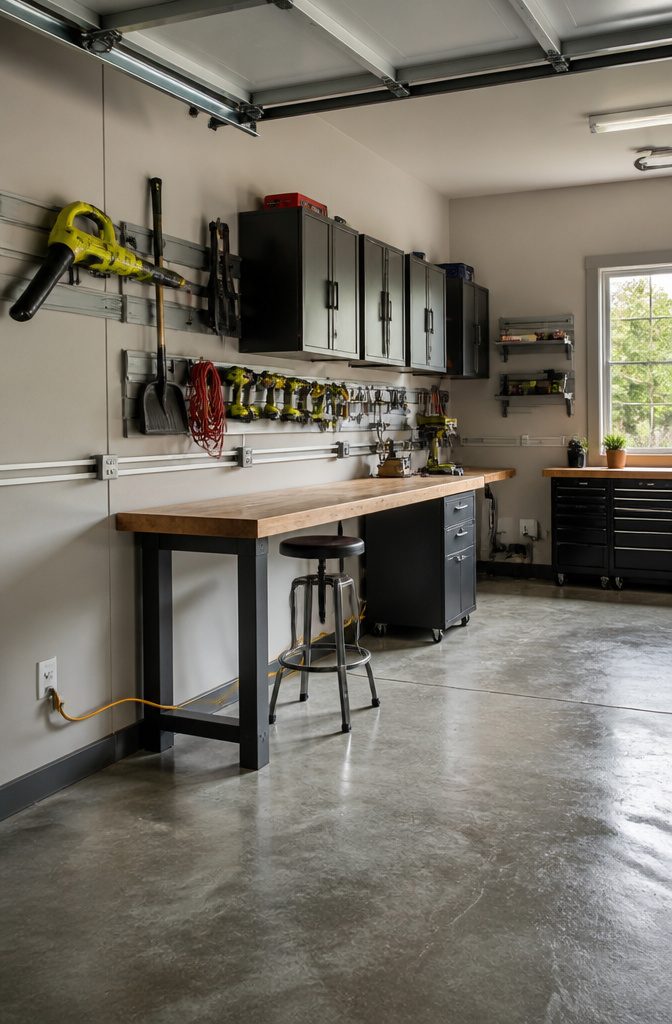
Most standard garages are underpowered for serious automotive work. I would start by upgrading to a dedicated circuit-breaker panel that can handle multiple high-draw devices running at once.
110v outlets every ten feet along the walls covers most hand tools and chargers without forcing you to stretch a cord across the floor.
That spacing matters because an extension cord snaking past a tire or under a creeper is a trip hazard that also eats up room you do not have.
For the bigger draws, a 220-volt circuit is worth the electrician’s fee. Air compressors and welders pull too much for a standard line, and trying to run them on 110v is how you trip breakers mid-project.
I would put receptacles at both floor level and workbench height so a grinder or a battery charger lands exactly where you need it.
The placement shapes your workflow: tools stay plugged in where they live, and you are not re-rigging cords every time you switch from mechanical work to cleaning up.

【Heavy-Duty Garage Work Bench 】Constructed with thickened steel and reinforced side beams, this workbench boasts a load capacity of up to 2000 lbs. Measuring 15.8"D x 47.2"W x 47.2"H its sturdy frame ensures long-term use without deformation, perfectly meeting heavy-duty storage needs in garages, workshops, or home studios

ULTIMATE STORAGE SYSTEM:Industrial workbench for garage revolutionizes workspace efficiency.Workbench with 2 deep drawers for small tool organization.3-sided heavy-gauge pegboard for hanging pliers/screwdrivers.Workbench with lockable magnetic cabinets to storage power tools.23.6" vertical pegboard workbench backer maximizes wall storage without sacrificing bench space.Workbench with storage 4"x6" top extension shelf holds frequently used lubricants or measuring tools.

HEAVY DUTY STABILITY FOR WORK: This heavy-duty folding workbench frame delivers reliable stable support for all your woodworking, construction and DIY projects, with a verified 2500 lbs load capacity. Built with thickened carbon steel tubing and six aluminum alloy support legs
Climate Control

A garage workshop in Phoenix summer or Minneapolis winter is miserable without some form of climate control, and that discomfort costs you actual work hours.
Portable space heaters and window air conditioners are the cheapest entry point, maybe $150–400 depending on capacity, but they chew electricity and leave cold pockets or blast zones that make precision work harder.
I would skip them for any garage I planned to use more than a few months a year.
The upgrade that justifies itself is a ductless mini-split system, which runs $2,000–4,500 installed and handles both heating and cooling through the same wall unit.
It draws less power than resistance heat, dehumidifies as it cools, and keeps the whole bay within a few degrees rather than fighting the concrete slab.
For a two-car garage in a four-season climate, this is where I would put my money.
Radiant floor heating gets mentioned for larger garages, and it is genuinely comfortable underfoot.
The cost is real: tubing, boiler, and pour add thousands, and it does nothing for July. I would only consider it if I were already pouring a new slab and lived somewhere with a six-month heating season.
Humidity control matters as much as temperature, though most guides barely mention it.
Air conditioning helps prevent mold and mildew on tools and vehicle interiors, but in the Gulf South or coastal Pacific Northwest, you may still need a dedicated dehumidifier running alongside it.
That is a separate $200–400 purchase, and the electricity is ongoing.
Ventilation matters for temperature regulation too, but that belongs in its own section.
For climate control specifically, the mini-split wins on total cost of ownership if you use the space weekly; portable units are a stopgap I would replace the first winter they fail to keep up.

Large Quantity and Proper Size: you will receive a package that comes with 100 pieces of slat wall hooks, which are about 15 cm/ 6 inches in length, and their thickness is approx. 4 mm/ 0.16 inch, meeting your matching or replacement needs

STURDY & DURABLE: The slat wall hooks are made of heavy duty steel metal with powder coating to get matte black finish, rust-resistant and corrosion-resistant. With 3 points welding technique, sturdy and firm design, not easy to bend or deform. Hold up to 30LBS

MULTI SIZES: The slatwall accessories kit comes with 4 pieces of slat wall baskets in 4 different size S M L XL, which meets your various storage use and replacement needs. S (10.5”x4.5”x3”) , M (11.5”x5.5”x3.75”), L (12.5”x6.5”x4”) , XL(13.5”x7.5”x4.5”)
Safety Features

A garage workshop needs a fire extinguisher rated Class B and C, the combination that covers both flammable liquids and electrical fires.
Mount it where you can grab it without stepping through the hazard to get there, which usually means just inside the main door or beside the entry to the house.
Flammables stored for accessibility still need containment.
A metal cabinet with a self-latching door keeps solvents and fuels reachable but separated from ignition sources, and the floor beneath it should be concrete, not wood or matting that can absorb a spill.
Any door connecting the garage to living space should be fire-rated and self-closing, a detail that matters more than most people think until they have a reason to think about it.
I would skip the suppression system unless the vehicle inside is genuinely irreplaceable; for a working garage on a weekend budget, the extinguisher and proper storage do the heavy lifting.

METAL NAILBOARD: Our peg board panels are made of high quality steel with a powder coated finish that is strong, scratch resistant and easy to clean. Each small pegboard has a weight capacity of up to 50 lbs. This is a favorite product for tool organizers, DIY enthusiasts, store owners and office workers.

Ring style design: each pegboard metal hook features 12 rings style pegboard hooks, each side for 6 rings, can store your screwdrivers, pliers and other daily stuff, ideal for hanging lightweight items and common tools, save time and space

Value Package: Our pegboard tool organizer comes with 120pcs pegboard accessories,16 different type pegboard hooks including 5pcs pegboard bins, curved hooks, angled hooks, straight hooks, and ring tool holder, multi tool rack. 49pcs of them are peg locks for fixing hooks
Organization That Saves Space

Wall-mounted storage is the first thing I would install in any garage that still needs to park a car.
Pegboards work best for the tools you reach for every day, slatwall systems adapt better when your collection changes, and specialized racks keep jacks and creepers off the floor entirely. Go vertical so the car still fits.
Labeled bins earn their space too, but only if you commit to categories by equipment type rather than by "miscellaneous."
I would skip the large catch-all bin that swallows half your hardware; it saves nothing if you still dig for twenty minutes.
Single-car garages force the hardest choices here.
Every slatwall panel you mount is floor space you do not have to sacrifice to a cabinet or shelf. In a two-car garage the same logic applies, just with more room to get sloppy about it.
I would not get sloppy. The work area shrinks fast once a second vehicle parks inside, and wall storage is what keeps that area usable at all.

Protection Upgrades: The 2nd-generation design prevents accidental electrical exposure, reducing shock risks during installation or maintenance.If you need to connect new and old LED lights, please make sure to use the new male-female connector cables

✅Super Bright: This 4FT LED shop light features 4400 lumens of 5000K Daylight White brightness with only 42W power consumption. Equivalent to a 2-lamp fluorescent fixture, it achieves up to 70% reduction in daily energy usage. Designed with a professional light reflector to avoid light loss and deliver even, uniform lighting output.

✅Super Bright Output: This 4FT LED utility shop light delivers 13000 lumens of bright 5000K Daylight White at only 120W power draw, reaching 105 LM/W high luminous efficiency. An ideal replacement for traditional 400W fluorescent fixtures, it significantly reduces daily power consumption.
Making the Space Multi-Functional

A single-car garage can still park a vehicle and host a workshop if you build around the car’s footprint from day one.
I would start by pulling the SUV into the bay and marking the floor with tape while the doors are open, then design every work surface and storage unit to live inside that remaining envelope.
Casters turn fixed tools into movable ones; a table saw on wheels rolls to center when you need it and nests against a wall when you don’t.
Some makers raise the saw top just enough to clear a folded workbench underneath, stacking drill press and router table on the saw deck itself to reclaim vertical space.
Wall-mounted slatwall panels keep hand tools and supplies off the floor entirely; you need that clear floor space so the car can slide back in.
Fold-down or collapsible workbenches disappear flat against the wall, and the cavity beneath a permanent bench swallows a miter saw and power tools in custom drawers.
If the budget allows and zoning does too, a bump-out on one wall buys dedicated workshop square footage without sacrificing the parking bay.
For most of us, though, the answer is mobility: everything rolls, folds, or hangs, and the garage shifts from parking to project and back in about ten minutes.

VERSATILE STORAGE CONTAINERS: Akro-Mils Shelf Bins are great for any space; Use them on shelves, as an under sink organizer, cabinet organizer, or for garage storage; Bins fit with 12", 18", and 24" deep storage shelves, vertical storage, and pick racks

DIMENSIONS: Overall cabinet measures 7" L x 19.5" W x 15.5" H. Features 64 small drawers (6.87" L x 2.12" W x 1.62" H) designed for organizing tiny parts and accessories.

9 large transparent drawers for high content visibility
Tool Selection and Access

A magnetic tool bar mounted at eye level is the first thing I would install, because a wrench you can grab without opening a drawer is a wrench you actually use.
Hand tools earn that priority: screwdrivers, pliers, a hammer, a tape measure. They handle ninety percent of weekend jobs and they do not need a $400 chest to stay organized.
Power tools come next, but only the ones that earn their shelf space. A cordless drill and an impact driver see constant use; a benchtop sander or a second angle grinder can wait until a project actually calls for it.
The table saw and miter saw that dominated my last shop would not fit a single-car garage that still parks a car, and that reality should shape every purchase.
Slatwall hooks keep drills and extension cords off the work surface, while small tilt-out bins sort fasteners by size without demanding a full hardware cabinet.
Drawer storage works for lesser-used items, but I would resist the temptation to file everything away. A tool buried in a drawer is a tool you replace at the hardware store, again.
Personalizing the Setup

The wall above your workbench is prime real estate for making the space feel lived-in. I would hang a few vintage signs or a poster of a car I actually care about, not whatever came free with a parts order.
Car-themed memorabilia from shows you’ve attended beats generic decor every time. If you collect, a small shelf for model cars or a wall-mounted display for a rare part you pulled yourself turns storage into something you stop and look at.
A themed refrigerator shaped like a toolbox or gas pump sounds gimmicky until you realize it solves two problems: it keeps drinks cold and it gives the garage a focal point that is not another rolling cabinet.
Collectors with the room should build a lit corner for a trophy or a framed piece of racing history.
The light does not need to be theatrical; a simple spotlight on a single shelf draws the eye better than a whole wall of half-visible items.
The mistake is treating personalization as an afterthought you add once the tools are sorted.
The color you paint the wall behind the bench, the mat you stand on, the clock you glance at during a timing job: these are the details that make you want to walk out there on a Tuesday night.
Frequently Asked Questions
How do I organize my garage workshop?
Start with wall-mounted storage: pegboards for daily tools, slatwall panels for heavier gear that changes often, and hooks for jacks and creepers.
Keep labeled bins on shelves, not the floor, and aim for a twenty-minute setup where everything visible and within arm’s reach. The floor belongs to the car and your creeper, not storage.
What are the best lighting options for a garage workshop?
Run 4-foot LED fixtures spaced 4 feet apart across the full bay; they draw 30% less energy than fluorescent and carry a 94,000-hour bulb rating.
Add a dedicated task light at the workbench and a portable fixture with a hook or magnet for work under vehicles, where overhead grids throw your shadow. White walls help bounce light around; without them, even generous grids turn dim.
How can I maximize space in a small garage workshop?
Build around your car’s footprint from day one, marking the floor with tape while doors are open.
Use fold-down workbenches that disappear against the wall, put casters on fixed tools so they roll to center when needed, and nest against walls when not.
Wall-mounted slatwall keeps hand tools and supplies off the floor entirely; you need that clear floor space so the car can slide back in.
What is the average cost to build a garage workshop?
A ductless mini-split for heating and cooling runs $2,000–4,500 installed. Portable heaters or window AC units cost $150–400.
A dedicated dehumidifier adds $200–400. These are add-ons to an existing garage; building from scratch would run well above them.
What’s the difference between a garage and a workshop?
A garage stores vehicles; a car garage workshop stores vehicles and supports active projects. The difference comes down to work surfaces, power, lighting, and storage layout.
A garage has an overhead door and maybe a shelf; a workshop adds a workbench at 32–36 inches high, 110v outlets every ten feet, task lighting, wall-mounted tool storage, and ventilation for fumes.
The same bay can do both if everything rolls, folds, or hangs and the space shifts in about ten minutes.
Can you build a garage for $10,000?
It focuses on converting or upgrading an existing garage into a working shop, with upgrades like epoxy flooring, a mini-split system, electrical work, and storage systems.
A $10,000 budget might cover a substantial retrofit of an existing structure but would not stretch to new construction in most U.S. markets.
Can you use a garage as a workshop?
Yes, and many do. Single-car garages can still park a vehicle and host a workshop if you design around the car’s footprint, use mobile and foldaway equipment, and keep the floor clear.
Treat parking and project work as two modes the same space switches between, not two separate rooms.