These 14 shed organization ideas run from a few dollars in PVC pipe to the cost of a full built-in wooden rack, and the one that belongs in your shed depends on whether you own the wall space, the ceiling height, or the floor space.
If your walls are bare corrugated metal, you will need backers or rivet nuts before a 20 kg hook set will hold; if your floor is the only solid surface you have, a freestanding metal unit on rubber feet or a garden tool stand becomes the starting point instead.
1. Use Clear Storage Bins
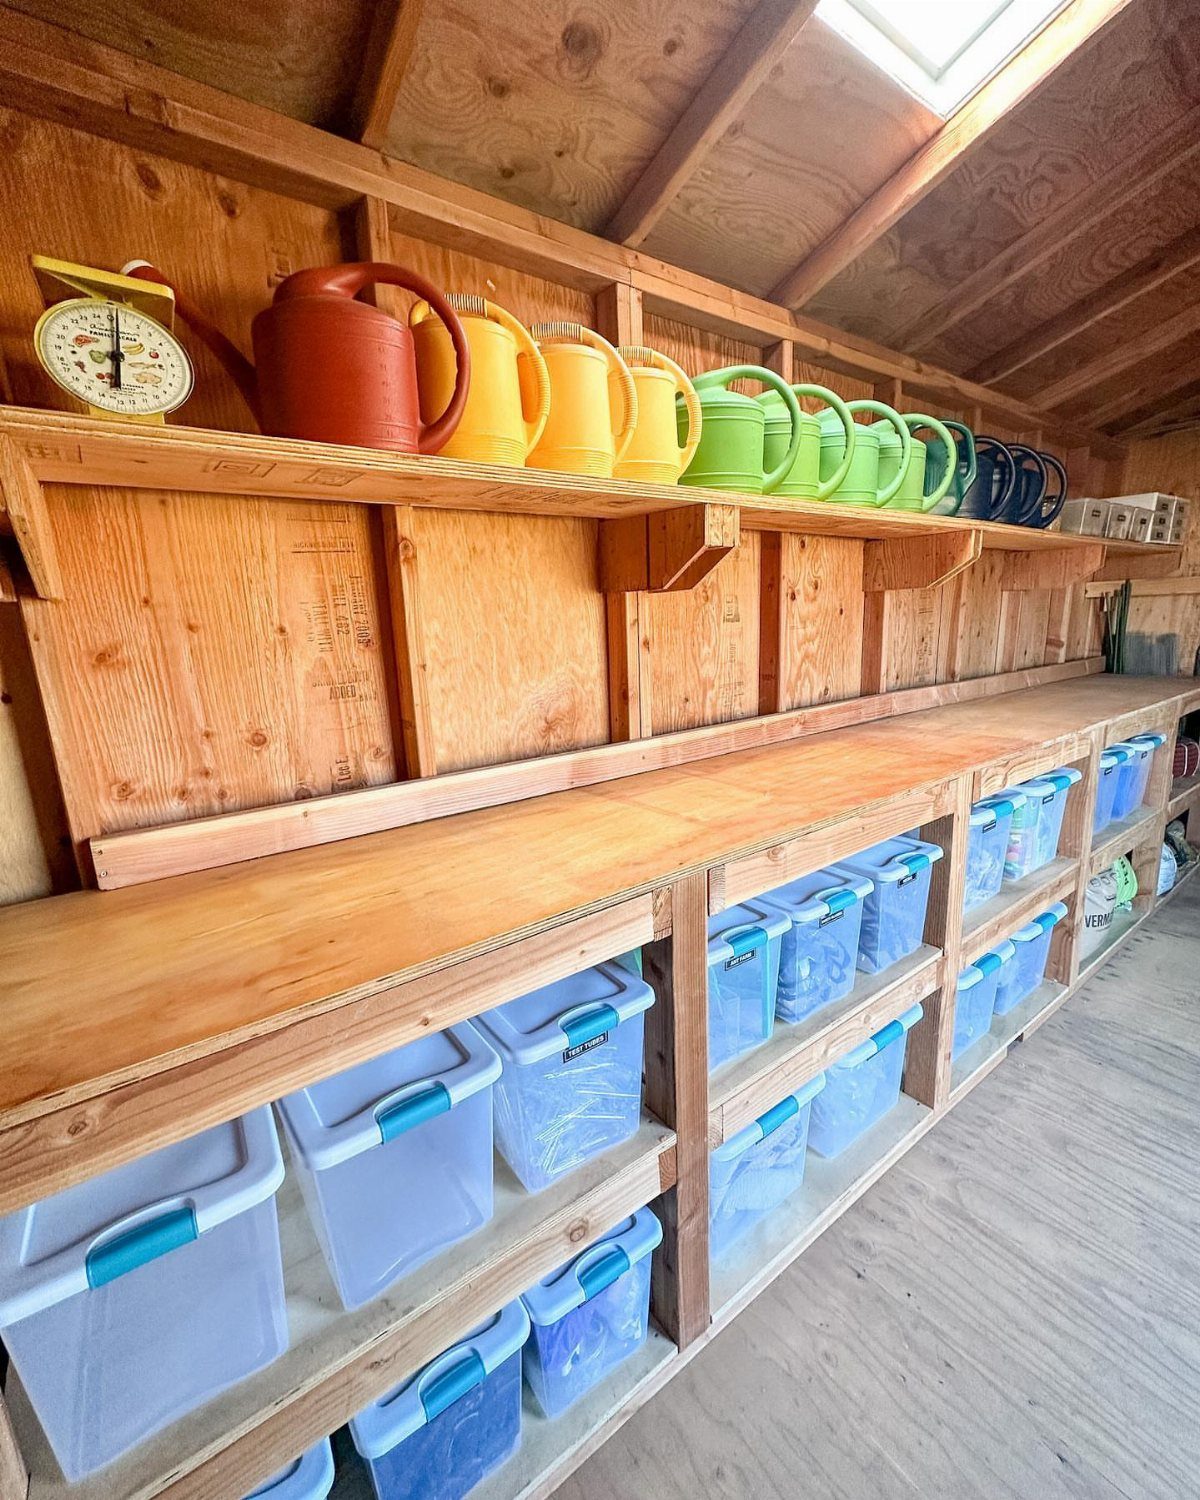
Clear bins earn their shelf space by letting you see what is inside without pulling the lid. Blue-handled bins sized for hardware and small tools sit on a workbench’s lower shelf, not the place for bulky items.
Check that your shelving depth matches the bin length before you buy a set. I would rather spend a few dollars more on uniform sizes that stack cleanly than save on mismatched leftovers from the garage.

Make Your Life Much Easier ---- You can use these pantry bins for various things throughout your home to organize and make your life easier. They are great for creating a clean and organized refrigerator or pantry. Ideal for fruit, vegetables, drinks, yogurts, canned goods, meat. You also can use them for storing dry goods in your pantry cabinet.

DIMENSIONS: 15.5" L x 12.69" W x 7.38" H -- Inner Dimensions: 12.5" L x 9.63" W x 7" H
【Size】36 Pack 3.7" x 5.3" clear adhesive index card pockets with top opening for easy index card insertion or removal. 3.7" x 5.3" for 3" x 5" index cards, the right size can be used in many scenarios.
2. Ceiling-Mounted Racks
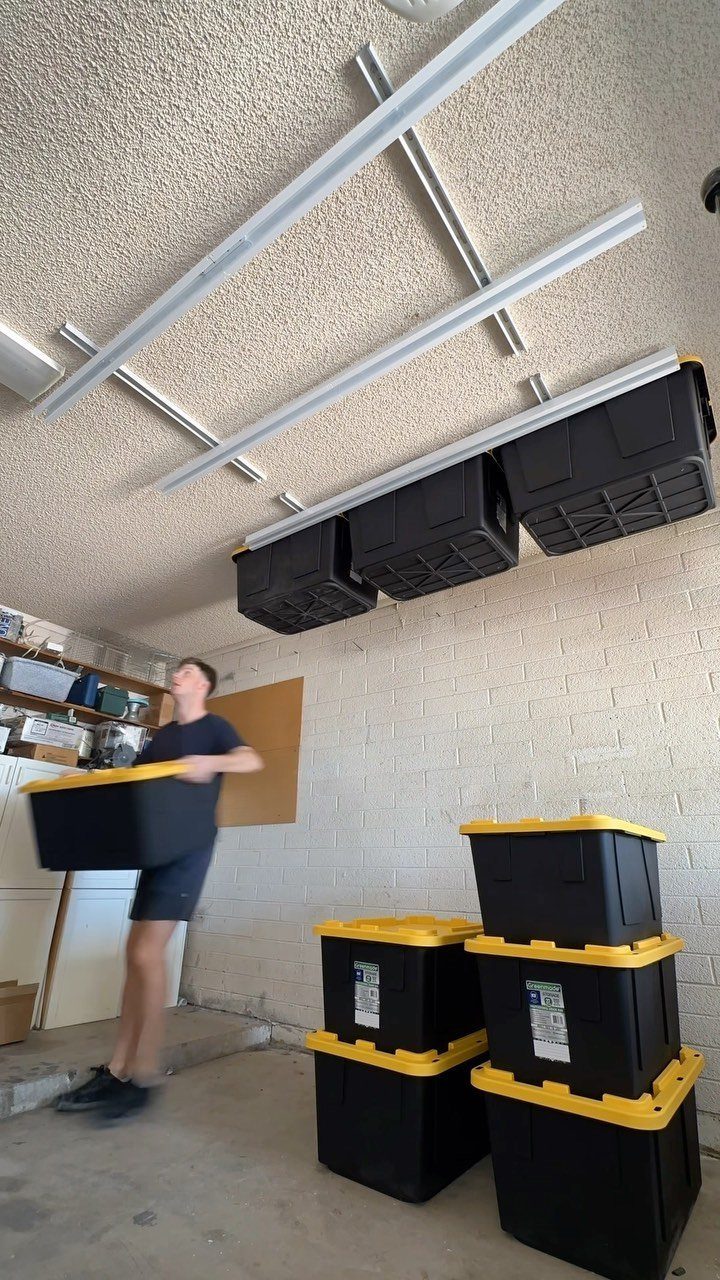
Ceiling rails suit the gear you touch twice a year: holiday decorations, camping equipment, the spare car parts you keep just in case.
Black bins hung above floor-level stacks of the same make the case for committing to one container line and staying with it.
What I would verify first is joist spacing.
Most racks need attachment at standard stud spacing, and a metal shed may need reinforcement plates the installer did not include. Weight adds up fast; label each bin so you are not lowering three to find the one you need.

INDOOR LADDER STORAGE: Utilize overhead storage space in your garage, shed, or basement with this innovative ladder storage rack. Holds most foling ladders, step ladders, telescoping ladders, and extension ladders.

USA BASED & FAMILY OWNED - Our patent pending handy connectable garage ceiling storage racks design was invented by father and son tradesmen looking for a handy way to unlock more storage. The rails allow you to connect as many together as you can fit in your garage, shed, or workshop space.

🛵 Heavy Duty Bike Rack: Made of strong iron material, provide a high load capacity, up to 77-99lbs/35-45kg. Strong enough to hold all kinds of bicycles, like mountain bike, road bike, cruiser bike, kids bike, etc.
3. Workbench with Storage
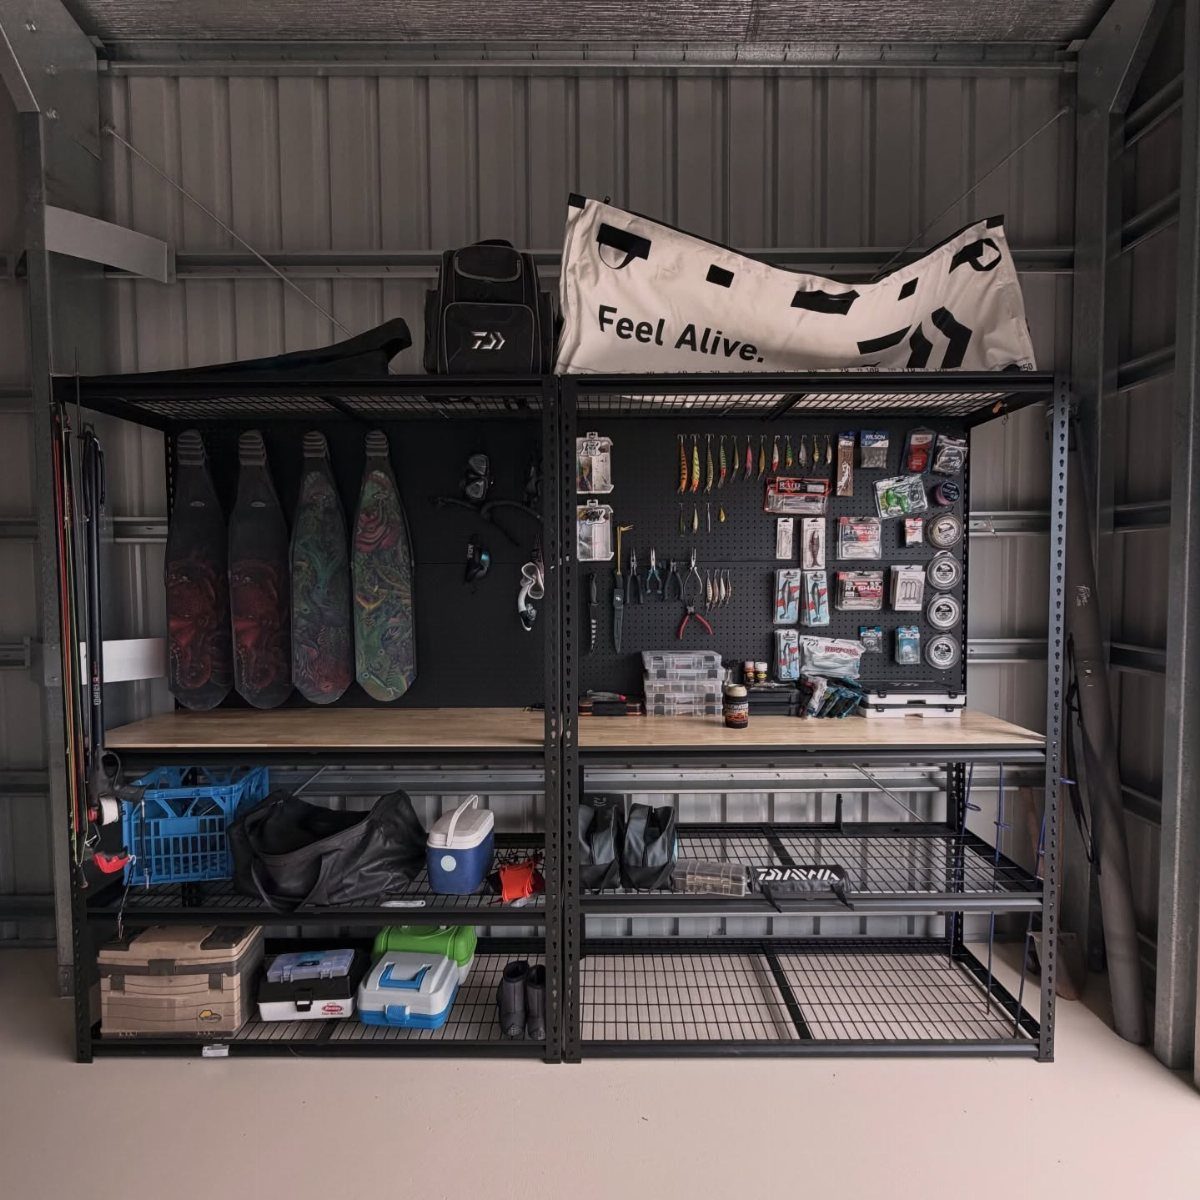
A workbench with built-in storage turns the center of your shed into actual workspace instead of a surface to pile things on.
The pegboard and wire shelves in this black metal unit keep fishing and diving gear where you can reach it, and the wooden top gives you a place to cut, clamp, or clean what you bring in from the yard.
I would want generous knee clearance underneath and a top that can take a clamp without denting. Standard pegboard holes fit most hook sets, but check that the board is steel rather than Masonite if your shed gets humid.

PREMIUM DURABILITY - Crafted from hardened steel, these pegboard baskets resist rust and corrosion, providing long-lasting strength for organizing tools and accessories in garages, workshops, or craft rooms

FITS ANY STANDARD PEGBOARD - Great for metal and non-metal pegboards. Fits Wall Control pegboards, Triton pegboards, and all other standard sized pegboards (1/4 or 3/16 inch hole diameter including 1/8 inch nominal hole diameter on pegboards that are 1/4 inch thick or less). Does not fit grid wall.

Value Package: The pegboard accessories kit comes with 4 packs pegboard baskets in different size S M L XL, each peg board basket can hold up to 30lbs. S (10.5”x4.5”x3”) , M (11.5”x5.5”x3.75”), L (12.5”x6.5”x4”) , XL(13.5”x7.5”x4.5”)
4. Hooks for Long-Handled Tools
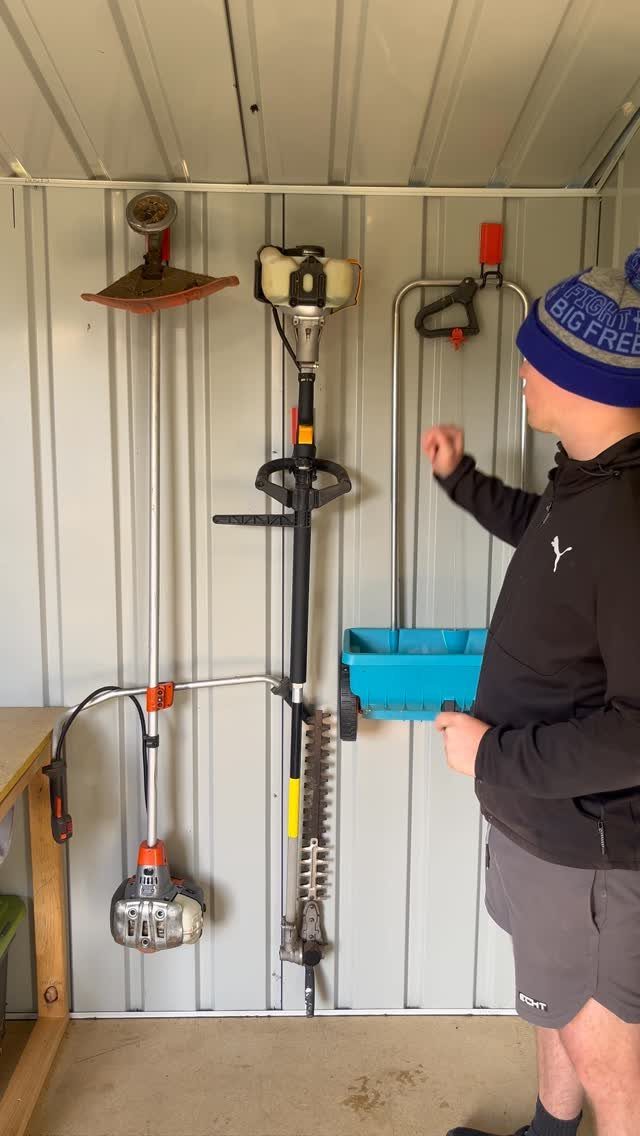
Wall hooks for rakes, shovels, and spreaders keep long handles from becoming the leaning pile that blocks your door every spring.
The ones in this metal shed are rated to 20 kg each, according to their maker, which covers any hand tool I own and most of what my neighbors borrow.
I would mount them at two heights: one row for full-length tools, another lower for hand shears and the spreader.
Check that your wall can take the load; corrugated metal may need backers or rivet nuts where a stud wall would take a screw directly.

【High-Quality Material】Our garden tool storage hooks are made of heavy-duty steel metal material with a non-slip rubber coating. They securely hold items in place, protecting their surfaces from scratches or damage, and preventing the garage hooks from slipping or rusting.
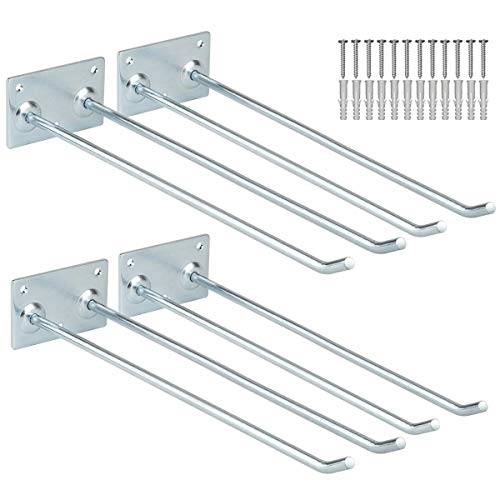
Multi Purpose: 12 inches wall mounted garage storage hooks for organization especially with folding chairs, ladders,hoses, cords, cables, brooms, racquet, rakes, shovels and long-handled garden tools.

MULTIPLE STORAGE OPTIONS: Features 5 slots and 6 hooks supporting up to 7.5 pounds per slot, perfect for organizing various cleaning tools efficiently
5. Drawer Organisers
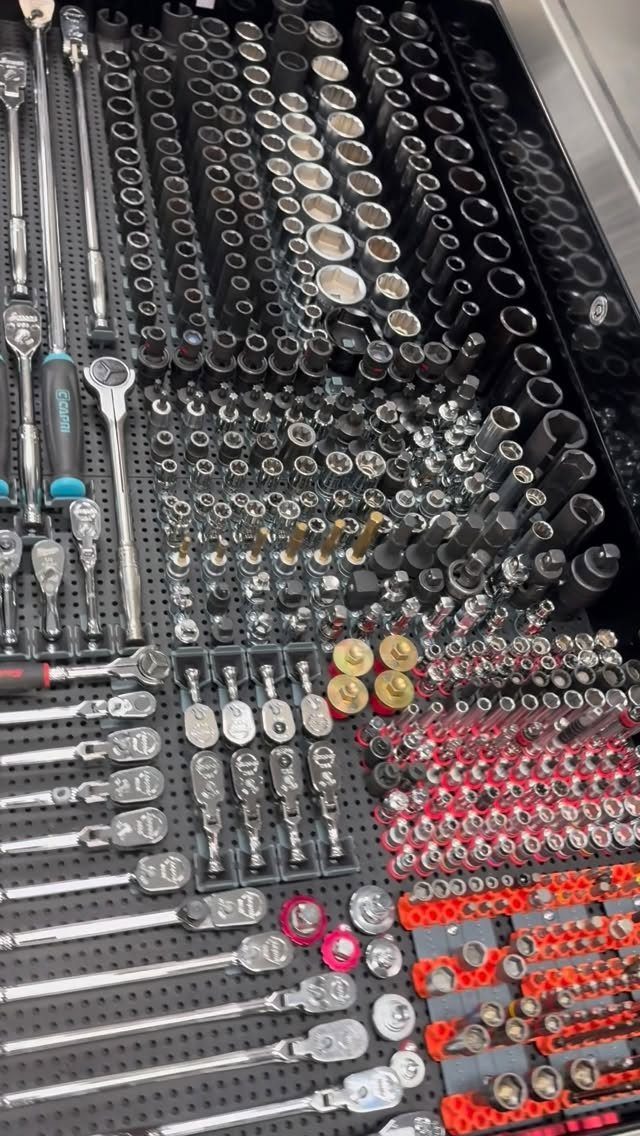
A drawer organizer for sockets and bits saves the time I used to spend digging for the one that always settled to the bottom.
The foam inserts in this chest hold each piece at its own height, so you spot the gap where something belongs before you close up.
Measure your drawer inside dimensions before ordering; half an inch too wide and the organizer becomes the thing you need to organize.
I would start with one drawer, the one you open most, and expand only after you know whether you prefer hard plastic trays or the softer foam that tools sink into.

💯【Unmatched Stability & Strength】Our freestanding hose holder features a upgraded Triangular Structure Base and four extended 6.4-inch ground spikes, ensuring maximum Stability, it firmly holds up to 151FT of hose without tipping. (Tips: Our unique design is protected by U.S. Design Patent No. D1,143,893.)
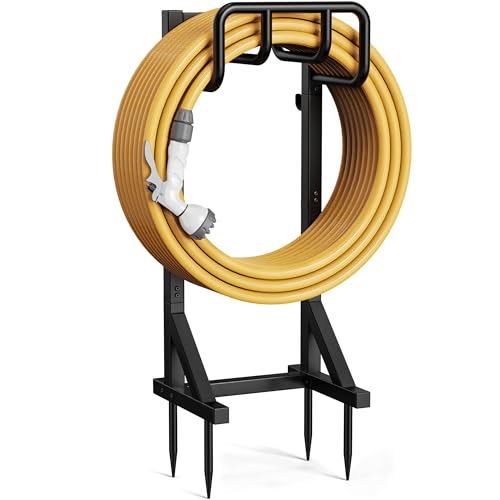
Heavy-Duty Build: Constructed from thick steel tubing, this garden hose holder provides strong load support and excellent stability. The durable metal structure resists bending or deformation, making it ideal for storing heavy garden hoses.
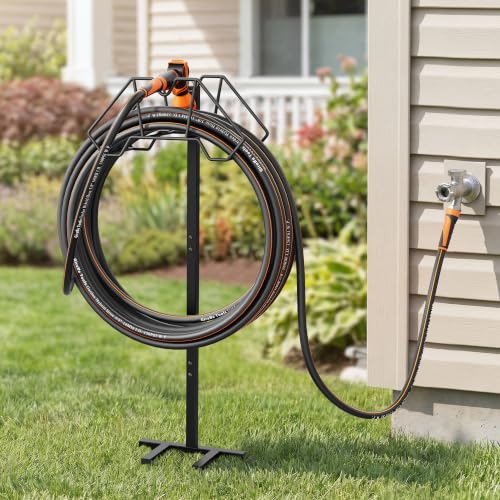
DEDICATED NOZZLE STORAGE: Store your spray nozzle on the rack—no detaching needed. The precision-grip slot holds it securely to prevent drops and tip damage. Heat-resistant design lets you hang it right after use, keeping your garden organized.
6. PVC Pipes
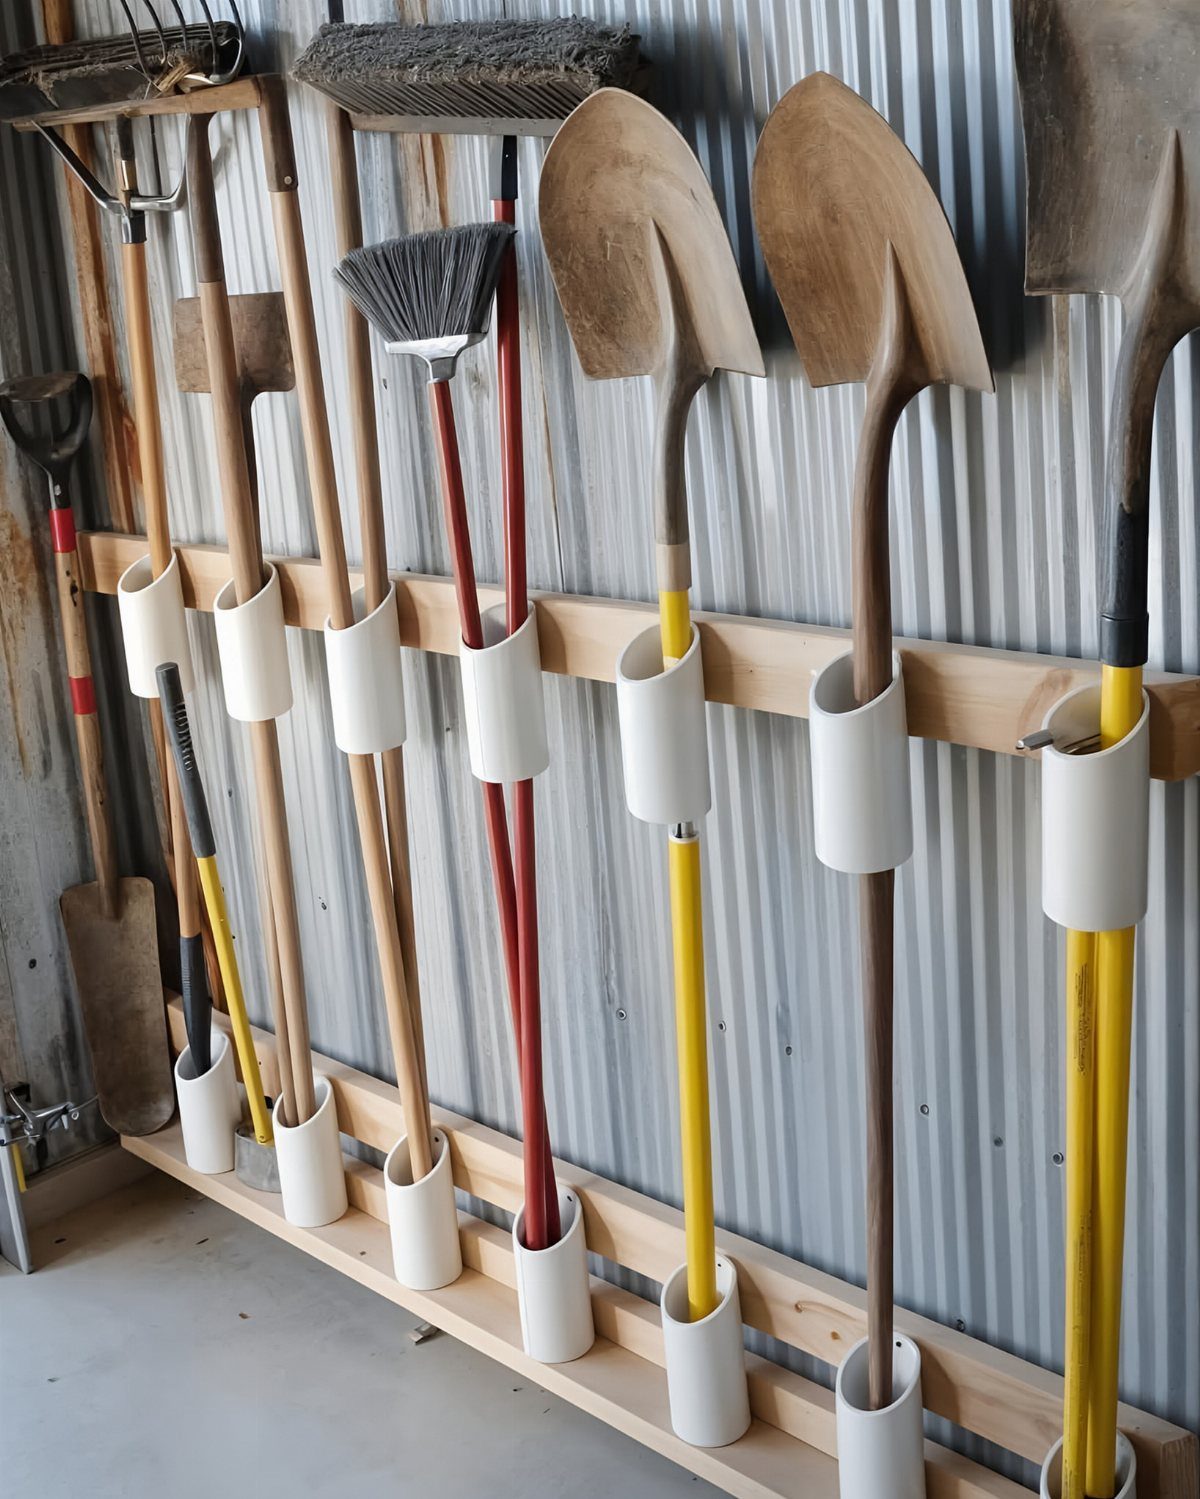
Cut PVC pipe screwed to a horizontal board gives each long-handled tool its own vertical slot, which beats the corner where handles used to tangle together.
I would cut each piece tall enough to cradle the tool head and angle the top edge so it slides in easier.
Space them close enough that the handles do not knock, but not so far that you waste wall space. A scrap 2×4 backing keeps the assembly rigid when you lever a shovel free.

DIMENSIONS: 18.5" L x 15.13" W x 9.38" H -- Inner Dimensions: 15" L x 10.88" W x 9" H

VERSATILE STORAGE CONTAINERS: Akro-Mils Shelf Bins are great for any space; Use them on shelves, as an under sink organizer, cabinet organizer, or for garage storage; Bins fit with 12", 18", and 24" deep storage shelves, vertical storage, and pick racks

MULTI-PURPOSE STORAGE BINS: These stackable storage bins hold up to 50 pounds and are great for closet organization, classrooms, garage storage, pantries, craft storage, bathrooms, and more; Use them to store snacks, toys, or as a tool organizer
7. Get Wheelbarrows Up
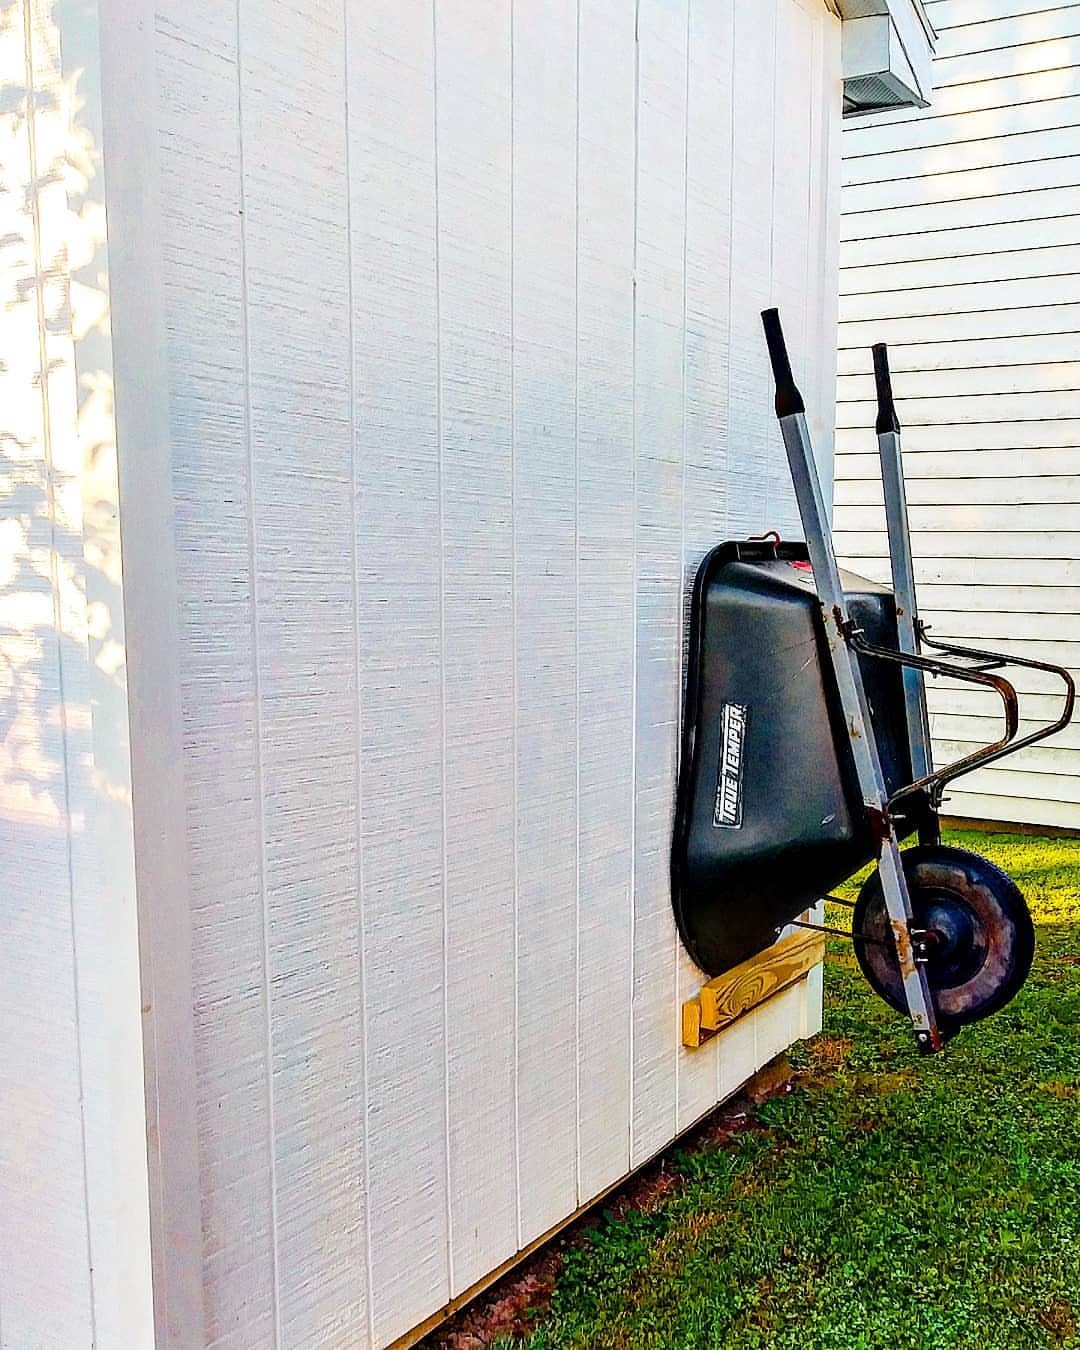
A wall-mounted cleat lets you store a wheelbarrow vertically against the shed wall, freeing floor space for the things you actually wheel around.
I would check the bracket spacing against your barrow’s tray width before drilling; a True Temper steel tray is heavier than poly and needs a sturdier backer.
Mount high enough that the wheel clears the ground and does not collect mud against the siding.

1200 lbs Tested, 750 lbs Rated: Our overhead garage storage rack undergoes rigorous 1.6 times load testing (1200 lbs) to ensure unmatched safety and durability, supporting up to 750 lbs for your tools and equipment.

【2 Sets Store 12 Rods or Combos】Ghosthorn Rod Rack can hold up to 12 rods or combos and can stores more in the same space than other brands, maximizing the use of your space and making storage tidy. It can be installed on the wall or ceiling and can be freely combined according to your needs.

Versatile Storage System: Transform your cluttered space with this garage tool organizer wall mount. Perfect for your garage, garden, or shed, it offers ample storage. The real challenge? Filling all the available space
8. Install Wall Storage
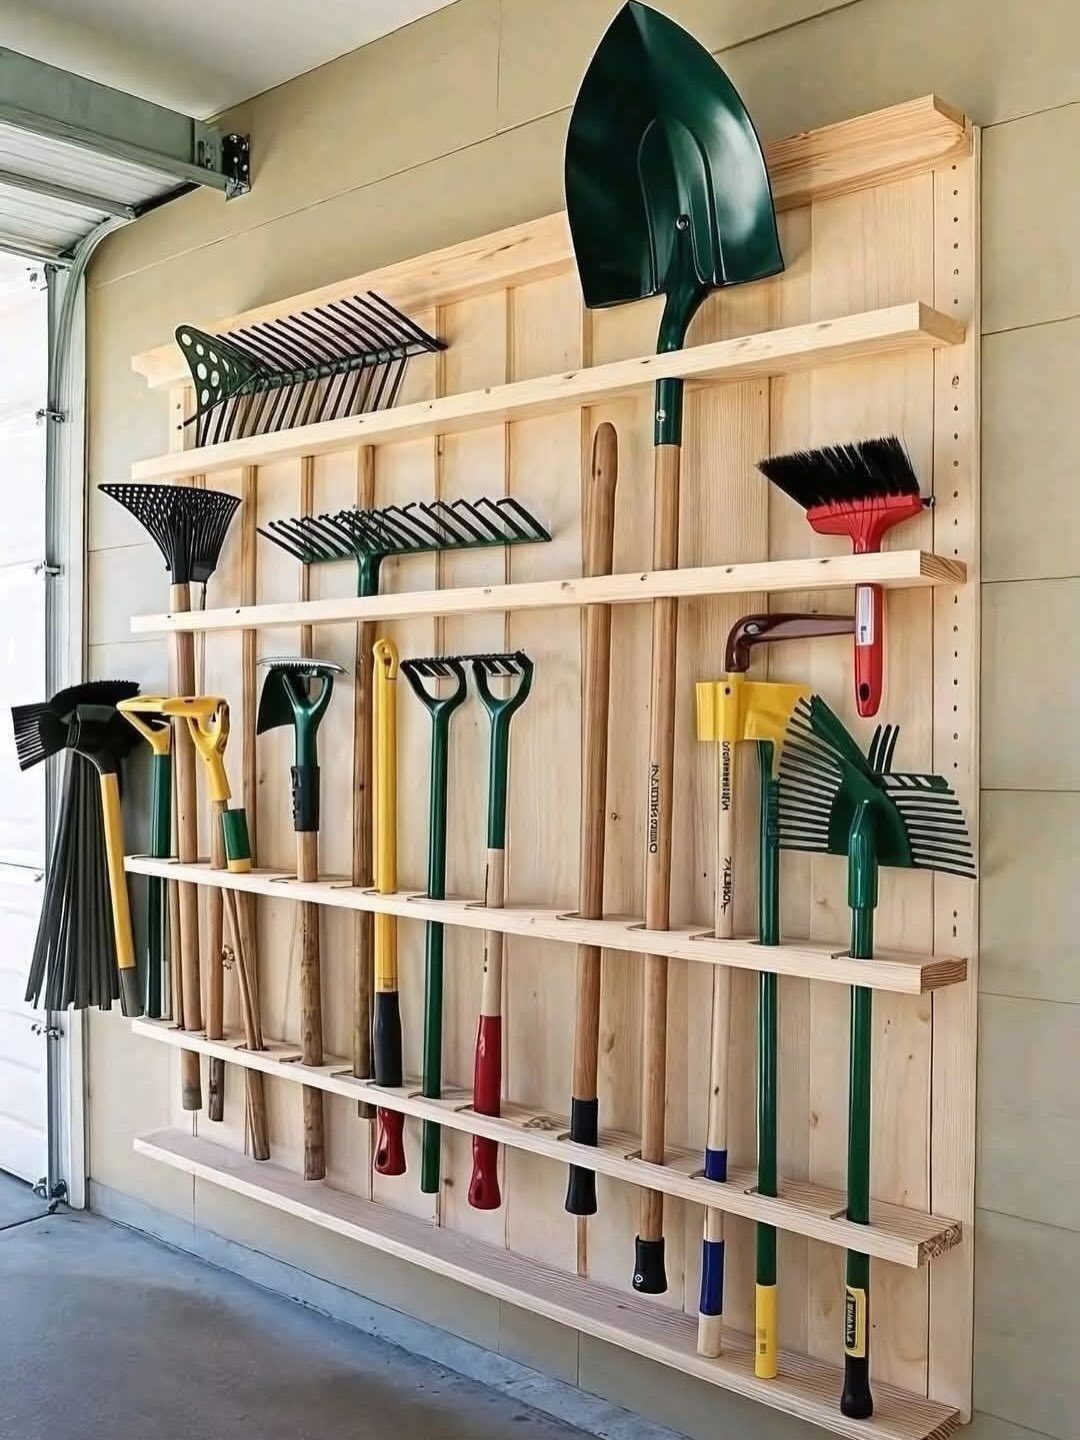
A wall-mounted rack with vertical slots keeps rakes, brooms, and shovels in a single row instead of the corner pile that grows every season.
Pine or cedar boards take screws more forgivingly than the composite decking some kits include.
I would leave an inch of clearance below the tool head so dirt falls free and does not pack the slot. Check that the longest handle in your collection fits the height before you cut anything to length.

Convenient Multipack for Ample Storage: with a generous quantity of 8 pieces peg board shelves in each package, you'll have plenty of shelving to meet your organization needs; Whether you're sorting tools in the workshop or ingredients in the kitchen, this set delivers flexible, ample storage to declutter your space effectively

Ample Quantity: with a package including 8 pieces of metal wire peg board shelves, you'll have enough storage options to transform your cluttered space into a well organized space; The enough quantity can meet your daily use and replacement, allowing you to keep your essentials neatly arranged on the wall
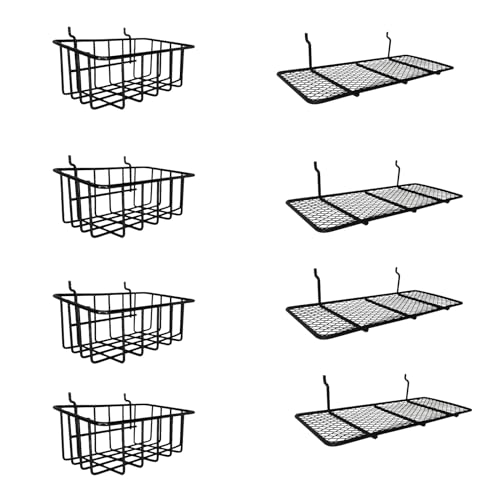
SUITABLE PEGBOARDS - These pegboard baskets are suitable for metal and non-metal pegboards, also fit for wall control pegboards and other standard size pegboards, such as: B. Hole diameter 1/4 or 3/16 inch, hole diameter 1/8 inch for pegboards that are 1/4 inch thick or less, but are not suitable for grid walls.
9. Create Storage Zones
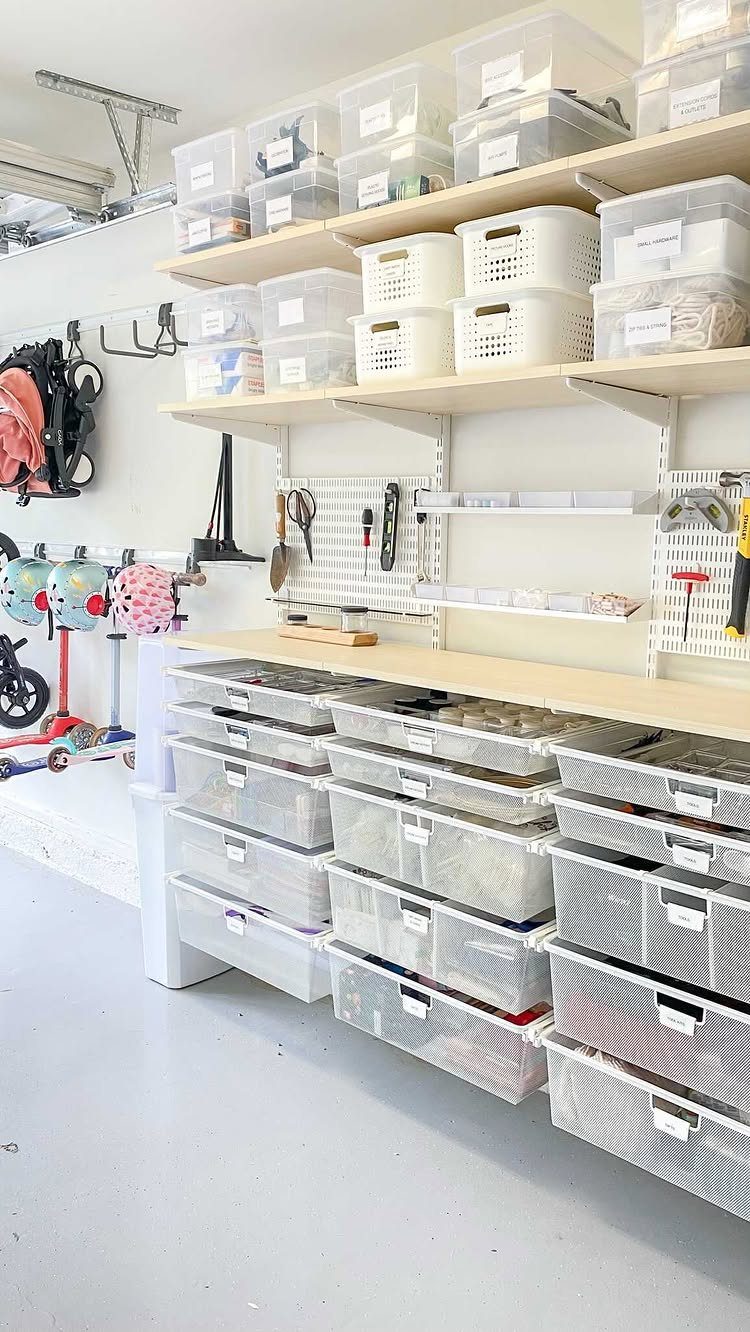
Dividing a wall into labeled areas, one for tools, one for bins, one for the things kids haul out, keeps each category from bleeding into the next.
The pegboard, wire drawers, and shelf bins in this setup share one wall because the tasks happen at different times.
I would start with the zone you use most and build outward; a full-wall system planned in one pass often leaves an awkward gap where the stroller or the fertilizer spreader did not fit the sketch.

💪Material - The mop holder is made of high quality stainless steel, Much strong and sturdy than plastic holder. Build to resist daily scratches, corrosion and tarnishing. Allowing it to remain looking its best for longer.

All Metal Material: Our garden tool organizer, both backboard and hooks are made of iron, which makes it more durable and solid.And its load-bearing capacity far exceeds other usual ABS material tool hooks. It is deal for various tools like shovel, rakes, bikes, broom, mop, trust that what you get is what you see,any dissatisfaction please contact our customer service team

💪Material - The mop holder is made of high quality stainless steel, Much strong and sturdy than plastic holder. Build to resist daily scratches, corrosion and tarnishing. Allowing it to remain looking its best for longer.
10. Group Similar Items
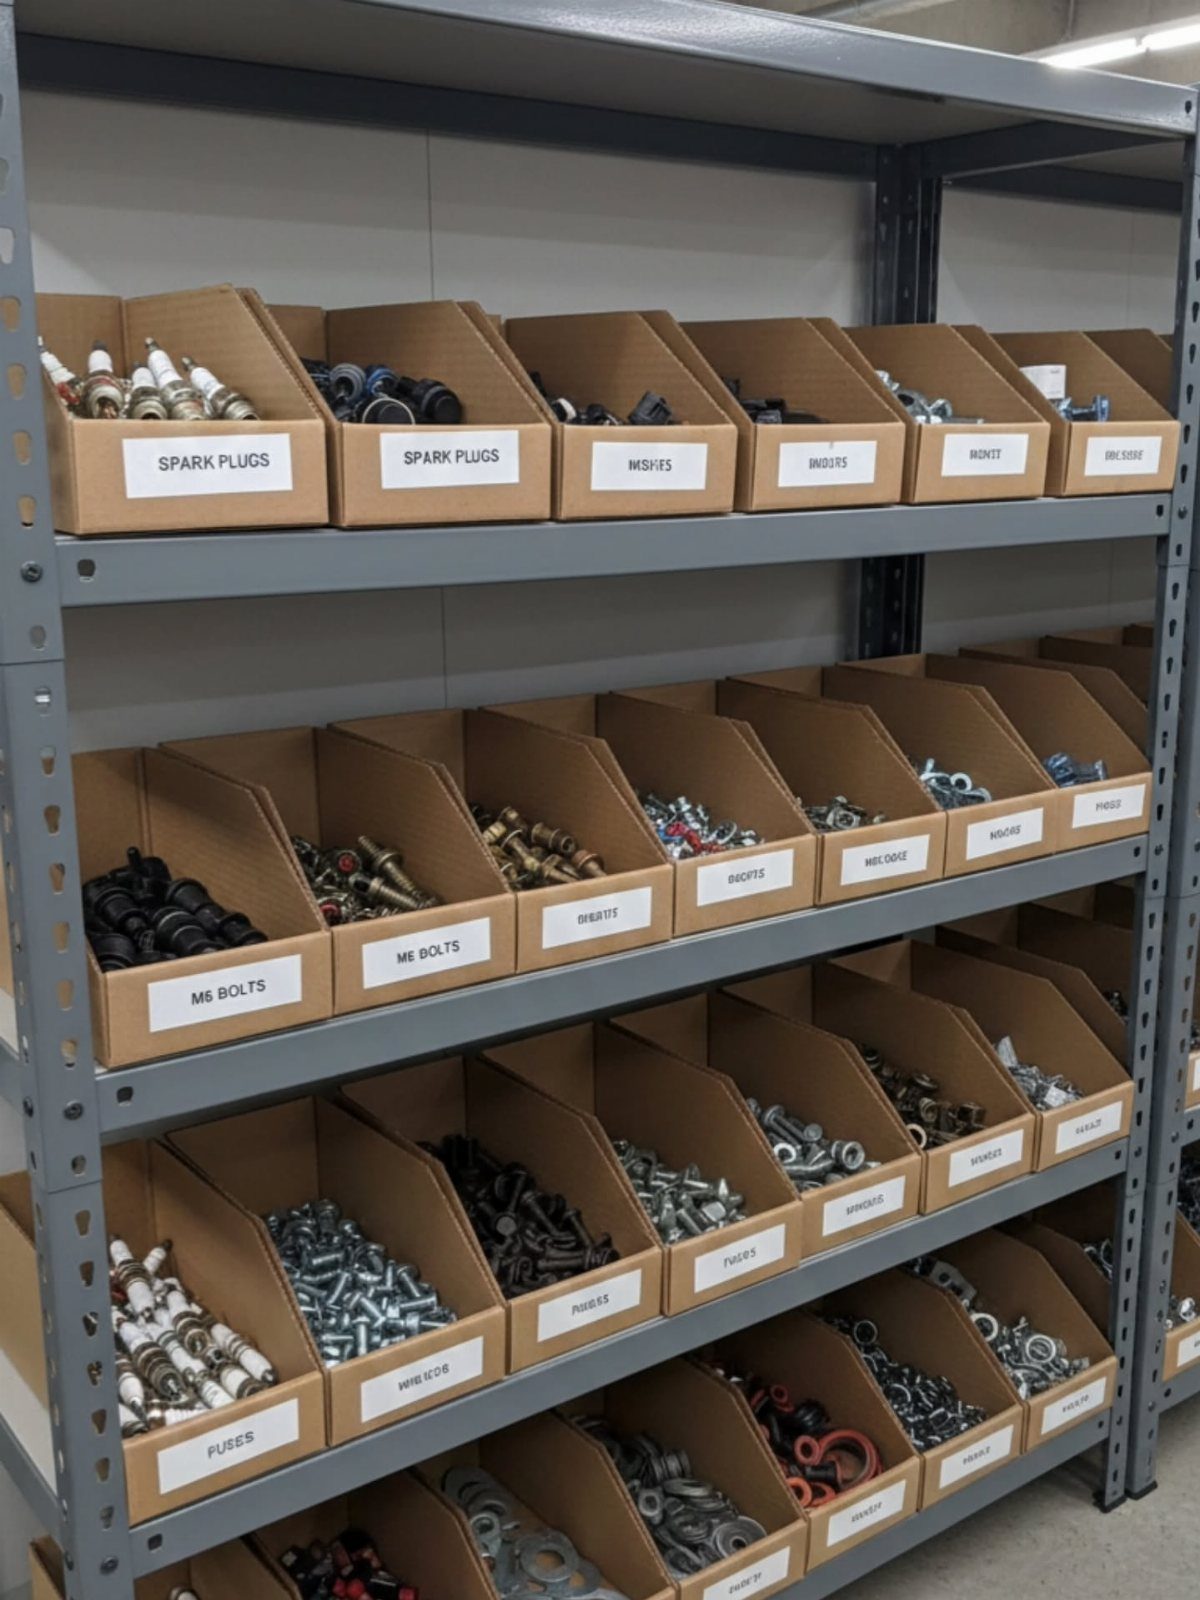
Cardboard parts bins on metal shelving sort hardware by thread size or job type so you grab the right bolt without reading every label.
Bins the width of a hand limit how much each holds and keep the stock from turning into a jumble.
I would label the shelf edge, not just the bin, so you spot the empty spot before you pull the wrong drawer. Replace cardboard when it softens; damp sheds turn fiberboard into mush faster than you would expect.

LARGE CAPACITY STORAGE:32 Tool Slots(1.96"x1.96")| 12 Wide Slots (1.96"x5")| 14 Hooks. Holds 50+ tools with multi-size slots and open vertical storage, keeping shovels, rakes, brooms, and D-handle tools separated instead of tangled. Works as a garden tool holder, yard tool storage, lawn equipment organizer, and rake and shovel organizer all in one.

【Utility Hook】This hose holder has a unique design that the two hooks on the back, can hold gardening tools, gloves, sprayer, or you can hang whatever you need.This hose holder is a good gardening gifts for women men gardener

【Three-sided Structure】Tri-sided gardening tool rack that integrates shelves, large tool slots, small tool racks, baskets, and hooks. The ingenious design allows the tool holder to store tools of various sizes and has a strong load-bearing capacity to realize comprehensive storage of garden tools.
11. Repurposed Wooden Crates
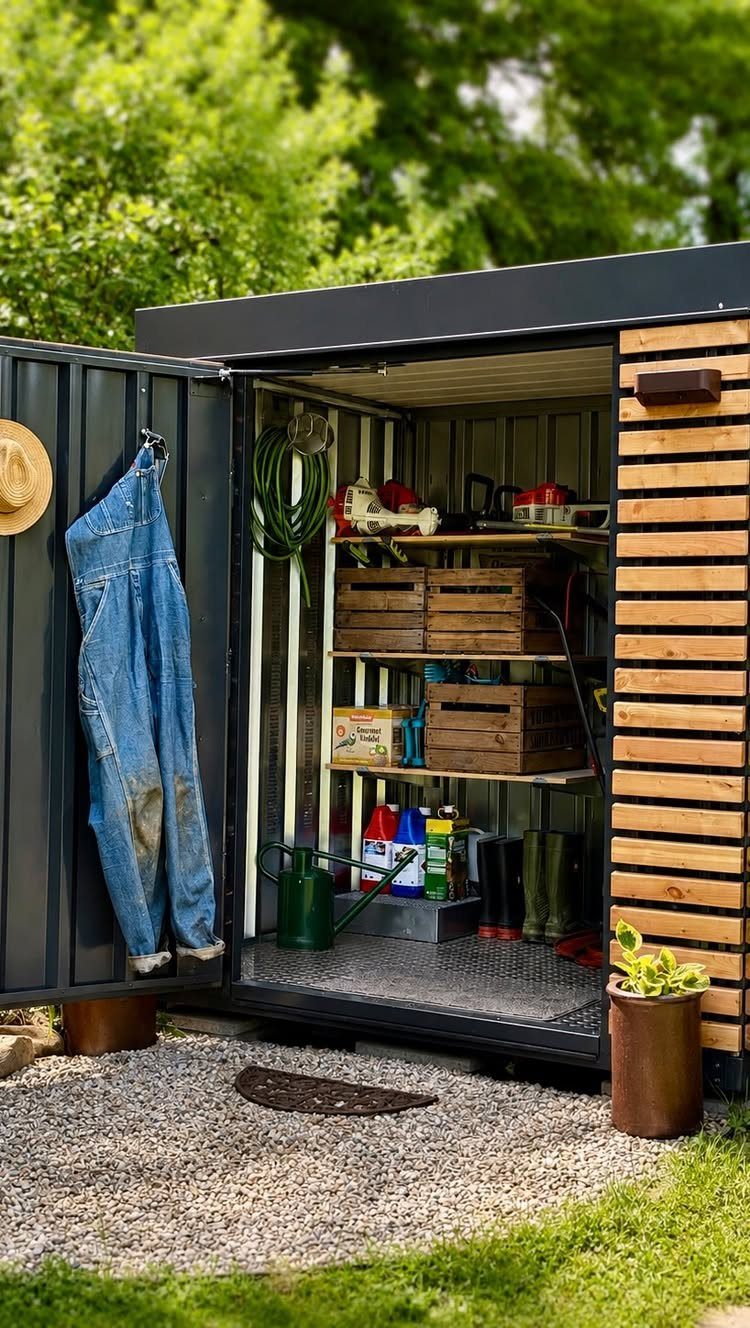
Crates set on existing shelves break a deep bay into smaller cells for gloves, seed packets, and the small tools that disappear in open storage.
The slatted sides in this shed let air move, which matters for damp boots or onions you are curing.
I would sand any splinters and check that the crate base sits flat; a wobbly crate tips when you load one end. Pine crates from a grocery or farm supply run cheap, less if you build from cutoff 1x4s.
12. Freestanding Garden Tool Stand
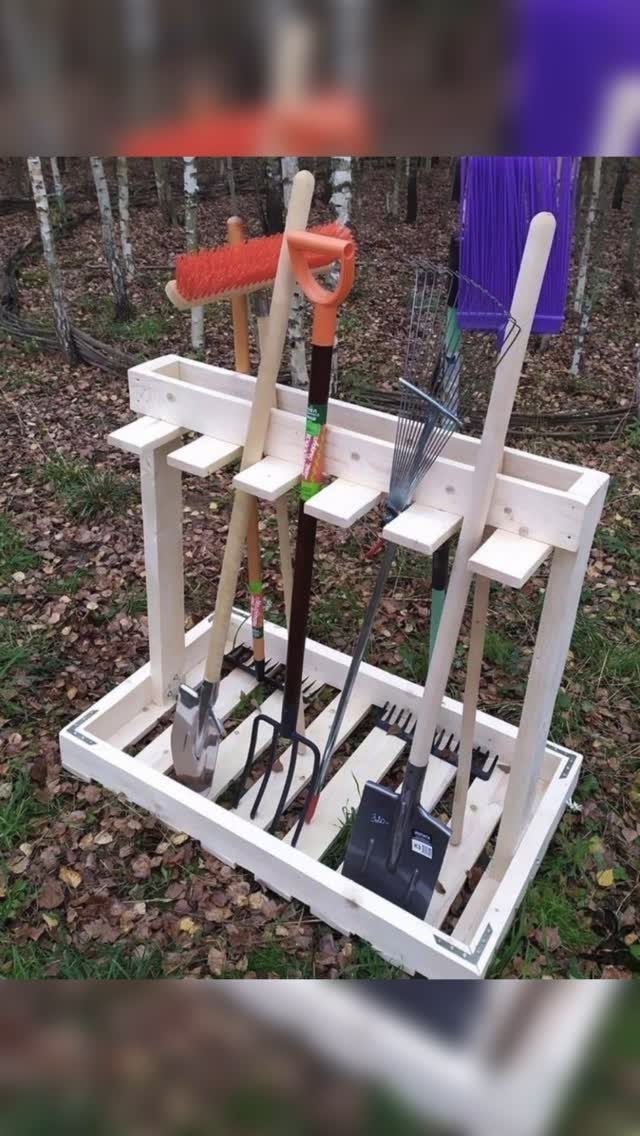
A wooden stand with vertical slots parks long-handled tools on the ground outside the shed, where the dirt they carry stays out of your clean storage.
Light wood like cedar or soft pine lasts longer if you raise the feet on pavers or gravel so rot starts slower. I would angle the slots slightly backward so tools lean into the frame instead of tipping forward.
Build it to the height of your tallest rake; a stand that fits a shovel but not a pitchfork earns its spot only half the year.
13. Metal Shelving Units
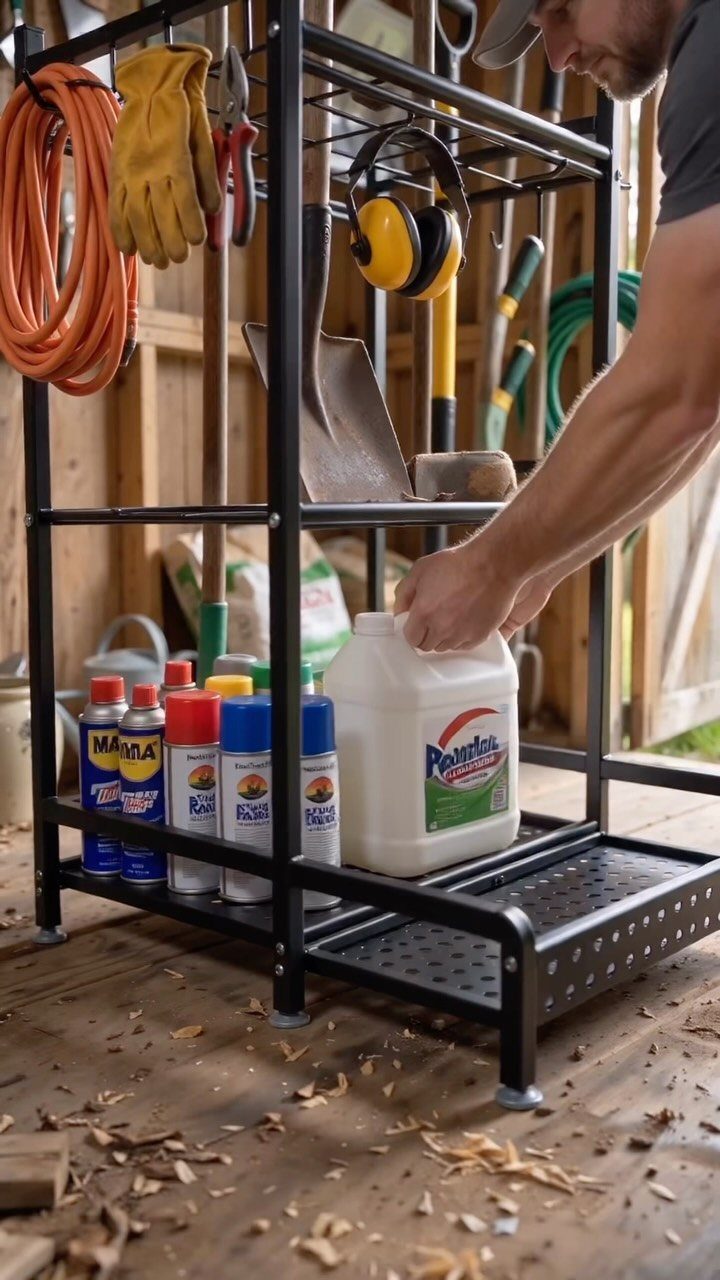
Freestanding metal shelving gives you open bays that adjust to whatever you bring home next. A metal shelving unit gives you open, visible storage for spray cans, coiled hoses, and the half-empty jugs that accumulate in any working shed.
I would check the gauge of the steel before loading heavy gear; 18-gauge legs flex under real weight, and a shed floor is rarely level enough to forgive it.
Rubber feet or a shimmed corner keep the rack from rocking when you pull a bin.
14. Heavy-duty Wooden Shelving Racks
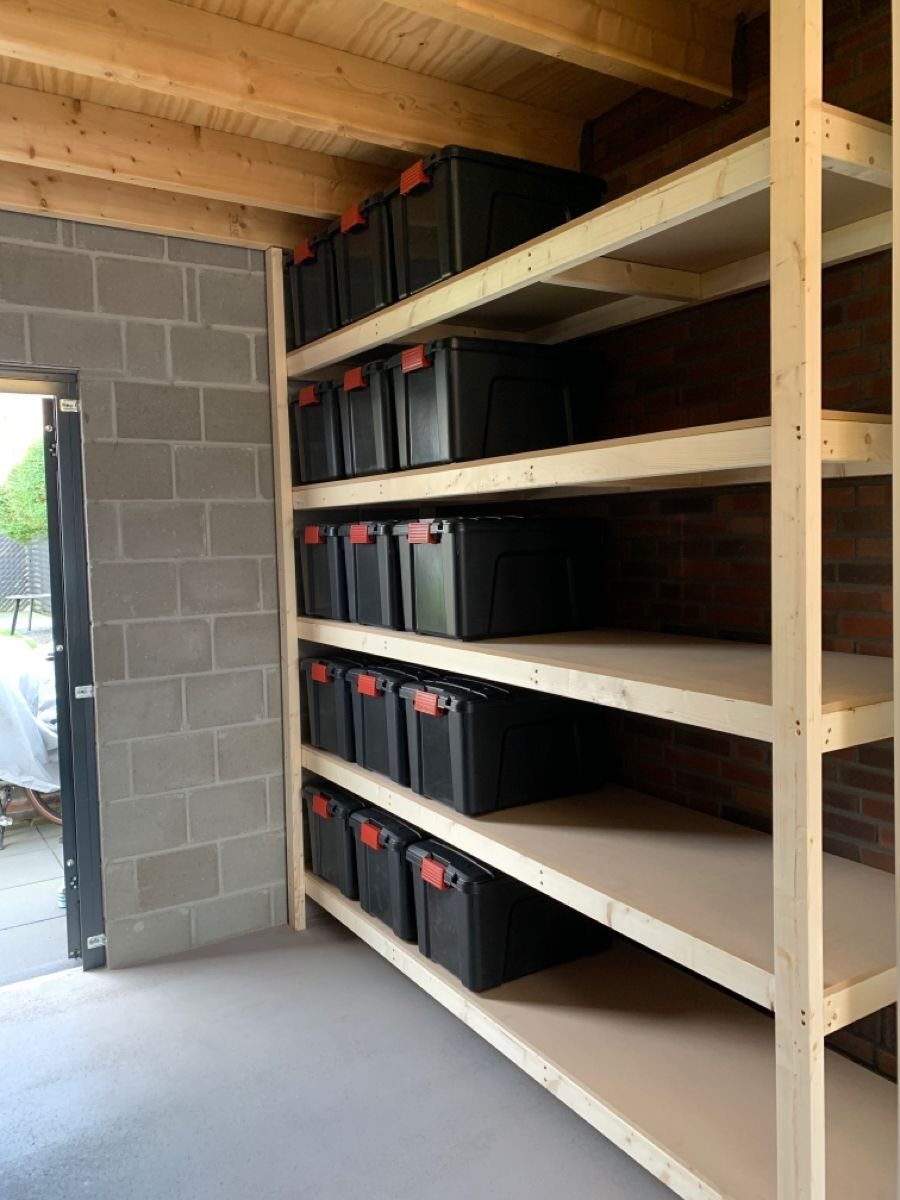
Built-in wooden racks let you size each shelf to the bins you already own instead of buying bins to fit a rack. The red-latched black boxes in this brick-walled space sit in rows with no wasted finger-width between them.
Pine or plywood construction is fine for dry storage; I would seal the wood if your shed breathes damp.
Check that your wall can take the lateral load; freestanding units tip, but a built-in rack levered by a full bin needs anchors into block or stud.
Importance of Shed Organization
An organized shed saves time in the most direct way possible: you know where the tool is, you grab it, and you start working.
The protection side matters just as much. Tools left on damp concrete or piled together wear faster; stored in designated spots, they last.
Safety runs parallel. A sharp tool in its place does not become the thing you step on or knock over reaching past it.
Vertical space is the asset most sheds waste.
Walls sit empty while floor piles grow, and that floor space is what you need to move, to sort, to actually work. Even a small shed holds more than it looks like it should once the walls start working.
The satisfaction is real, if harder to measure. A shed in order means starting a project without the hunt that kills momentum before it builds.
One of the most effective shed organization strategies is maximizing vertical space. Wall-mounted storage keeps items off the floor and easy to find.
Maintenance Tips
Organization decays fast without habits to match.
After each project, put tools back before you close the door. It takes less time than you think, and it saves more than the alternative.
Once a season, walk through with 3 questions: is this broken, is this used, is this needed. The donate and discard piles should grow.
Shelves need wiping; floors need sweeping. Dirt and sawdust compact into corners and attract moisture, which attracts rust.
A quick tidy after each use prevents the gradual slide that turns a clean shed back into a catch-all. The systems you built only work if you use them.
Planning Your Shed Organization
Start by pulling everything out. A blank floor and empty walls let you see the space you actually have, not the space you remember.
Group what you own into categories as it comes out: garden tools, power tools, seasonal items, hardware.
Be honest about what returns. If it is broken, unused, or you forgot you owned it, it does not need a place in the new layout.
Measure walls, height, and obstacles before buying shelving or racks.
Sketch where the large items sit first, then fill in around them.
Flow matters more than perfect symmetry. The path from door to workbench to the tool you use most should stay clear.
Quality storage costs more upfront and saves replacement later. Cheap bins crack, cheap shelving flexes, and both fail when you are mid-project and need the thing they held.
Frequently Asked Questions
What are some good storage ideas for a shed?
Wall-mounted racks with vertical slots keep long-handled tools in a single row, and clear bins let you see contents without pulling lids. Dividing walls into labeled zones keeps categories from bleeding together.
How to organize a 7×7 shed?
Vertical space is the asset small sheds waste most; walls sit empty while floor piles grow. Start by pulling everything out, group into categories as it comes, and be honest about what returns.