A great home office starts with five simple checks: enough desk space (at least 60 inches wide), good lighting, quiet corners, smart storage, and clear workflow zones.
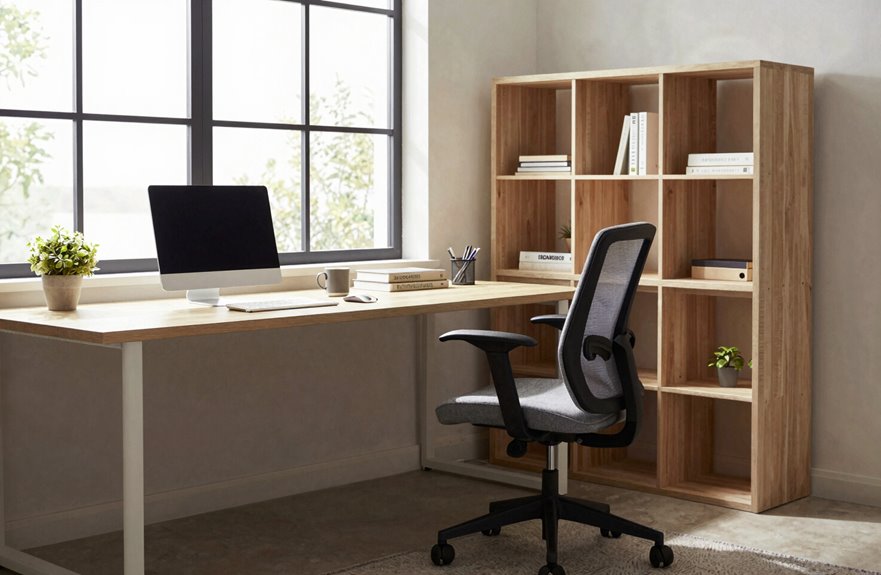
For solo work, I prefer a desk facing a window, as north or south light keeps screens glare-free.
If clients visit, I position my desk to face the room with a sofa behind it for easy conversation.
Shared spaces work best with a wide table and minimal clutter.
On a budget, I tuck a slim desk in a corner and use baskets for quick cleanup.
The optimal layout depends on your work habits, and there are various ways to customize it to fit your daily routine.
Start With These 5 Layout Evaluation Criteria
How do you know if your home office layout will work for you? I check these five basics before moving any furniture.
1. Space and Surface.
My desk needs at least 60 inches in width and 84 inches in depth. I keep the height between 28 and 30 inches for comfort.
My desk spans 60 inches wide and 84 inches deep, with a height kept between 28 and 30 inches for lasting comfort.
2. Storage.
I add shelves or cupboards to stay organized. Everything needs a designated place.
3. Lighting.
I layer lamps and consider window placement to balance natural light. This reduces glare and keeps my screen clear during video calls.
4. Acoustics.
I choose a quiet, private corner for focused work and client calls.
5. Workflow.
I set up defined zones, keep daily items within reach, and allow space for creative projects.

【Spacious Storage & Personalized Display】Featuring 3 fabric drawers and 4 side hooks, plus a raised desktop stand perfectly sized to accommodate your gaming PC tower, this setup lets your panoramic computer configuration shine in a visually distraction-free environment. Keep all essentials neatly stored and within easy reach, so your computer desk stays clean, your mind stays clear, and you can focus on what truly matters. Additionally, a dedicated side shelf with a top panel provides the ideal space to showcase your favorite collectibles or audio equipment.

DESK WITH 8 DRAWERS: This desk with storage function has 8 fabric drawers, four drawers on each side, providing you with enough space to store books, headphones, files, office supplies, etc. These drawers are lightweight and easy to pull out, allowing you to easily organize your workspace

Stay Powered and Organized: This executive desk seamlessly integrates two AC outlets and two USB ports, putting essential power within effortless reach. Conveniently charge your laptop, phone, tablet, and desk lamp simultaneously—eliminating clutter and the need to search for outlets.
Design a Shared Layout for Two Workers
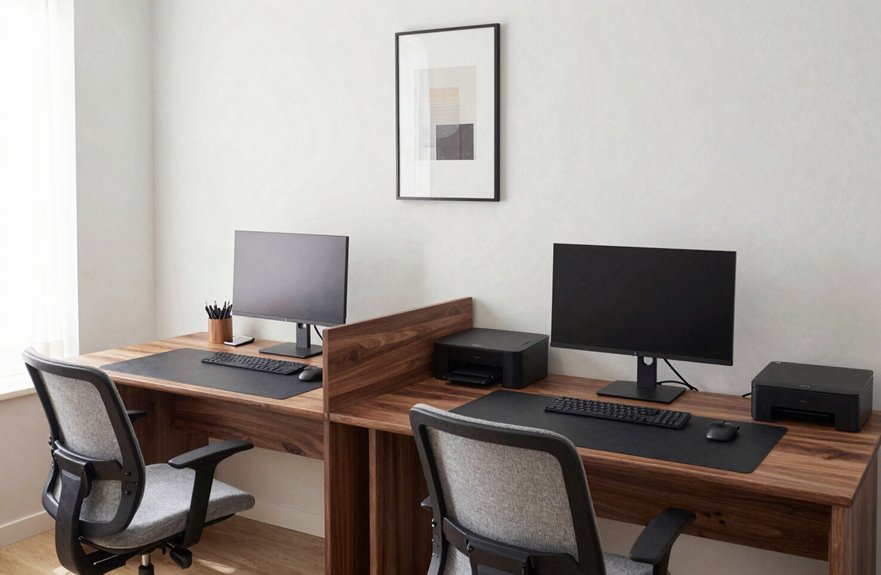
Two people can effectively share one home office without needing to buy new furniture. A repurposed dining table can provide ample workspace for both individuals, which is particularly useful if you keep storage needs minimal and lean towards a paperless approach. This setup fosters an open and friendly environment, allowing for easy communication and collaboration without clutter accumulating.

Materials & Design: Made from high-quality PVC, the table cover protector is highly durable and resistant to wear and tear, the clear and frosted design allows the natural beauty of your table to shine through, blending seamlessly with any decor while providing effective protection
Materials & Design: Made from high-quality PVC, the table cover protector is highly durable and resistant to wear and tear, the clear and frosted design allows the natural beauty of your table to shine through, blending seamlessly with any decor while providing effective protection
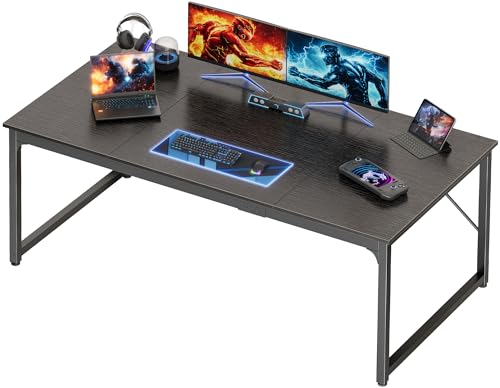
【Deeper and Wider Desktop for Daily Needs】Measuring 63''x29.5'', this deeper desktop of the laptop desk fits your laptop, lamp, planner, and even a second monitor, ideal for working from home, attending online classes, or organizing your study zone without clutter
Repurpose a Dining Table
Why let your dining table sit empty when it can become a shared desk for two? This simple swap fosters togetherness. You’ll find plenty of space to spread out papers and projects, especially when you both opt for a paperless approach. The wide surface facilitates quick idea sharing, allowing materials to be passed back and forth without bulky storage in the way.
| Feature | Benefit | Best For |
|---|---|---|
| Large surface | Space for two | Joint projects |
| No storage bulk | Clean, open look | Quick collaboration |
| Flexible center | Adapts to tasks | Changing daily needs |
This setup works by keeping things streamlined. Positioning two chairs opposite each other creates a natural hub for discussion. Your dining table can become the center of teamwork, enhancing collaboration in a meaningful way.
Plan for Minimal Storage
Where should you put your stuff when sharing one table? The best desk layout keeps storage minimal and the surface clear.
- Use the table as your hub. Repurpose an unfinished dining table as your shared worktable. It provides ample room to spread out papers without needing bulky filing systems.
- Go mostly paperless. This setup works best when you don’t need substantial personal storage. Prioritize digital files to avoid crowding each other.
- Add storage off to the side. For extra supplies, rely on peripheral shelving or cabinets away from the main table. Avoid large under-table drawers.
This arrangement supports quick access to shared supplies while maintaining a streamlined workspace. You’ll both feel organized and connected.
Collaborate Without Clutter
Moving from keeping storage lean, let’s look at how your shared table actually supports day-to-day teamwork.
- Pick a simple surface. Grab an unfinished dining table for your room. It provides ample open space to spread out papers and projects together without feeling cramped.
- Keep it paperless. This setup works best when you store files digitally. You will avoid mess and maintain smooth collaboration for two workers.
- Stay connected. The table keeps surfaces open, allowing you to easily reach across and share ideas. It creates a low-storage footprint that invites frequent interaction and conversation.
Sharing this space helps you build a home office where both individuals feel included. Maintain a clean and open environment to encourage the free flow of ideas.
Build a Solo Layout With Sofa and Window Desk
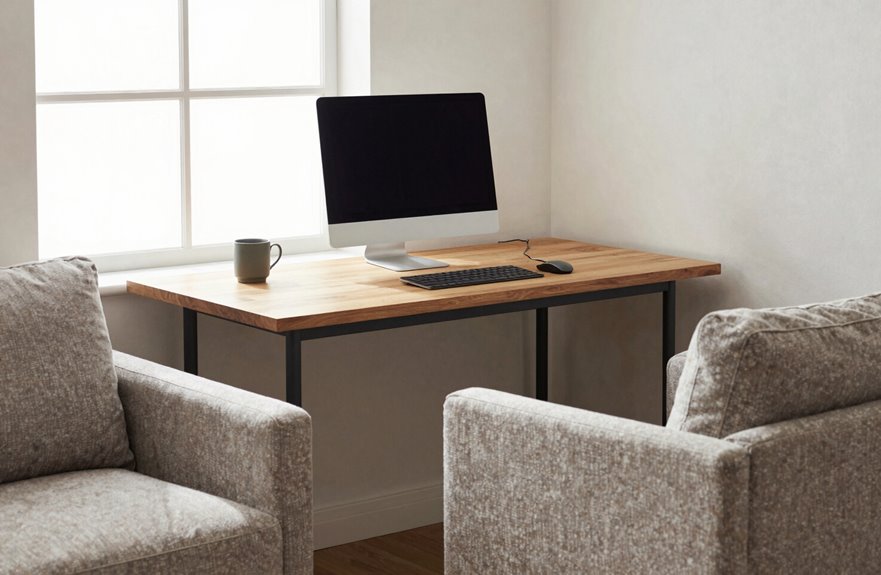
How do I build a solo layout that feels comfy while still being functional for work? I start with a green velvet sofa that allows me to settle in for long sessions. I pair it with a solid wood desk positioned right in front of a window. The fringe details on the sofa reflect the grandmillennial style I enjoy.
Position Your Desk for Natural Light
I face my desk toward the window, being mindful of its placement. North or south-facing windows provide soft natural light without harsh glare. I avoid east or west windows, as they can strain my eyes and impact my mood.
My desk includes a pull-out keyboard tray, which helps me stay mostly paperless and organized. This setup offers a relaxed alternative to stiff office chairs while maintaining productivity and a calm atmosphere in my own space.

More than a Desk Light: This office lamp isn't just for brightening your workspace—it's designed to brighten you, too. With a slight adjustment in direction or position, this LED desk light seamlessly transitions from a desk lamp to a webcam light. You could say it combines the functionality of a desk lamp and a ring light;

More than a Desk Lamp: The Litones home office desk lamp doesn’t just illuminate your workspace, it’s designed to enhance your look, too. With an adjustable lamp head, it easily transforms from a tall desk lamp to a ring light. Blending style and functionality, this versatile lamp offers soft lighting for your office, remote work, studying, reading, gaming, vlogging, and more. Plus, it helps you look your best in video conferences, Zoom meetings, and video calls as a professional fill light.

𝐄𝐲𝐞-𝐂𝐚𝐫𝐢𝐧𝐠, 𝐒𝐨𝐟𝐭, 𝐆𝐥𝐚𝐫𝐞-𝐅𝐫𝐞𝐞 𝐈𝐥𝐥𝐮𝐦𝐢𝐧𝐚𝐭𝐢𝐨𝐧 – This 15W LED desk lamp features LitONES’ exclusive 4-layer optical soft panel with integrated diffusion and edge-lit technology to mimic natural daylight. Unlike traditional lamps that cause harsh shadows, our multi-layer structure scatters light evenly at the source, creating a broad, flicker-free field. This design effectively protects your eyes and relieving eye strain from prolonged use, making it an essential, comfortable companion for prolonged work or home office desk accessories.
Arrange a Client-Facing Layout That Welcomes Visitors
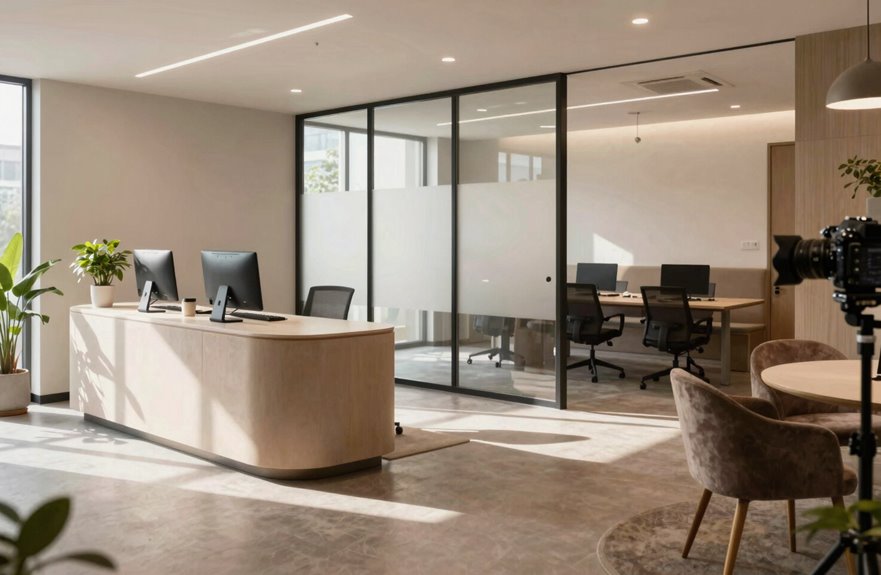
I face my desk into the room to provide a clear, welcoming view upon entry, ensuring that there is no bright window behind it to cast glare. I have arranged a sofa and a few armchairs along the wall to create a comfortable, private area that keeps my main workspace out of sight and clutter-free. I chose a desk with a solid back and no cord holes, allowing you to see a clean, professional surface during our meeting.

12 PACK CLEAR ORGANIZER BINS - Item includes 12 pcs plastic bins (9.6" L x 6.6" W x 4.1" H) & 12 pcs black labels. These clear organizer bins are made of thick clear plastic with smooth edges which are food grade and easy to clean. Check the dimensions first before ordering.

BPA Free Material: Our storage bins are made of premium BPA free, durable, shatter-resistant, clear plastic. Food Safe. These organizer bins are crystal clear, allows you to find the contents quickly.

Versatile multi-purpose storage items with a coordinated look
Welcoming Desk Orientation
Where should your desk sit when clients walk through the door?
Positioning is crucial. I place my desk facing into the room, avoiding a window behind me. This choice minimizes glare and allows visitors to see me clearly, rather than just my silhouette against bright light.
I chose a desk with a solid back and no visible cord holes. This design looks clean and professional from the front, helping clients feel at ease right away.
My layout features sofa seating along one wall while my desk establishes a gentle boundary. This arrangement protects my workspace without creating barriers. Clients feel invited rather than intruded upon.
The right desk orientation conveys a sense of belonging before I even speak.
Visitor Seating Layout
Why does seating matter so much in a home office? It shows your visitors they belong in your space. I place a sofa or armchairs along the wall, facing a central desk that looks into the room. This setup welcomes clients and quietly divides your workspace from the visitor area. I keep the desk back solid and skip cord holes, so it stays tidy from the dining room area. I also avoid putting a window right behind the desk, as this reduces glare and eases eye strain. This layout encourages conversation and helps everyone feel comfortable.
- A sofa against the wall creates a cozy client spot.
- The desk faces inward, building a natural barrier.
- Solid backs and no cord holes keep the view neat.
Clean Desk Profile
How to Keep Your Desk Looking Sharp
To maintain a polished appearance from every angle, position your ergonomic furniture so the desk faces into the room. Place a sofa or armchairs along the wall to create a welcoming barrier. This arrangement invites visitors while keeping your work zone distinct.
Clean Desk Tips
| Feature | Benefit |
|---|---|
| Solid back | Hides cords |
| No cord holes | Looks tidy |
| Faces room | Invites chat |
| Window behind | Causes glare |
| Sofa barrier | Defines space |
Avoid placing your desk directly in front of any window, as glare can strain your eyes during video meetings. Instead, create a cozy client area that is distinct from your daily workspace. This layout encourages natural and open conversations, making everyone feel included.
Choose the Right Layout for Your Space and Work Style
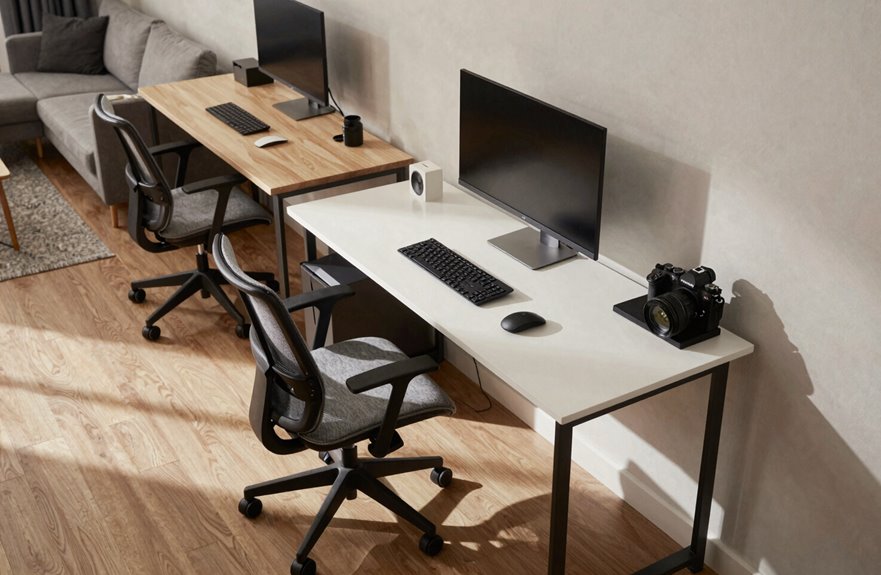
What kind of layout will actually work for your space and daily routine? We all need a spot that feels like ours, even in a busy home. A dedicated mini zone keeps supplies tidy and looks polished on a budget. An unfinished dining table can serve as a shared desk for two if you’re tight on space.
- Place a central desk facing the room with a sofa behind it to welcome clients and block glare.
- Position the desk to face north or south windows to soak up natural light, which can improve your mood and reduce eye strain.
- Layer ambient, task, and accent lights at 3000K to enhance visibility and create a calming environment.
The right setup can foster a sense of belonging in your workday.

Effective treatment of sound insulation block corner filling is not in place

Enhanced Privacy Fence Design: this felt desk divider measures 86 x 16.5 inches with a unique fence design that blocks visual distractions in open offices or home work spaces; The privacy screen with clips creates a personal zone, functioning as an acoustic desk partition for busy environments needing a quiet corner

Installation Ease: The desk privacy divider stands out for its installation ease. With a simplified process, users can effortlessly set it up on their desktops. There's no requirement for complex tools or any special expertise, ensuring a smooth start
Fit an Office Into a Corner or Dining Space
Not every home has a whole room to spare, and that’s perfectly fine. You can create a home office setup that fits your life and feels welcoming.
Try This
- Tuck a secretary desk into a corner for laptop work.
- Choose a style you love, like industrial chic or mid-century modern.
- Your dining table can double as a workspace.
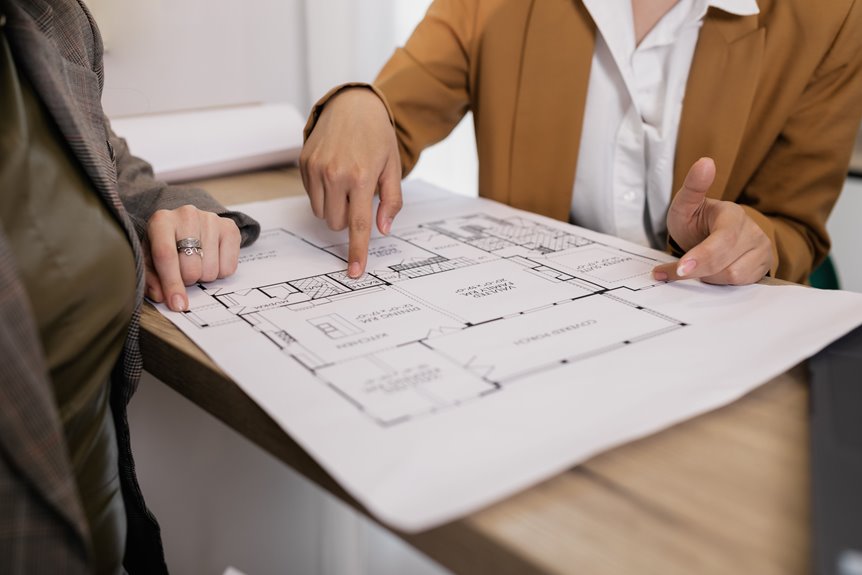
- Spread out plans and add a bookshelf with baskets to store samples.
- Roll plans into a taller basket to stay organized.
- Close everything when the day ends.
- You can create a comfortable work area, even in a small nook.
| Space | Key Piece | Storage Tip |
|---|---|---|
| Corner | Secretary desk | Close it after work |
| Dining area | Dining table | Use baskets for samples |
| Wall nook | Small shelf | Roll plans in tall bins |

Stay Powered and Organized: This executive desk seamlessly integrates two AC outlets and two USB ports, putting essential power within effortless reach. Conveniently charge your laptop, phone, tablet, and desk lamp simultaneously—eliminating clutter and the need to search for outlets.

[Convenient Charging Station]: The computer desk integrates a recessed charging station to power up your devices. 2 outlets (125V/12A) and 2 USB ports (5V, 2A) keep your essential electronics fully charged and within reach.

Premium Privacy Solution: 60-inch under desk privacy panel with tassel trim provides dual functionality - offers full coverage to block unwanted views, maintain personal space while hide cables. The heavy linen fabric offers professional privacy protection and seamlessly blends with any office decor.
Transform a Guest Room With a Murphy Bed Office
A Murphy bed saves a significant amount of floor space and can be easily folded up, allowing for the inclusion of a real desk and wall storage. This setup creates a dual-purpose room that functions as a quiet office during the week and a cozy guest room on weekends, eliminating the need for constant rearranging. To maintain productivity, position the desk facing into the room, use baskets or rolling storage for supplies, and keep the bed concealed to ensure privacy and professionalism during video calls.

Sleek Two-Tone Geometric Design:This reception desk boasts a minimalist matte two-tone finish (white to charcoal) with clean linear lines, creating a floating visual effect for a modern, professional commercial space
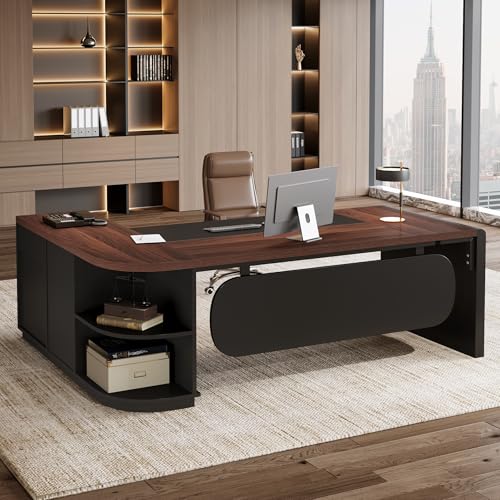
𝐋-𝐒𝐡𝐚𝐩𝐞𝐝 𝐖𝐨𝐫𝐤𝐬𝐭𝐚𝐭𝐢𝐨𝐧: The 81" L x 31.5" W desktop of this large executive desk provides generous space for dual monitors, files, and office supplies—offering a spacious workstation that fuels productivity in any corporate office or home study

Smooth Marble Front Design: The main counter showcases white panels with grey veining to create a sleek and refined look for professional indoor reception zones
Space-Saving Design Benefits
A Murphy bed office setup can transform how you use a guest room. This design allows me to reclaim vertical space that would otherwise remain empty. When I finish working, I simply fold up the desk, and the bed disappears into the wall. It effectively provides the functionality of two rooms in one.
This setup is effective for several reasons:
- A built-in desk area that folds away neatly when guests arrive
- Corner spaces utilized as mini offices with just a laptop and a secretary desk
- Wall beds that maintain the room’s readiness for visitors without sacrificing my workspace
I don’t need a large house to stay organized. With smart choices like baskets on bookshelves and extendable surfaces, I achieve a high-end look without a significant budget. It is practical, and it feels like home.
Dual-Function Room Setup
My Plan
Why let a guest room sit empty most of the year when it could earn its keep? This dual-function room setup allows us to welcome guests and tackle work without wasting space.
- Install a Murphy bed. It folds up to reveal desk space for daily work.
- Add some modular storage. Shelves keep supplies tidy and transitions quick.
- Close the bed. The workspace hides away, leaving a clean retreat for visitors.
This compact design combines sleeping, storage, and desk zones in one spot. We maximize every square foot, and the room maintains an organized feel. It serves as a flexible solution for modern living, accommodating both work during the day and overnight guests.
Productivity-Focused Arrangement Tips
Now that the Murphy bed is in place, let’s discuss how to make this space work effectively. A well-designed home office reduces stress and enhances workflow.
Your desk requires good lighting to prevent eye strain during long days. I position mine near a window for natural light and add ambient lighting for video calls. This layout helps maintain focus without the clutter that hampers productivity.
For organization, I utilize vertical storage. Here’s what works:
- A tall basket for rolled plans and papers
- A bookshelf with woven bins for samples and supplies
- A compact seating nook that doubles as a reading space
Air quality is important as well. I open windows frequently, and I fold my Murphy bed up each evening. This signals that the workday is complete, allowing me to transition back to personal time.
Position Your Desk to Capture Natural Light
Where should you put your desk? I recommend placing it facing a window to soak up natural light throughout your day. This setup can lift your mood, spark creativity, and lower stress while you tackle your daily work.
- Pick the right direction. Aim for a north- or south-facing window if possible. These directions provide soft, steady light without the harsh glare of east- or west-facing windows. This gentle brightness keeps your eyes comfortable during long sessions.
- Check your view. Sit where daylight hits your workspace evenly. Facing the window directly balances brightness and reduces eye strain. This arrangement can enhance your productivity and comfort in your home office. You belong here.

Stepless Dimming Mode: The desk light offers effortless switching of color temperatures (2700K-6500K) and stepless dimming (1% - 100%) to meet your arbitrary color temperature and brightness needs, providing you with a healthy and comfortable office lighting experience. It is perfect for you and your child to read, work, study, unwind, draw, knitting, sew, craftwork, etc

𝐄𝐲𝐞-𝐂𝐚𝐫𝐢𝐧𝐠, 𝐒𝐨𝐟𝐭, 𝐆𝐥𝐚𝐫𝐞-𝐅𝐫𝐞𝐞 𝐈𝐥𝐥𝐮𝐦𝐢𝐧𝐚𝐭𝐢𝐨𝐧 – This 15W LED desk lamp features LitONES’ exclusive 4-layer optical soft panel with integrated diffusion and edge-lit technology to mimic natural daylight. Unlike traditional lamps that cause harsh shadows, our multi-layer structure scatters light evenly at the source, creating a broad, flicker-free field. This design effectively protects your eyes and relieving eye strain from prolonged use, making it an essential, comfortable companion for prolonged work or home office setup.

More than a Desk Lamp: The Litones home office desk lamp doesn’t just illuminate your workspace, it’s designed to enhance your look, too. With an adjustable lamp head, it easily transforms from a tall desk lamp to a ring light. Blending style and functionality, this versatile lamp offers soft lighting for your office, remote work, studying, reading, gaming, vlogging, and more. Plus, it helps you look your best in video conferences, Zoom meetings, and video calls as a professional fill light.
Layer Natural, Task, and Ambient Lighting
I start my lighting plan with natural daylight because it boosts my mood and keeps the room feeling open. Next, I add a desk lamp or under-cabinet light to brighten my work surface and reduce eye strain. Finally, I incorporate ambient light with a soft overhead fixture or floor lamp to fill the room, avoiding harsh, flat brightness throughout the day.

【Multi-Functional】The closet drawer are convenient to store your lightweight items such as shoes, clothes, toys, snacks, books, file etc. Suitable for bedroom, bathroom, kitchen, living room, office or study areas. Stylish neutral style, suitable for any place

『Durable Metal Material』: Letaya metal storage cabinet is made up of 0.8mm steel ,rugged and not easily deformed, plate adopted environmentally powder coated finish, moisture proof ,capacity to resist corrosion and rust.
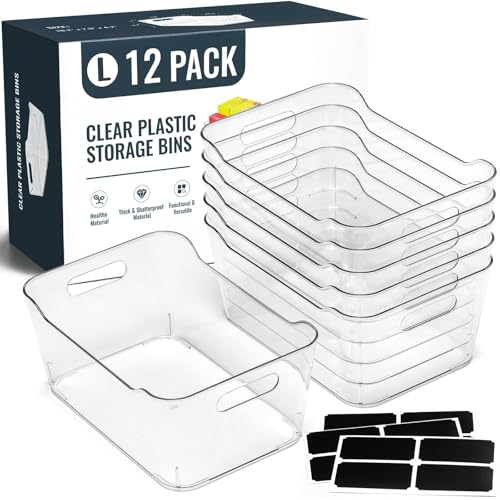
12 PACK CLEAR ORGANIZER BINS - Item includes 12 pcs plastic bins (10.3" L x 7.3" W x 4.7" H) & 12 pcs black labels. These clear organizer bins are made of thick clear plastic with smooth edges which are food grade and easy to clean.
Natural Daylight Benefits
Why does a desk near a window feel so much better than one stuck in a dark corner? Natural daylight enhances my sense of vitality and focus. When I place my workspace near a window, I rely less on harsh artificial lighting, and my eyes appreciate that.
I follow three simple rules:
- I face north or south windows to catch soft rays that boost my mood without painful glare.
- I avoid east or west setups where the sun blasts my screen and strains my eyes.
- I position my desk so sunlight provides gentle ambient illumination, creating a warm, welcoming spot where I want to work.
This adjustment supports my health and maintains my productivity throughout the day.
Task and Ambient Options
How do I keep my office bright once the sun goes down? I layer my lights so the room feels welcoming and I don’t strain my eyes.
- Add task lighting. I place a desk lamp or floor lamp near my work area. It provides focused light for reading and typing without tiring my eyes.
- Use ambient lighting. I brighten the whole room with ceiling fixtures or wall lights. Track lighting or lanterns create a cozy, balanced glow.
- Pick warm bulbs. I choose 3000K LEDs. They look nice and help maintain a calm atmosphere.
- Position carefully. I angle my task lighting to avoid screen glare and let my ambient light blend with any remaining natural light.
Build Ergonomics Into Your Desk and Chair Setup
Where should your arms rest while typing, and how high should your screen be? Good ergonomics keep us comfortable and productive. About 80% of remote workers experience back pain, so you’re not alone. I use a height-adjustable desk and a supportive chair because they enhance energy and focus. OSHA guidelines emphasize that proper setup is important. Position your monitor at eye level or slightly below, and lower it if you wear bifocals. Picture your ideal workspace:
- Your feet rest flat on the floor while you type.
- Your elbows remain at a comfortable 90-degree angle.
- Your screen is high enough that you’re not looking down.
When we prioritize ergonomics, we improve comfort and efficiency.

Privacy Protection: Divides open layouts into separate private spaces, shielding personal activities from view while filtering gentle ambient light for a quiet, focused environment.

Instant Personal Space: Divides shared areas efficiently into secluded zones to shield private routines, personal work corners, or video conference backgrounds while filtering pleasant natural sunlight.

Instant Privacy: Create dedicated quiet zones in shared areas. The breathable white polyester fabric provides personal space while permitting gentle natural light to softly filter through.
Integrate Storage and Cord Management Into Your Layout
Since clutter drains my focus faster than a dying phone battery, I’ve learned that smart storage is essential for staying productive at home.
Storage Management Basics
I build my workspace around three principles:
- Shelving and cabinets: I install ample shelving, filing cabinets, or cupboards to keep surfaces clear and my mind sharp.
- Integrated solutions: I choose modular furniture with built-in storage so frequently used items stay within arm’s reach.
- Designated zones: I create specific spots for supplies, crafts, and daily essentials, making organization automatic.
Cord Control
I manage cable chaos with clips, sleeves, and under-desk trays. Hidden cords result in fewer distractions and a cleaner look.
Even compact, budget-friendly storage options can feel polished and cohesive when chosen thoughtfully. Quick retrieval systems keep my small office tidy without added stress.
Arrange Plants and Scent Stations Within Your Design
After hiding my cords and organizing my supplies, I bring my office to life with greenery and gentle scents. I place plants near windows where they catch natural light without creating screen glare. This simple step freshens the air and lifts my mood while I work.
Greenery near windows catches light without glare, freshening the air and lifting my mood through the workday.
- A small pothos trailing from a shelf, catching morning sun
- A diffuser with peppermint oil humming softly beside my keyboard
- Open space between my desk and chair, letting air move freely
I balance my plants with breathable furniture so nothing feels crowded. Soft lighting paired with my greenery creates a calm spot where I enjoy spending my day. These touches make my workspace feel personal, a place where I can focus effectively.
Separate Your Work Zone From Living Areas
I keep my work life and home life separate by clearly defining where I clock in and where I relax. I create a dedicated mini office within my larger space, which helps my brain distinguish between focus time and relaxation time.
Here’s how I make it work:
| Strategy | What I Use | Why It Helps |
|---|---|---|
| Corner desk | Secretary desk against the wall | Saves space, creates boundaries |
| Smart storage | Designated bins for supplies | Keeps work stuff out of sight |
| Flexible furniture | Murphy bed in larger rooms | Transforms the room as needed |
| Quick cleanup | Rolling plan system with tall basket | Allows for fast transition from work |
I position my desk in tight corners to maximize every inch. I fold up plans and tuck them away when I’m done. This physical separation allows me to feel fully present in both my work zone and living space.
Design a Polished Layout on a Tight Budget
Creating separate zones is just the beginning. Making them look polished doesn’t require deep pockets. Working from home feels better when your space looks put-together, not patched-together.
Creating separate zones is just the beginning. A polished space doesn’t require deep pockets.
Here’s how I build that high-end vibe on a budget:
- I tuck a slim secretary desk into an unused corner and borrow my dining table when I need extra room for spreading out plans.
- I stash supplies in baskets on a tall bookshelf; towels, craft items, and paperwork are all hidden but handy.
- I roll my active plans into a basket and close the desk at day’s end, so work disappears.
For larger spaces, I would choose a wall bed that folds up, turning my bedroom into an office without construction. Cohesive finishes tie it all together. A well-organized space enhances productivity and comfort.