

Essential kitchen tools are the specific handful of items that handle nearly every cooking task without cluttering your drawers.
The right setup depends on how much maintenance you’re willing to do; carbon steel knives reward daily care with a sharper edge, while stainless steel forgives the cook who just wants to chop and rinse.
A single 8- to 10-inch chef’s knife alone covers 90% of cutting work, which is why that is where your money belongs first.
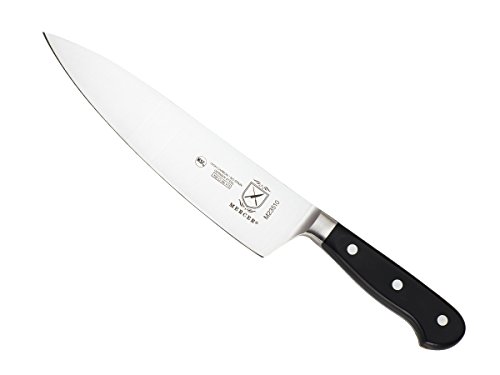
Chef’s Knife

A single 8- to 10-inch chef’s knife handles roughly 90% of cutting work in most home kitchens. That concentration of use is why I would put the bulk of any knife budget here before thinking about specialty blades.
Blade length matters more than people expect. An 8-inch knife suits most home cooks for daily vegetable prep and protein breakdown.
A 10-inch blade adds reach for larger items but demands more board space and a bit more control. Either way, the knife should feel like an extension of your hand rather than a tool you fight against.
The steel choice is where I weigh trade-offs directly.
Carbon steel takes a keener edge and holds it longer, yet it stains and demands wiping after cutting anything acidic. Stainless asks less of you day to day but needs steeling more often and eventually sharpening sooner.
For a weekend cook who wants the tool ready without ceremony, stainless wins. For someone who enjoys maintenance as part of the ritual, carbon rewards the attention.
Handle shape decides comfort over an hour of prep. I look for a grip that fills the palm without forcing the fingers into a fixed position.
The Wüsthof Classic line gets this right for many hands, and the company’s lifetime guarantee against defects matters when you’re spending around $135 for a tool you intend to keep for decades.
Weight distribution matters as much as handle contour; a blade-heavy knife tires the wrist, while one balanced at the bolster feels neutral through long sessions.
One good chef’s knife outlasts most owners if maintained. That longevity makes the initial cost easier to justify against replacing three mediocre knives over the same span.
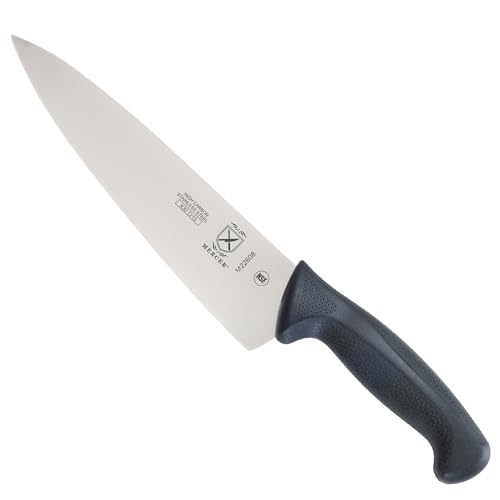
QUALITY CONSTRUCTION: Knife is crafted with one-piece high-carbon Japanese steel for easy edge maintenance and long-lasting sharpness

This 8- inch chef’s knife is a versatile tool for cutting, chopping, dicing, mincing and more

PROFESSIONAL ALL-ROUND CHEF'S KNIFE: Bolexino 8" chef's knife with WIDE blade for commercial use and home cooking available. Containing all the essentials for you to chop, slice and dice to easily handle a variety of kitchen tasks. It's well balanced and simply beautiful to behold. Bolexino knife is the good choice for your kitchen.
Paring Knife

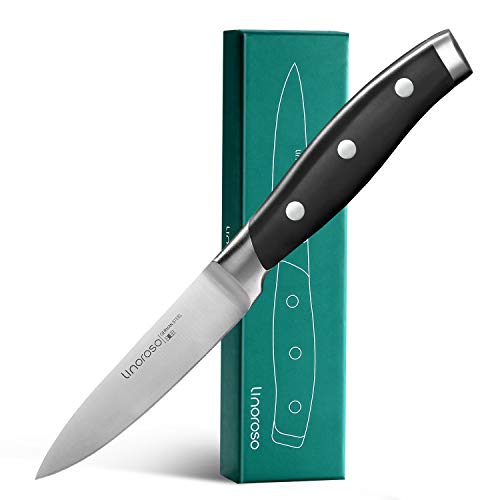
A 3.5–4 inch paring knife handles the jobs where a chef’s knife feels like a cleaver.
Peeling apples, coring strawberries, trimming fat from a chicken thigh, removing the silver skin from a tenderloin; all of it happens in your hand, not on the board, and a shorter blade gives you the control you need without the tip wandering.
The work is lighter, the edge takes less abuse, and the geometry matters more than the steel pedigree.
I would not spend much here. A mid-range blade sharpens easily on a cheap rod or stone, and since it sees gentler use than your primary knife, it stays keen longer with less fuss.
Save the investment for the chef’s knife you reach for twenty times a night; this one just needs to feel nimble and hold an edge through Sunday prep.

QUALITY CONSTRUCTION: Knife is crafted with one-piece high-carbon Japanese steel for easy edge maintenance and long-lasting sharpness

Superior Blade Quality and Sharpness - Professional-grade forged knives are made from high carbon stainless steel (50 Cr MoV15), ensuring maximum sharpness and edge retention. The blades are ice-tempered to create a hardened edge that maintains its sharpness longer and performs well when re-sharpened.

PROFESSIONAL 10-INCH CHEF KNIFE: The BOLEXINO 10 inch Chef Knife is designed to meet various kitchen needs. This multipurpose cooking knife is ideal for chopping, slicing, dicing and mincing vegetables, meats, fruits and more. With a total length of 36.1cm (14.21 inches) and a 70° tip angle, it provides excellent leverage for heavy-duty cutting tasks.
Serrated Knife

A straight-edged chef’s knife glides through an onion, then meets a crusty sourdough and tears the crumb.
That is where a serrated blade earns its keep. The teeth bite through brittle crust without compressing the soft interior, and they do the same for a ripe tomato where a smooth edge would slide and squish.
The right length sits around 9 to 10 inches.
At that size, the serrations do the cutting work, so you keep pressure light and let the sawing motion finish the slice. You are not pushing down; you are drawing back.
I do not bother resharpening mine. The points and valleys are too fussy to restore with any home setup, and a decent serrated knife costs little enough that I would rather replace it every few years when the edge dulls.
It is a practical tool, not an heirloom.
In my own order of priorities, this comes third.
Chef’s knife first, paring knife second, serrated third. You can manage without it if you never bake your own bread, but for anyone who does, it saves a lot of frustration.

High-quality stainless steel blade

CUTLERY ESSENTIAL: The KitchenAid chef knife is the workhorse of the kitchen, ideal for a variety of cutting tasks including slicing, dicing and, mincing.

Complete 3-Piece Set for Home Cooking – Includes an 8" chef knife (heavy chopping, slicing meat), 7" Santoku (fish, vegetables, precise slicing), and 5" utility knife (peeling, coring, cheese). No more juggling tools – everything you need from meal prep to plating, all in one Set.
Cutting Board

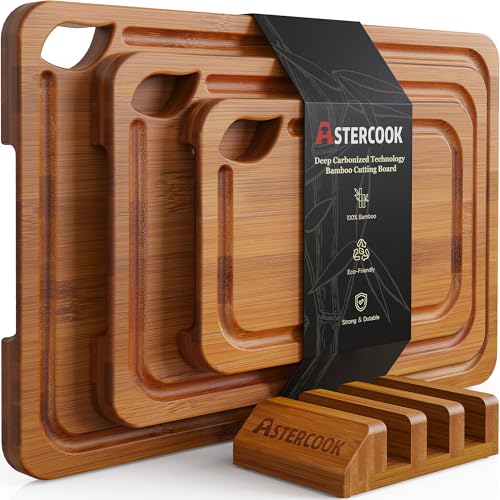
A cutting board is non-negotiable, and at least 12×18 inches is the size that actually holds a chicken or a pile of greens without food sliding onto the counter.
I keep two boards minimum, one for raw meat and one for everything else, because cross-contamination is not a risk worth managing mid-recipe with a quick rinse.
Wood versus plastic is the real fork in the road. Hard maple, walnut, or Japanese hiba are the woods worth owning.
End-grain construction, where the fibers stand vertical, is what I would pick for a board that sees daily use; the knife slips between the fibers rather than slicing across them, and those fibers close back up, which is what "self-healing" actually means.
Edge-grain is cheaper and still kinder to blades than plastic, but it does not recover the same way.
Plastic goes in the dishwasher, which is its whole advantage, yet it scars permanently, eventually sheds microplastics, and does your knives no favors. For a home cook working weekends, wood is the better tool.

Superior high-carbon stainless steel blades for precision and accuracy

Sturdy, stainless steel blade

Variety of innovative new knife and block styles let home cooks customize their cutlery collection
Mixing Bowls

A nesting stainless steel set wins on space and weight in a kitchen that never has enough of either. Most sets run from 1.5 to 5 quarts, which covers everything from beating a single egg to tossing a full batch of dough.
I look for a rolled lip around the rim; it channels batter and beaten eggs without running down the side and onto the counter.
Glass bowls photograph well, but I skip them for everyday prep. They chip, they shatter, and they weigh enough that you notice every time you lift one.
Stainless steel bounces instead of breaks, and the same thin wall that keeps it light also chills quickly if you need to set a bowl over ice.
One large bowl from the set usually lives on my shelf as a serving piece.
It holds popcorn for movie nights or a dressed salad at dinner, and no one guesses it spent the morning under a whisk. A 5-quart bowl with a lip handles both jobs without a swap.

Contains a 10 inch x 7.5" cutting board and a paring knife with sheath

NSF CERTIFIED FOOD GRADE - This premium mineral oil is NSF certified and lab-tested to meet the strictest food safety standards. Colorless, odorless, tasteless, and gluten-free — perfect for cutting boards, butcher blocks, and all food-contact surfaces.

100% BAMBOO: Kikcoin bamboo wooden cutting boards for kitchen preserves the original bamboo grain and texture.The surface is carefully polished and coated with food-grade oil, ensuring a smooth, burr-free finish that resists cracking
Measuring Cups
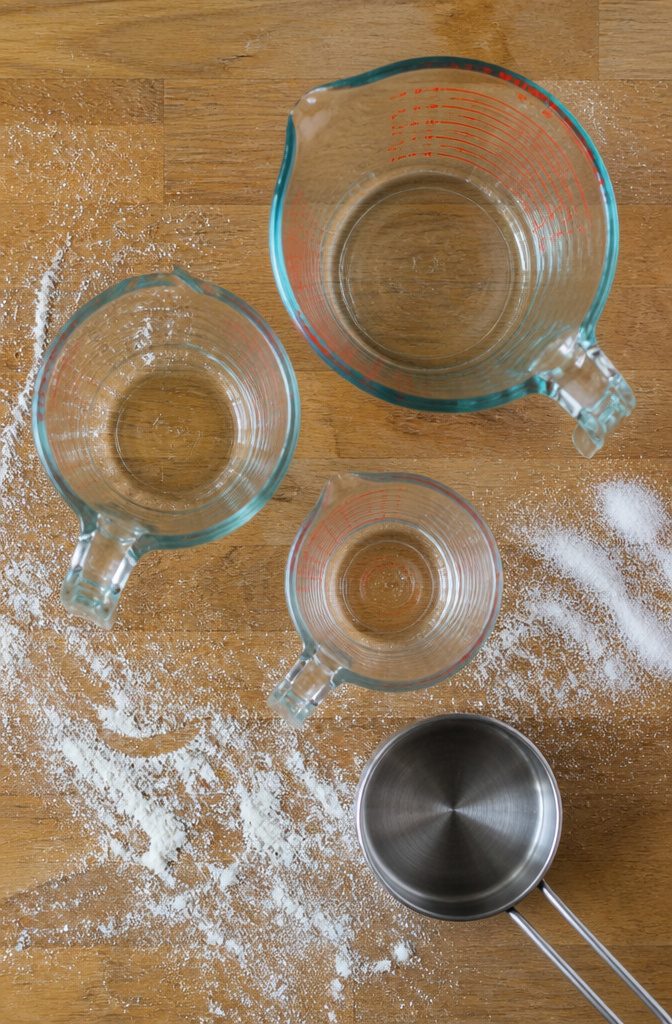
Liquid and dry measuring cups are built for different jobs, and treating them as interchangeable is the fastest way to throw off a recipe.
Liquid measures need a spout and enough headspace to read the meniscus without spilling; dry measures need level rims you can sweep across with a straight edge for an accurate fill.
For liquid, I would grab a 1-cup, 2-cup, and 4-cup Pyrex glass set. The pour spout matters more than the material, though glass lets you microwave and see the measurement from above.
For dry, a nested 4-piece stainless set, something like the OXO Good Grips with magnetic snaps, keeps the cups together without a ring that rusts or catches drawer hardware.
You will lose some shelf space. A full kit of both types runs about $22.99 for the dry set and roughly the same for the liquid trio, so this is not where the budget breaks.
Skip the all-in-one adjustable cups; they do neither job well and the sliding mechanism traps flour in the track.

High-Carbon Stainless Steel Blade: It is manufactured from high-quality stainless steel that maintains its functionality for a long time. And to boost its sturdiness, the steel contains 0.6-0.75 carbon. This makes it two times as hard as other knives in its class as they contain about 0.3% carbon

Variety of innovative new knife and block styles let home cooks customize their cutlery collection
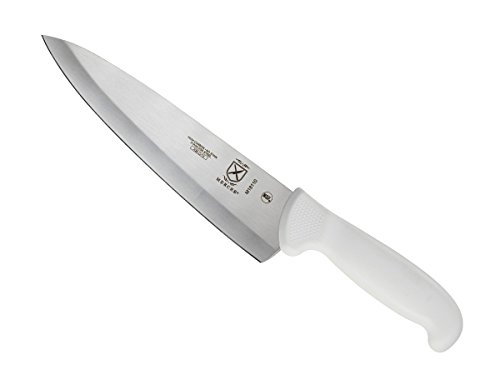
QUALITY CONSTRUCTION: Knives are crafted with high-carbon Japanese steel for easy edge maintenance and a razor sharp blade that lasts
Colander
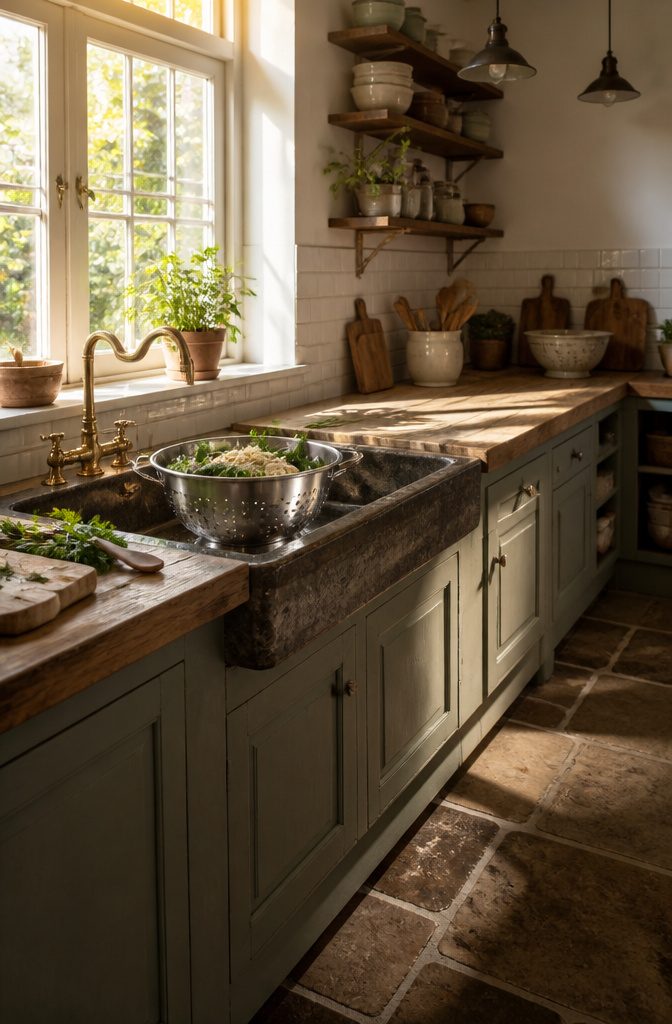
A colander has two jobs that matter: draining a pound of pasta fast enough that it does not keep cooking, and washing vegetables without sending half of them down the drain.
For the first, you need holes large enough that water runs out in seconds, not in a trickle. For the second, holes small enough to hold rice or quinoa without a second strainer in the way.
The shape of the base decides how stable it feels under that weight of water and food.
Footed colanders sit in the sink or on the counter, which works until you need both hands free and the bowl starts to tip.
I would pick a hook-over-sink design with a solid ring base instead; it hangs on its own, drains straight down, and the ring keeps it from rocking when you set it on the counter to spin greens dry.
Stainless steel is the material that lasts. 18/10 stainless is the grade that holds up, and it is the one to look for.
It goes through the dishwasher, does not pick up stains from tomato sauce or turmeric, and carries enough weight that it does not skitter around when you are working.
Plastic colanders are lighter and cheaper, but they stain, they can melt against a hot pot, and they flex when you need them steady.
Ceramic is sturdier than plastic, yet it chips and it is heavy enough that I would rather not lift it full of boiling water.
Two details to check before buying: the hook should be wide enough for your sink rim, and the base ring should be one continuous piece, not three small feet that wobble on an uneven counter.
QUALITY CONSTRUCTION: Knife is precision-forged with high-carbon German cutlery steel for incredible long-lasting sharpness

PROFESSIONAL CHEF KNIFE: The BOLEXINO10 inch Chef Knife is designed to meet the various need when cutting. Multipurpose cooking knife ideal for chopping, slicing, dicing and mincing all vegetables, meats, fruit and more. The extra length gives you extreme cutting power.

【10” Kitchen Gyuto Knife】- This MOSFiATA 10 Inch Kitchen Knife is made of high-quality German stainless steel that resists rust, corrosion and discoloration. It can be used for your daily kitchen tasks of chopping, slicing, dicing and mincing of all kinds of meat, vegetables, fruits and bread. It is suitable for both home and restaurant kitchens.
Non-Stick Frying Pan

A 10- to 12-inch non-stick frying pan earns its place for eggs, fish, and anything delicate that sticks the moment it touches bare metal.
The coating lets you flip an omelet with a silicone spatula and wipe the surface clean in seconds, which matters on a Tuesday morning when the dishwasher is already full.
That same coating is why I keep these pans out of high-heat territory.
Above medium, the non-stick surface breaks down faster, and it will never build the fond that makes a pan sauce worth eating. For searing steak or finishing under the broiler, I reach for stainless steel instead.
I replace mine every three to five years, no matter the brand. The coating wears with use, and spending more than about $40 does not buy you more years.
A $120 pan flakes just like a $30 one; the difference is marketing, not longevity. Buy mid-range, treat it gently, and plan on buying again.

Stainless steel blade - Resists rust and corrosion for durability

Ultra Sharp Knife: Here we have an ideal tomato knife that effortlessly slices tomatoes and veggies, whether thick or thin

Material advantages: Soft texture and not easily allergic; Long lasting and bright color; Natural gemstones have a warm color and unique texture. After fine cutting, it becomes more glossy and textured, and can maintain its exquisite appearance even after long-term wear.
Saucepan

A 2- to 3-quart saucepan handles the work I actually do most nights: a cup of rice, a jar of marinara reduced down, last night’s soup reheated, a small batch of oatmeal.
Anything smaller scorches on the walls; anything larger steams instead of simmers and takes twice the water to clean.
Clad stainless wins this spot over non-stick for three reasons that matter in daily use.
You can stir with a metal spoon without thinking, deglaze with wine when a sauce sticks slightly, and finish a braise under the broiler without the 500°F ceiling that kills most non-stick coatings.
The tri-ply or 5-ply construction, aluminum or copper sandwiched between steel, gives even heat for a steady simmer without the hot spots that separate a good pan from a frustrating one.
On a 3-quart pot, the helper handle opposite the main grip matters more than it looks. Water plus pasta or beans runs heavy fast, and lifting one-handed from stove to sink strains wrists and spills.
Two hands, two handles, no drama. I would skip the glass lid and buy the metal one; it survives an oven trip and never fogs to the point of uselessness.

Premium High-carbon Stainless Steel Blade - imarku paring knife is made from imported expertly forged Japanese high carbon stainless steel to enhance its robustness, containing 0.6g-0.75g carbon. Through the high-temperature forging process, the blade comes at a staggering 58 on the Rockwell Hardness scale

STAY-SHARP EDGEKEEPER SHEATH: Built-in sharpener in the EdgeKeeper sheath hones the blade edge every time you insert or remove the knife - so your paring knife stays sharper longer without any extra effort or tools
Premium German High-Carbon Stainless Steel: Forged from authentic ThyssenKrupp steel and heat-treated to 56+HRC hardness, this paring knife delivers exceptional strength, rust resistance, and long-lasting performance for daily kitchen use
Baking Sheet
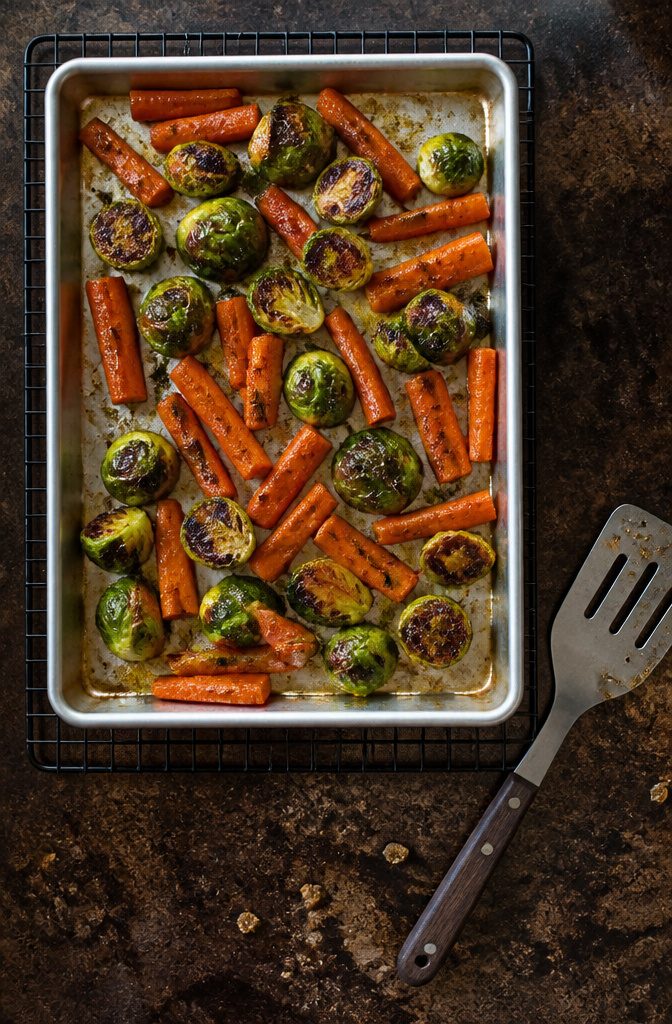
The rimmed half-sheet at 18×13 inches is the only baking sheet I keep in my kitchen.
Anything smaller leaves vegetables crowded into a steam bath instead of a roast, and the rimmed edge contains olive oil and drippings that would otherwise smoke on the oven floor.
I buy aluminum, never non-stick. The dark coating on non-stick pans absorbs heat too fast and burns the fond before it ever forms, while bare aluminum gives me the even browning that makes roasted broccoli worth eating.
A wire rack insert set inside the sheet is worth the extra ten dollars.
Air circulates underneath chicken thighs or bacon, and the fat renders out instead of pooling. The result is crisp skin or flat, crackly strips without flipping.
Two half-sheets let me rotate positions mid-bake.
I slide the top sheet to the bottom rack and vice versa, which evens out the hot spots every oven hides. At about $15 to $20 each, the pair costs less than one boutique sheet and outlasts it.
【Nature Bamboo for Lasting Strength】 Crafted from premium bamboo and treated with high-heat carbonization, this wood cutting board set resists warping, cracking, and water absorption. Stronger than standard cutting boards for kitchen, it protects knife edges and stays smooth through years of everyday use.

Stainless steel mezzaluna blade: Single curved rocker blade is crafted from high-quality stainless steel for precise, efficient chopping; resists rust and corrosion with regular use; sharp edge maintains performance across repeated sessions without dulling quickly

Real Cooking Tools for Kids – Safe & Effective: Our kids knife set actually cuts fruits, veggies, cheese, and more—helping picky eaters get excited about food. Unlike plastic toy sets, these Montessori-inspired knives keep safety first while teaching real kitchen skills.
Tongs

If I could keep only one hand tool, it would be a 12-inch locking tong.
That length keeps my fingers clear of splattering oil without turning a simple flip into a wrestling match. I keep two pairs on hand so I never pause mid-recipe to wash the pair I just used on raw chicken.
Nylon-tipped tongs are the only safe choice for non-stick surfaces, since metal will chew through that coating in a matter of weeks.
For everything else, stainless steel gets my vote. The spring tension matters more than most people think: a stiff spring forces you to squeeze constantly, which exhausts your hand when you are turning a full sheet pan of vegetables.
A light, responsive spring lets the tool do the work.
Look for a locking mechanism you can open and close with one hand. The best models, like those from Rösle, are strong enough to lift a full rack of ribs and carry a lifetime warranty.
Whisk

A balloon whisk with 10 to 12 wires works best for whipping cream or egg whites. Fewer wires and you spend too long at the bowl; more and the wires crowd each other instead of cutting through the liquid.
Silicone-coated wires matter if you cook with non-stick pans, since bare metal will scratch the coating and ruin it over time.
For pan sauces and roux, a flat whisk sits low in the skillet and keeps flour from clumping in the corners. The balloon shape throws sauce out of a shallow pan; the flat profile stirs it where it bubbles.
A fork can beat an single egg, but it does not pull the same volume of air into cream, and it will not break up lumps in a béchamel.
A blender works for vinaigrettes, yet for a small batch, half the sauce clings to the jar blades and you lose it to the rinse.
The whisk emulsifies better than a fork and faster than a blender when you are working with a cup or two.
Peeler

A vegetable peeler is one of those tools where the ten-dollar version is the right one. The real choice is between a straight swivel and a Y-shaped frame, and for firm vegetables like potatoes and carrots, the Y-shape wins.
The wider handle sits more naturally in your palm and gives you more control against dense skins, so you take off less flesh with each pass.
I have used both for years, and the straight swivel still has its place for softer produce or when you need a more controlled angle. But the Y-shape is what lives in my drawer now.
Blade material is worth a moment.
Ceramic holds an edge longer than steel and will not rust, which matters in a tool that sits wet in a sink half the time. The downside is brittleness: drop it on a tile floor and it is done.
Steel bends; ceramic shatters. For a tool this cheap, I replace a steel blade when it dulls and sleep fine.
Grip comfort matters more than brand here. A rubberized handle with some width to it beats a slim metal one every time, especially when your hands are wet.
Test that in the store if you can, or read reviews for the word "slippery." The rest is marketing.
Can Opener

A can opener is the tool most people forget until they need it, and a failing blade or slipping gear is a safety hazard worth replacing the moment it shows wear.
I keep a manual side-cutting safety opener in my drawer even in a small kitchen, because it takes no counter space and needs no outlet.
The side-cut design lifts the lid from the seam rather than piercing the top, leaving a smooth rim with no sharp edge to catch a finger when you pour or rinse the can.
Electric openers trade that safety for speed and bulk, and for the one or two cans most weeknight recipes call for, the manual wins on reliability and storage.
Rösle makes a side-cutting model with a lifetime guarantee at around $54, though cheaper versions exist at grocery and drugstores.
The cheap ones rust and dull fast, so a smooth edge is worth the few extra dollars for a tool you will reach for weekly and trust not to slip.
Food Processor

A 7-9 cup food processor is the right size for most home kitchens. Anything smaller stalls on pizza dough or a full batch of pesto; anything larger becomes a storage problem you will avoid using.
I treat mine as a prep tool, not a blender. The blade action is completely different: it slices and shreds with discs, and the dough blade develops gluten in a way a knife never will.
You can make a shortcrust or a Thai curry paste in minutes, neither of which a knife does well. The fine shred disc also saves my knuckles on a pound of carrots.
The mini bowl insert is worth seeking out. It sits inside the main bowl for a quarter cup of herbs or a single shallot, which means you are not washing the full assembly for a five-minute job.
Without it, I would reach for the knife more often than I already do.
You will lose some counter space and face more cleanup.
The base is heavy, the parts are numerous, and the feed tube is never quite wide enough. But for anything more than a rough chop, it earns its spot.
Thermometer

A thermometer does two jobs in the kitchen, and the tools for each are not interchangeable.
An instant-read digital thermometer gives a reading in under four seconds, which is what you reach for when you want to know if the center of a pork chop is ready or if your bread has cooled enough to slice.
I would not cook poultry without one. The $15 models are reliable, accurate, and fast enough that the oven door does not hang open long enough to matter.
Probe thermometers, the kind with a cable that snakes out of the oven to a display on your counter, are built for the long haul of a roast.
They track temperature as it climbs, which matters when you are cooking a whole bird or a thick cut that you do not want to open the oven to check.
They read slowly; they are useless for a quick check of a skillet-seared steak.
Calibration is simple and worth doing twice a year. Fill a glass with ice water, plunge the probe in, and confirm it reads 32°F. If it does not, most budget models have a small screw or button to reset.
A thermometer that reads accurately is non-negotiable for poultry, and at this price, there is no reason to guess.
Grater
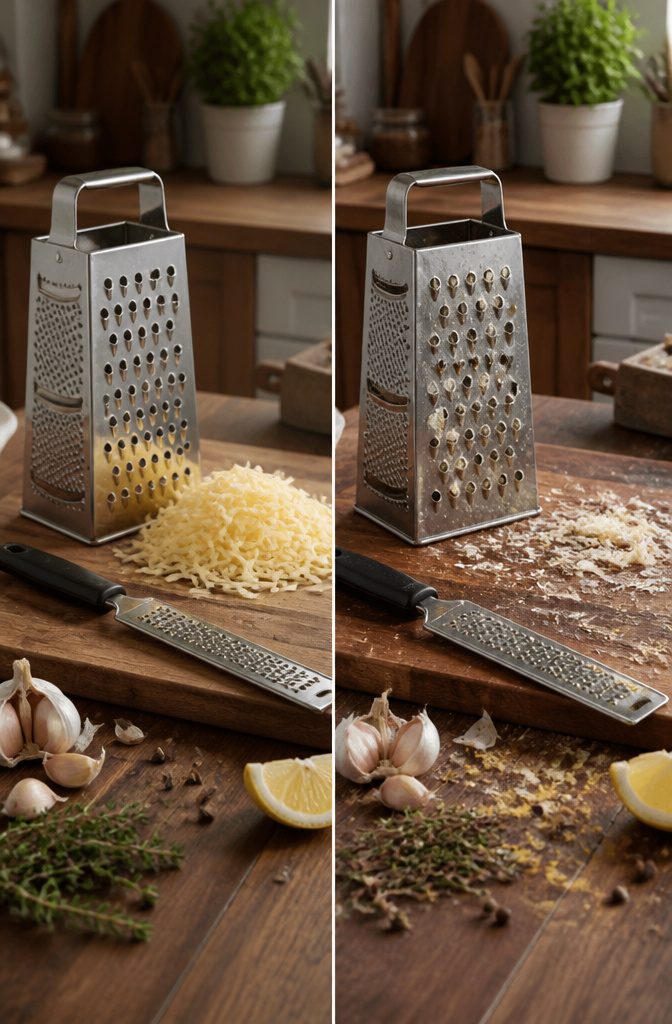
A box grater earns its floor space for volume work, and the four sides matter more than marketing suggests.
A box grater with four faces is worth the space: coarse for cheese, medium for vegetables going into fritters, the slicer side for quick cabbage, and a fine side for zesting or hard cheese.
That rasp-style grater handles what a box grater botches.
Garlic turns to paste instead of nubs, ginger fibers catch on the teeth rather than clogging the holes, nutmeg grates fine enough to melt into béchamel, and citrus zest comes off as oil-filled ribbons without the bitter pith.
The teeth are fine enough for parmesan to feather rather than crumble.
Fine Microplane graters are an easy way to grate hardy ingredients like garlic, ginger and nutmeg. They’re also great for zesting citrus fruits.
This means you can stop mincing garlic with a knife when the recipe calls for a teaspoon, and stop buying pre-ground nutmeg that lost its volatile oils six months ago.
Keep both graters: the box grater for the pound of cheese and the Microplane for the four cloves of garlic.
Kitchen Scissors

A pair of kitchen shears that come apart at the pivot belongs in the drawer even if you already own a chef’s knife you trust.
Spatchcocking poultry is the task that justifies them: cutting down either side of the backbone goes faster with scissors than a knife, and the curved blade on some models grips bone without slipping.
The same tool snips herb stems directly into the pot, cuts twine off roasts, and opens packages without hunting down the tape end.
The hinge matters more than the blade shape. Shears that dismantle separate for washing, which keeps dried food out of the joint and lets you sharpen the inside edge properly when it dulls.
The pair from your desk drawer lacks this, and the shorter blade struggles through poultry bone. Kitchen shears also add a serrated section near the handle for cracking nuts or gripping jar lids, though I find that feature secondary.
I would skip anything labeled multipurpose that folds into a gadget cluster. A simple two-piece shear with a visible screw at the pivot is easier to maintain and less likely to jam with food debris.
Rubber Spatula
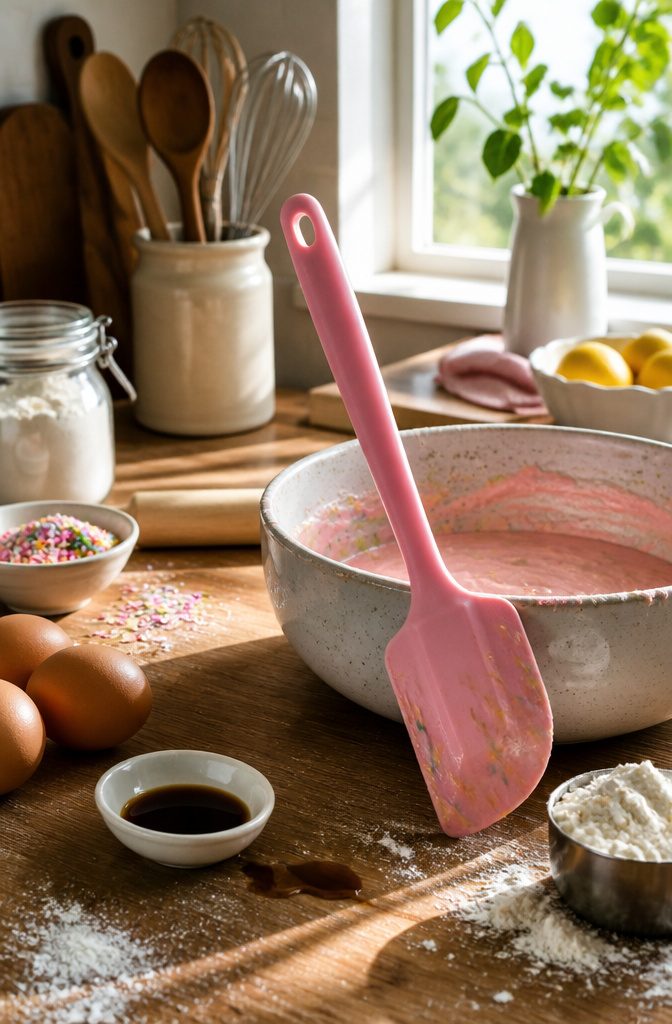
Heat-resistant silicone has replaced the old rubber spatulas of my mother’s kitchen, and the upgrade is worth every penny.
I keep two shapes on hand: a narrow jar scraper that bends into the corners of a peanut butter jar, and a wide flipper that turns pancakes without folding at the wrist.
The jar scraper earns its drawer space by recovering what would otherwise be the last tablespoon of batter, sauce, or sour cream.
One-piece construction matters more than most people think; spatulas with a separate wooden handle and a metal neck collect gunk in the seam and eventually snap at the joint.
Silicone withstands temperatures up to about 450°F, so it melts into hot polenta without melting itself.
The only trade-off is stiffness: a silicone blade lacks the give of old rubber when you’re pressing it flat against a bowl, which means a second pass sometimes, but the hygiene and durability win.
Immersion Blender
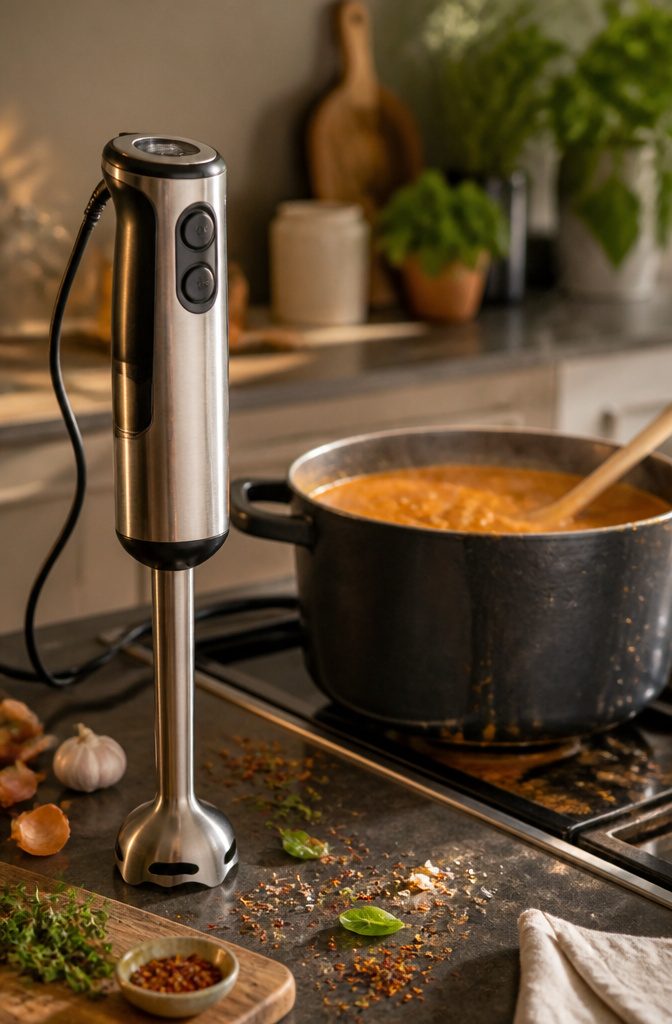
An immersion blender saves the mess of transferring hot soup to a countertop blender in batches.
The blade sits at the end of a long shaft you submerge directly in the pot; no lid to pop off from steam pressure, no counter splatter, one less vessel to wash.
I reach for mine any time a sauce needs smoothing or a bean soup needs body.
Power matters more than attachments. Anything below 200 watts struggles with cooked chickpeas or a thick butternut puree.
I look for a metal shaft rather than plastic, since it takes the heat of a simmering pot without warping, and a shaft long enough to sit flat at the bottom of a Dutch oven.
A whisk attachment is nice for whipped cream or emulsions, but a basic hand whisk covers that ground. The immersion blender earns its drawer space on soups and sauces alone.
Frequently Asked Questions
What are kitchen essentials?
Kitchen essentials are the core tools that handle 90% of daily cooking tasks: a sharp 8- to 10-inch chef’s knife, a paring knife, a serrated blade, a wooden cutting board at least 12×18 inches, nesting stainless steel mixing bowls, separate liquid and dry measuring cups, a colander, a 10- to 12-inch non-stick frying pan, a 2- to 3-quart clad stainless saucepan, a rimmed half-sheet pan, locking tongs, a balloon whisk, a Y-shaped vegetable peeler, a manual side-cutting can opener, a 7-9 cup food processor, an instant-read thermometer, a box grater with a Microplane, kitchen shears that come apart for cleaning, and a heat-resistant silicone spatula.
These cover chopping, measuring, cooking, baking, and serving without crowding your drawers.
What is the most essential kitchen equipment?
A single 8- to 10-inch chef’s knife is the most essential piece of kitchen equipment, handling roughly 90% of cutting work in most home kitchens.
It should feel like an extension of your hand, with a handle that fills your palm without forcing your fingers into a fixed position.
One good chef’s knife, properly maintained, outlasts most owners and makes the initial cost easier to justify against replacing multiple mediocre knives over the same span.
How do you choose kitchen accessories?
Choose kitchen accessories based on durability, efficiency, comfort, and ease of use. For peelers, grip comfort matters more than brand; a rubberized handle with some width beats a slim metal one when your hands are wet.
For tongs, look for a light, responsive spring and a locking mechanism you can operate with one hand. For spatulas, one-piece silicone construction matters more than most people think, since separate handles with metal necks collect food and fail.
What is a fully equipped kitchen?
A fully equipped kitchen contains high-quality cookware, knives, small appliances, prep tools, bakeware, kitchen linens, and food storage containers, allowing you to cook diverse recipes conveniently.
For home cooks, this centers on about 20-25 carefully chosen items: three pans, two mixing bowls, measuring tools, a few utensils, and one multi-tasking appliance that handles nearly any challenge without overcrowding drawers or breaking the budget.
How often should I upgrade my kitchen gadgets?
Replace tools only when performance drops or safety is compromised.
Non-stick frying pans need replacement every 3-5 years as the coating wears, no matter the brand. Stainless steel pans, wooden cutting boards, and quality knives can last decades with proper care.
A failing can opener blade or slipping gear is a safety hazard worth replacing immediately, since a smooth edge and reliable cut matter for a tool you reach for weekly.