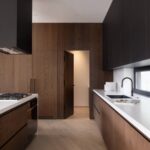

The right storage solution for a tiny house depends on whether you own the walls or rent them.
Built-in cabinetry reclaims the gap between furniture and wall that freestanding pieces always leave behind, but it stays with the house when you move; removable wall-mounted racks travel with you instead.
A 5’x5′ off-site unit costs roughly a nice dinner out each month and handles winter coats or holiday gear that would otherwise eat your interior square footage year-round.
1. Vertical Storage Solutions

Wall-mounted racks are the backbone of vertical storage in a tiny house. I would start with the kitchen, where a simple rail system keeps utensils, pots, and even spice jars off counters and within arm’s reach.
A magnetic strip on the wall or fridge side frees up the last few inches of workspace without adding bulk.
Floating shelves work for dishes and decor in rooms where cabinets would crowd the floor plan. Hooks and pegs run floor to ceiling in entryways and baths, turning any blank wall into storage for bags, robes, or tools.
Removable mounting matters here; tiny-house layouts shift as needs change, and hardware that leaves clean holes keeps options open.
Vertical storage saves floor space but can look busy if every shelf is visible from the living area. Open storage demands some discipline, because everything sits in sight.
For renters, removable wall-mounted racks beat built-ins. They cost less upfront, install in an afternoon, and travel to the next place.

Sturdy Grid Shelf with 12 Movable Hooks: Our large pot organizer measures 29.9" by 9.8" and is sturdy enough to hold pots, pans, and any other kitchen necessities. The 12 S-shaped hooks hanging below are easily detachable, movable, and strong enough to withstand even heavy utensils. Max. Load: 100 lbs, screw-mounted on solid concrete wall.

Utensil Rack: including 1 stainless steel cutlery rack, 14hooks.

SOLID POT RACK We designed the simplest black wall-mounted hanger solution which could fit any wall style. The cookware kitchen hanger made of heavy-gauge iron rods with black-coated finish. The 2 pack utensil organizers are firm and sleek for any occasions.The rack can hang all your pots and pans on the wall to save spaces. No worry about your kitchen being a mess and unable to find your cookware when you need it.Keep your kitchen well-organized.
2. Multi-Functional Furniture

A storage ottoman earns its keep fast in a tiny house. The one piece handles seating and hides blankets, board games, or whatever you do not want on display.
I would pick one with a hinged lid that stays open on its own; fighting the hinge while you dig out a pillow gets old in a space where you bump elbows already.
Beds with drawers underneath handle seasonal clothing and spare bedding without asking for extra floor space. The drawer depth matters more than the bed frame looks: measure your tallest boots or thickest comforter before you buy.
A lift-up platform bed trades drawer convenience for one big cavity, which works if you store items in bins you can lift out whole.
Murphy beds fold into the wall and free up the entire footprint during the day. The hardware has to be solid; a cheap piston turns the morning routine into a two-person job.
I would skip the Murphy bed if you sleep in the same spot every night and never use that floor otherwise. The savings only pay off when the room doubles as an office, workout area, or living space.

[HEAVY-DUTY MAGNETS] Strong magnetic grip holds securely on any metal surface – no drilling, no assembly. Just unpack and stick to your fridge, microwave, or tool cabinet.
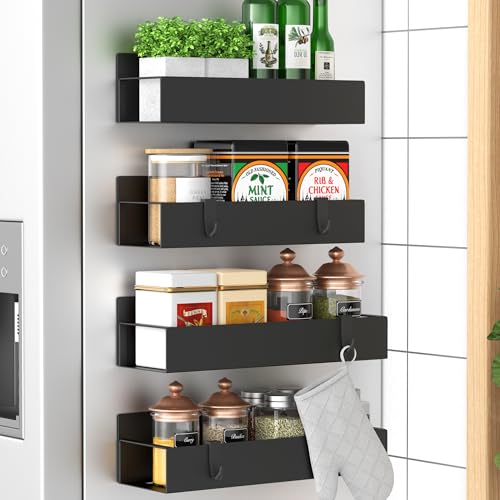

Complete Spice Jars with Rack Set - 4 Pack space saving magnetic spice rack, 24 Square empty glass spice jars with lids, Quick-find pre-printed waterproof spice jar labels and a collapsible silicone funnel to help transfer spices, simplifying the refilling task!
3. Under-Bed Storage

The space beneath a bed is dead storage unless you treat it like a drawer.
Most frames leave 6 to 8 inches of clearance, enough for low-profile bins but not the bulky totes you might already own. Measure height, width, and length before buying anything, and account for legs and center supports that shrink the usable footprint.
Rolling containers win if you are accessing items weekly; built-in drawers win if you never want to see the clutter.
I would put off-season clothing and extra bedding in bins here, and I would move anything temperature-sensitive, like leather or photographs, off-site.
Vacuum-sealed bags work for bedding but trap moisture if the seal fails, so I skip them for long-term storage.
Clear plastic lets you identify contents without dragging everything out. Label each bin anyway, because "clear" only helps when the lighting is good and you are not crawling on the floor.

𝐌𝐨𝐝𝐞𝐫𝐧 & 𝐌𝐢𝐧𝐢𝐦𝐚𝐥𝐢𝐬𝐭 𝐒𝐭𝐲𝐥𝐞 - Featuring clean lines and a rustic brown finish, these wall-mounted shelves bring warm farmhouse charm and modern style to any space. Perfect as shelves for room decoration, book shelves display, and rustic farmhouse wall decor — they elevate your bathroom wall art vibe, bedroom aesthetic, living room style, kitchen organization, office setup, and laundry room storage all in one versatile design

Floating Shelves for Wall Storage Set of 6 - The size of the WOPITUES floating shelves for wall is 16.5*6*0.6 inches. WOPITUES Floating Wall Shelves for Bathroom/Bedroom Set of 6 could give you extra storage space in the bathroom, bedroom, guest bathroom, kitchen, and living room. You can install our floating shelves for wall anywhere you like. Let’s make life simpler.
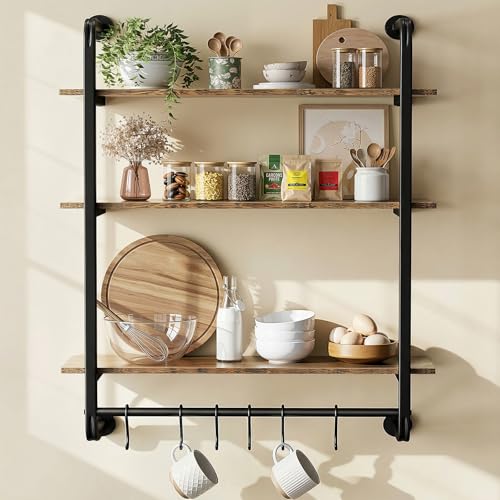
𝗥𝗲𝘁𝗿𝗼 𝗜𝗻𝗱𝘂𝘀𝘁𝗿𝗶𝗮𝗹 𝗦𝘁𝘆𝗹𝗲: Kssiaz 3-tier industrial pipe shelving has a unique water pipe designgive your home a vintage feel. Great for displaying souvenirs, collections, photos, books, trophies, food containers and tableware. As a bookshelf in the farmhouse or living room or as wine rack in the bar, any other where you want to install.
4. Overhead Storage
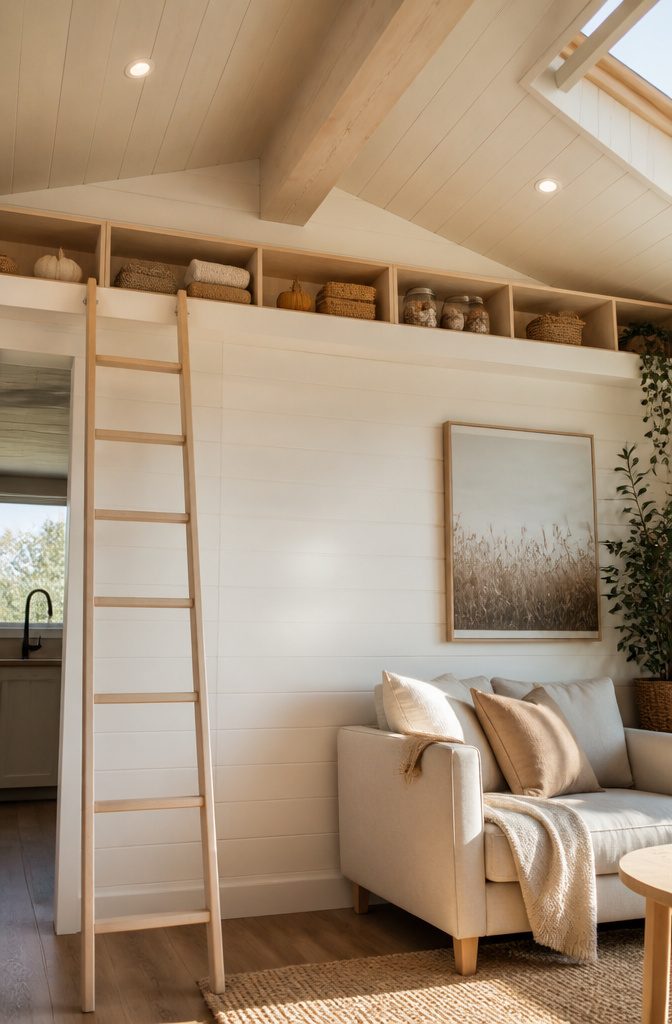
Lofts and high shelves turn the dead zone above your head into storage you can actually use, but only if you are honest about how often you will climb up there.
I would reserve overhead placement for items I touch once a year, holiday decorations and camping gear, not the spare linens I convince myself I need monthly.
The moment you need a ladder to retrieve something, that 12-foot climb filters out the "maybe someday" items from the keepers.
Safety and access shape everything. A fixed ladder eats floor space; a spiral stair keeps a smaller footprint and leaves your hands free for a box.
Either way, if the ceiling is sloped, the usable loft shrinks to a wedge where you crawl rather than stand.
That changes what goes up there, small bins beat bulky suitcases, and clear labels on the outward-facing side save you from hauling everything down to read the contents.
Built-in shelving along the top of a wall works the same way. Keep it shallow, just deep enough for a single row of jars or folded fabric, so it hugs the surface and does not crowd the room below.
The height makes it feel lighter than a cabinet, but there is a real cost: out of sight means out of mind, and out of reach means you will procrastinate on putting things back.
I would rather own less and store it where I live.

STURDY CONSTRUCTION: Our ottoman storage bench uses a thickened solid wood X-shaped frame inside, making the overall structure stronger. The bottom of ottoman storage is equipped with solid wooden legs, which is stable and not easy to shake. Designed for home use and has a maximum capacity of 500 lbs.

Generous Hidden Storage: Measuring 16.9"D x 16.9"W x 18.1"H (43 x 43 x 46 cm), this square ottoman offers a 12-gallon (45.3 L) of storage space—perfect for tucking away books, clothes, and blankets to keep your home neat and organized

[Strength to Rely On] This storage ottoman, crafted with a 1.2" (3 cm) thick frame and solid wood legs, supports up to 330 lb with ease, promising you a durable and reliable companion
5. Built-In Storage

Custom cabinetry and shelving fitted to awkward spaces, closets, tiny alcoves, and areas beneath stairs eliminates the wasted gaps that freestanding furniture always leaves behind.
The gap between wall and furniture is dead space in a tiny house, and built-ins reclaim it entirely.
Measurements vary too much from house to house, but the principle holds: anything custom-fitted to your interior wins back inches that add up to square feet.
Built-in storage costs more upfront than freestanding units. Built-in cabinetry runs pricey to install, and it stays with the house if you move.
For renters, that locks in the decision; for first-home owners planning to stay, you get storage that actually fits the odd corners no IKEA cabinet will fill.
"Built-ins can be your friend—especially when they help add functional storage to otherwise limited spaces," says Cheryl Kees Clendenon, owner of In Detail Interiors. "Think drawers in benches or makeup vanities in little nooks that have no other purpose."
What that means in practice: the triangular void under a stair, the six-inch recess beside a chimney, the toe-kick beneath lower cabinets. Each becomes a drawer, a shelf, a hidden bin.
I would put the money here before almost anywhere else in a tiny house, because built-ins shape the storage around your actual life rather than forcing your life into a box meant for someone else’s.

Hold Up to 66lbs: Yecaye under bed storage with wheels is made of high quality 300D PU fabric and sturdy metal frame, can hold up to 66 lbs, stronger than other fragile metal mesh, spacious capacity perfect for storing clothes, toys, books, shoes and other heavy items also won't compromise stability and durability

Leather Handles&Rotating wheels: our underbed storage is equipped with leather handles, which are comfortable to hold; it comes with 4 x 360°rotating wheels, two of which have locking function; when placed under the bed, the wheels make it very convenient to push and pull

Versatile Dividers: Yecaye under bed storage containers comes with 2 adjustable dividers that let you organize items of varying sizes effortlessly. Whether it’s winter boots or seasonal clothes, configure the compartments to fit your exact needs. Our underbed storage ensures every inch of space is utilized efficiently, transforming chaos into an artful organization
6. Hidden Storage
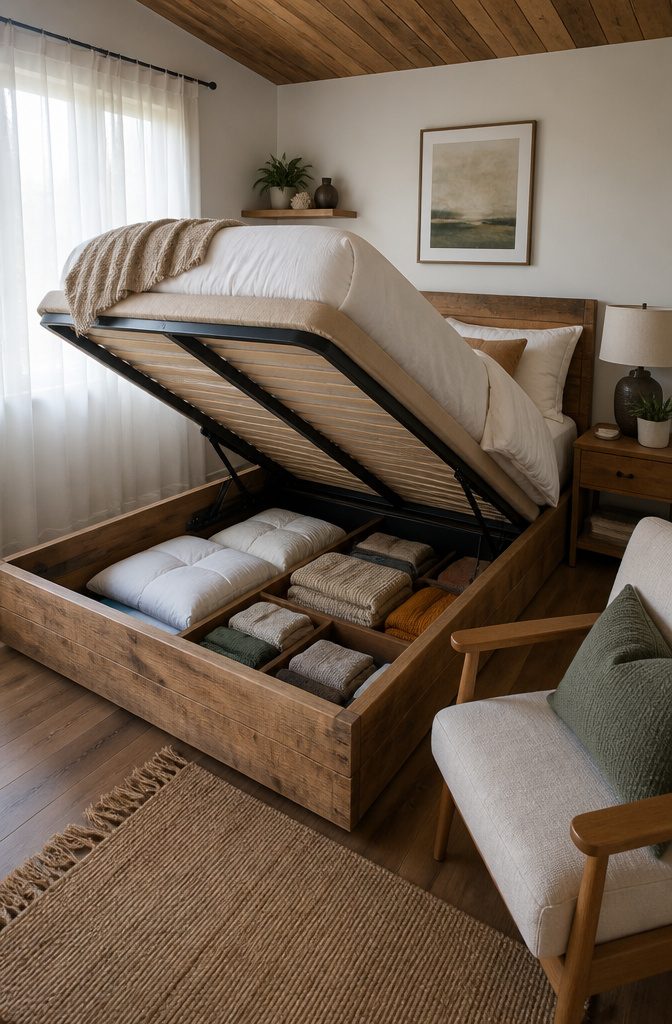
Hidden storage works best for the things you own but do not want to live with looking at: spare bedding, seasonal clothes, the backup router, a small safe.
I would put these in a lift-up platform bed, a storage ottoman, or drawers tucked under the stairs. What I would not bury there is anything you reach for more than twice a week.
The extra motion of lifting a banquette seat or rolling out a toe-kick drawer adds friction, and in a tiny house that friction becomes a reason to leave the item on the counter instead.
The real risk is overfilling the compartment just because it exists. A hidden drawer under the kitchen cabinet looks like free space, but once it jams with rarely-used gadgets you have created a clutter problem behind a clean facade.
Reserve hidden storage for items you access monthly or less, and keep a clear rule: if you have not opened it in a year, it leaves the house, not the compartment.
For renters, furniture with concealed compartments moves with you; built-ins do not, so I would weigh how long the lease runs before committing to a wall niche or custom stair drawer.

【Decorative】 The kitchen utensil hanger comes in beautiful quality and color, simple and stylish, adding an elegant look to your space.

Premium Materials: This floating shelves for wall features durable solid wood and sturdy metal construction with protective rails to keep items from falling. Each shelf showcases unique natural wood grain, offering strong weight capacity. Perfect for adding extra storage in your bathroom, bedroom, living room, home office, or kitchen

Set of 2 wall-mounted 15-inch floating shelves in white metal with necklace and bracelet hooks, earring rail, and ring tray
7. Outdoor Storage Solutions

Outdoor storage is where the math on tiny-house living gets honest.
A 5’x5′ unit runs roughly the cost of a nice dinner out each month, and for that price you reclaim the square footage that winter coats, holiday decorations, and ski gear would otherwise occupy inside your home year-round.
I would rather pay for off-site storage than build a second closet into a 200-square-foot plan.
The break-even point depends on how tightly your interior layout is already squeezed. If you are storing items used fewer than four weeks a year, off-site almost always wins.
Seasonal furniture, extra kitchenware, and family heirlooms are the classic candidates; business inventory, too, if you work from home and need mental separation between your desk and your living space.
A 3’x3′ locker handles most tiny-house overflow and keeps your minimalist credentials intact.
Garages and sheds on your own lot are preferable when you have the land, but many tiny-house setups do not. In that case, the smallest available unit, accessed twice a year for rotation, beats cramming bins under every interior surface.
I would skip anything larger than 5’x5′ unless you are storing a vehicle or running inventory; the point is to extend your home, not recreate the clutter you left behind.
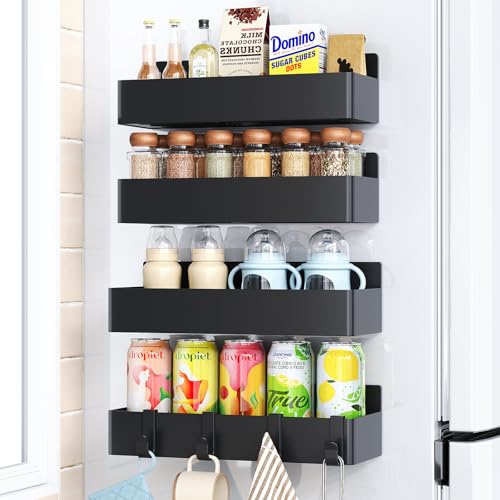
Magnetic Design: Innovative magnetic spice rack attaches securely to refrigerator doors, keeping spices organized and within easy reach.

COMPLETE MAGNETIC SPICE RACK SET OF 15 SMALL HEXAGON GLASS SPICE JARS FOR CREATE A DIY HANGING SPICE RACK ON YOUR OWN FRIDGE, REFRIGERATOR, CABINET AND WALL MOUNT: 15 Complete Sets including 15 pcs Clear Hexagon Glass Jars with Airtight & Leak Proof Magnetic Lids + 15 pcs Shakers + Total 320 Pcs Waterproof & Oil Resistant Pre-printed Spice Labels (160 Transparent + 160 Black).

【Come with stainless steel base】-Magnetic spice tins made with advanced magnetic feature which help you to keep them stick with refrigerator oven, stove and any kind of flat metal. The stainless steel base can be attached to the position you want. It is recommended to stick to a smooth surface that will be easier to change over a long period of time.
Declutter First

The one-year rule is simple: if you have not used something in the past year, you probably do not need it.
I apply this ruthlessly before any container gets bought, because buying bins before purging is how you end up storing stuff you should have thrown out and paying for the privilege.
Tiny house living makes this non-negotiable.
Clean out first, then measure what remains, then choose systems. Skip the order and you will rent a storage unit that defeats the purpose of going small, or worse, fill custom-built drawers with clutter that should have left.
Multi-purpose furniture and wall organizers only work when they are holding items you actually use.
A spice rack rolled under a cabinet is wasted space if half those jars are expired. The minimalist look that makes a tiny house livable comes from owning less, not from hiding more.

[Product Specifications] - These wall floating shelves are in 4 different sizes: 15.75 x 5.7 x 4.3 inches, 13 x 5 x 3.5 inches, 10.7 x 4.5 x 3.15 inches, 7.9 x 3.9 x 2.7 inches, and the shelf thickness is 0.43. Package contains 4 dark carbon black paulownia shelves, 4 black metal wire frame fences, 10 plastic anchors, 10 long screws and 1 installation manual.

2 Pack Unique Yoga Mat Hanger: This yoga mat rack comes with floating shelves and 4 hooks, larger capacity. It can save floor space, stylish and simple design is the first choice for home gym decor.

Centerpiece of Room Decoration - These shelves boast a distinctive design and an elegant shape, making them a focal point that elevates the style of any room. Ideal for the living room, bedroom, study, bathroom, laundry room, children's room, or office, they reflect the owner's sophisticated taste and blend seamlessly with various decor themes.
Labeled Bins and Clear Containers

Labeled bins earn their keep in a tiny house because categories matter more than inventories.
I mark bins by function, not by item: winter gear, office overflow, guest bedding. That keeps me from opening three containers to find one spare pillowcase.
Color-coding the bins by category speeds the hunt further; seasonal decorations, clothing, and office supplies each get their own hue, so I know at a glance which stack to pull from.
For anything I reach for weekly or more, clear plastic beats opaque every time. Seeing the contents without lifting the lid saves minutes and prevents the shuffling that turns a neat closet into a mess.
Lax labeling costs time; opaque lids on everyday bins cost just as much, because you end up opening them to confirm what you already half-knew.
Opaque containers have their place, but only where aesthetics take priority over access. I use them on open shelves in the main living area, where a row of matching woven bins or solid-color boxes reads as texture rather than clutter.
The trade is real: I sacrifice the at-a-glance convenience for a calmer visual field in the one room where I spend waking hours. Everything behind a closed door or in a loft stays clear.
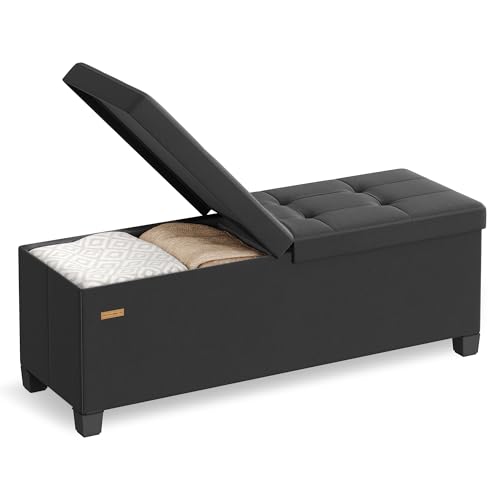
Elegant Design, Enduring Comfort: This ottoman boasts a chic linen-look surface with an elegant tufting design, adding a stylish touch to your space. The double-layer fabric and high-resilience foam ensure lasting comfort for relaxation
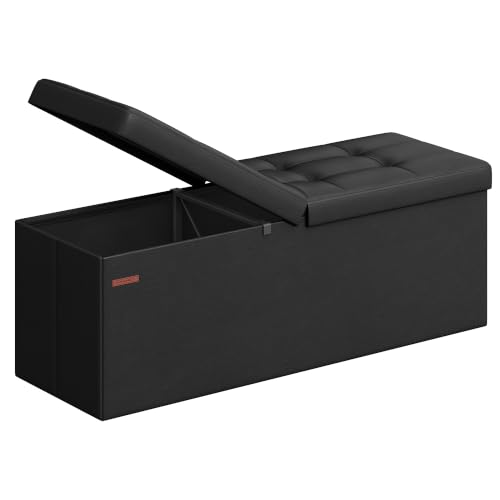
【QUICK ASSEMBLY, EASY FOLDAWAY】This storage ottoman from the SONGMICS MAZIE Collection has a foldable design that allows quick setup in seconds by simply inserting the bottom panel. Easily fold and store it under the bed or in a closet when not in use

COMPACT SIZE: Measuring 17.9"D x 35.6"W x 18.1"H, this space-saving ottoman offers ample storage and seating while fitting comfortably in living rooms, bedrooms, or entryways.
Hooks and Pegboards

Pegboard in a tiny house kitchen hangs utensils where backsplash rails leave off, but the real gain is the pots.
A 24-by-32-inch sheet of standard hardboard, framed in pine, bolts to wall studs and carries a dozen cast-iron hooks rated at roughly ten pounds each.
I would skip the painted craft-store boards; raw hardboard lets hooks seat firmly and costs under $30.
Hooks and pegboards need solid backing; drywall alone will sag or crumble under real weight. Tiny house framing runs 2-by-3 rather than 2-by-4, and sheathing is sometimes 3/8-inch plywood, not half-inch.
Toggle bolts into that void grip poorly. I would mount only where I hit a stud, or use a plywood backer spanning two studs and bolt the board to that.
Hook spacing at six inches handles mugs and spatulas; ten-inch centers, with heavier hooks, hold a three-quart saucepan. Anything larger belongs on a ceiling rack, not pegboard.

[Quality Metal Container] Never settle for flimsy plastic&linen under bed storage bins which rip all too easily. This under the bed storage container is completely made of metal, compared with other under bed storage bins, smaller mesh size of the shelf is used for a larger load-bearing capacity. Plus, the whole frame was welded into a whole that never falls apart.

【Say Goodbye to Cluttered Space】– Tired of cluttered closets and wasted space? Our under bed storage containers measure 30" L x 16.2" W x 7.5" H, effortlessly turn unused under-bed areas into smart storage zones—perfect for apartments, dorms and living spaces where every square foot counts.

80L Expandable Larger Capacity : Under the bed storage with dimensions 31.5 x 15.75 x 9.45 inches (with wheels), height adjustable from 9.45" to 11.02" to fit most bed frames. Perfect for storing clothing, shoe, bedding, pillow, towel, and seasonal decor like wrapping paper, Christmas and Halloween supplies. Slides smoothly under bed, couch, closet and table to maximize unused space
Stair Storage
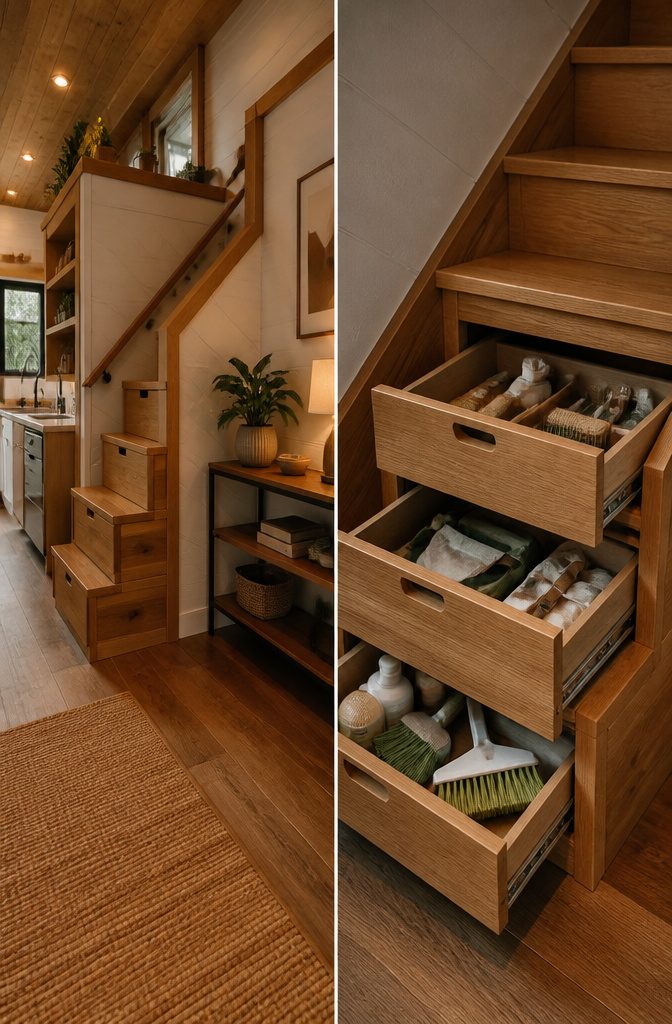
Stair storage in a tiny house with a loft usually means the triangular cavity beneath the run.
The tallest section, where headroom clears roughly 4 to 5 feet, works for a closet or pantry-style cabinet with fixed shelves. Coats, shoes, and dry goods sit there because you can stand in front of it.
Lower down, where the slope pinches to under 2 feet, pull-out drawers beat fixed cabinets every time.
A fixed door that low means crawling on hands and knees to reach the back corner. A drawer on full-extension slides brings the entire contents out into the aisle.
Depth is the trade-off. Most stair stringers sit 18 to 24 inches from nose to wall, but only the front third is easily reachable.
I would store cleaning tools and reusable bags in those deep pull-outs: light, bulky items you can fish out with a long hook if needed. Heavy or fragile pieces stay in the tall section where I can see them.
Pet bedding and bowls fit the mid-height zone, around 2 to 3 feet, with a custom door to contain the clutter. The awkward geometry is the same, but a dog does not care about a low ceiling.
DIY Custom Storage

Pull-out shelves and rolling carts built to exact gaps are where a weekend project pays off most clearly.
Rolling spice racks, under-bed drawers, and custom carts are the practical targets, with one rule: build only when the gap is odd enough that nothing off-the-shelf sits flush.
A 14-inch kitchen cabinet void or the 8-inch strip beside a stacked washer leaves you choosing between a $200 custom order with a four-week wait and two hours with a circular saw and a Kreg jig.
Skill level here is genuinely beginner-to-intermediate. If you can measure twice, cut plywood square, and install drawer slides level, you have what you need.
I would skip the temptation to get fancy with hardwood faces; paint-grade birch ply holds up fine and keeps the cost under $40 in materials per unit.
The tool list is short: a circular saw or track saw for clean rips, a drill, a level, and clamps.
A pocket-hole jig speeds assembly but is not required; butt joints with glue and screws work if you are not loading heavy pantry goods.
The judgment call is when the gap is under 12 inches wide, build rather than buy.
Retail pull-outs start narrow but rarely fit the depth or height of a true custom void, and you end up losing two inches to brackets on each side.
For rolling carts, the same math applies: a 6-inch gap between fridge and wall is dead space unless you build the cart to ride it exactly.
DIY custom storage trades your hours for a perfect fit. A bought cart rolls in today; a built one fits like it grew there.
Frequently Asked Questions
How can I maximize storage in a tiny home?
Use multi-purpose furniture, vertical storage, and off-site storage units for overflow items.
Wall-mounted racks, floating shelves, and furniture that doubles as storage let you reclaim floor space without adding clutter. A small 3’x3′ locker handles most seasonal overflow and keeps your interior minimalist.
What are some creative storage solutions for small spaces?
Vertical space, multi-functional furniture, and hidden compartments are the most effective tools.
Magnetic strips for utensils, ottomans with hinged lids, and drawers built into stairs or toe-kicks turn dead zones into usable storage. Match the solution to how often you access the item.
Can I store furniture in a small storage unit?
Yes, a 5’x5′ unit accommodates most furniture and seasonal items, and many facilities offer smaller lockers for tighter budgets.
For tiny-house dwellers, off-site storage extends your square footage without sacrificing the minimalist lifestyle. Reserve the smallest unit that fits your actual overflow, anything larger risks recreating the clutter you left behind.
What are some good storage options for a tiny room?
Floating shelves, wall-mounted hooks, and Murphy beds free up floor space while keeping essentials reachable.
Under-bed bins with rolling casters work for weekly access; built-in drawers suit items you want permanently out of sight. Measure your clearance first, most frames offer 6 to 8 inches, enough for low-profile containers but not bulky totes.