

The best kitchen storage ideas range from $5 adhesive bins to $39 spice drawer organizers, and the single factor that sorts one from another is whether you rent or own.
Renters need drill-free solutions like magnetic stove shelves that move with the lease; owners can bolt in permanent dividers that handle a 12-inch cast-iron skillet without bowing.
Weight limits are the trap most people miss, a 15-pound over-the-door rack holds oils fine but collapses under canned goods, and that gap between promise and reality is what the rest of this covers.
1. Magnetic Stove Shelf
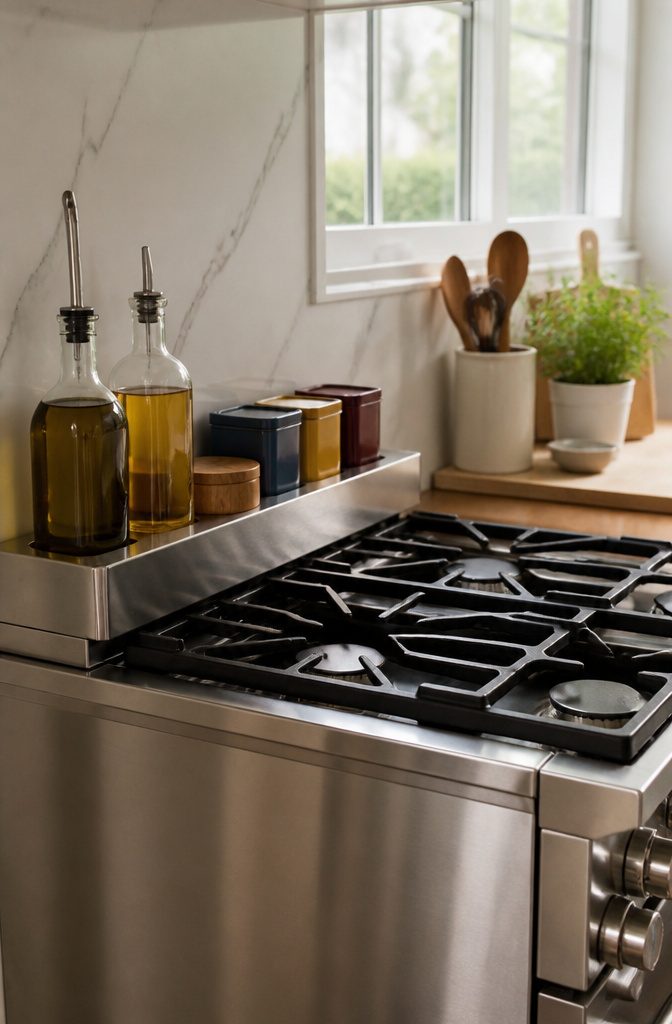
A magnetic stove shelf solves the problem most renters know too well: the back of the stove is dead space that collects grease and spare packets, but you cannot drill into it to add storage.
The shelf sits weight-bearing on the stove’s own rear ledge and uses light magnets to stay put against the back panel. That means no holes, no adhesive residue, and it comes with you when the lease ends.
Typical widths run 24–30 inches, with about 3 inches of front-to-back clearance. That is just enough depth for oil bottles, salt cellars, and the spice tins you reach for mid-cook, without crowding the burners or forcing you to reach over open flame.
I would skip anything deeper; it looks like a ledge for clutter and collects splatter you now have to wipe from three sides.
The metal finish matters more than most people think. Brushed stainless hides water spots and fingerprints from oily hands; glossy black or white looks cleaner in photos but shows every grease streak by week two.
I would pick brushed every time, even if it does not match the stove exactly.
Weight limits are real on these.
Two or three full oil bottles plus a spice rack is about all the magnets handle before the shelf starts to slide. I treat it as a home for daily-use items, not a pantry annex.

KEEP ESSENTIALS WITHIN REACH: Transform unused space into functional storage with our extendable steel magnetic stove shelf. Designed for strength and stability, it provides a secure spot for condiments, spices, oils, and décor - keeping your essentials neatly organized and always within reach. Declutter your cooking area and elevate your kitchen with a sleek storage solution that blends convenience and style.

[FUNCTIONAL KITCHEN ORGANIZATION](30" x 3.55" x 1.33") features 3 compartments, serving as a practical spice rack for stove back. It effectively frees up counter space by storing oils and seasonings, making it an essential kitchen storage organizer and an ideal choice for kitchen organization and storage or top of stove shelf utilization.

MAXIMIZE STOVE SPACE – Create extra storage above your stove with this magnetic stove top shelf. Keep spices, cooking oils, seasonings, and everyday cooking essentials organized and within easy reach while maximizing unused kitchen space.
2. Lazy Susans

Turntables earn their keep in two spots: the cabinet above the counter where you pull olive oil and soy sauce daily, and the pantry floor where bulk jars live.
For cabinets, a 9- to 12-inch model fits standard shelves without wasting depth. The 1-inch lip matters more than diameter; it catches a bottle before it tips into the door hinge.
I would skip two-tier turntables in a standard 10-inch cabinet. The second tier sits too close to the shelf above to fit a vinegar bottle upright, so you lose vertical space you already paid for.
Pantry floor models run larger, up to 18 inches, and work best for back-row storage where reaching deep means kneeling. One turntable back there replaces pulling out six jars to find the cumin.

[ Please Note ] - The lazy susan is large enough for 8 cans of coke (refer to the 2rd image). Please read the lazy susan dimensions and measure your tabletop or closet space before ordering in case it doesn't fit. Overall Size - 10" x 1.4". Available Size - 9.1"
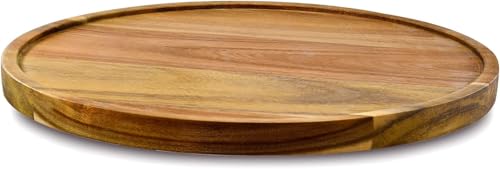
NOTICE❗Since this lazy susan is from Natural Acacia Wood, so each of their patterns is different, our pictures for reference only.
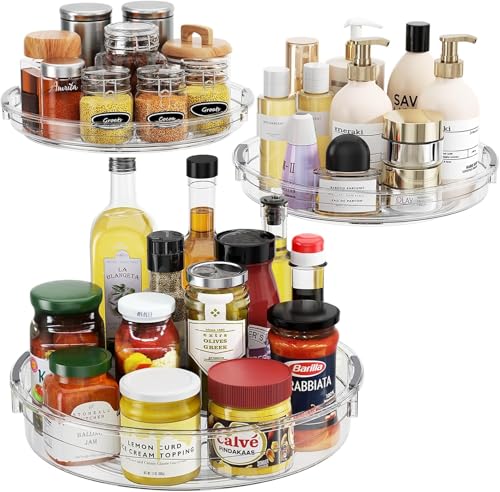
One Set for All Storage Needs: LAMU Lazy Susan turntable for cabinet comes in 3 convenient sizes to tackle any storage challenge. Select the perfectly size organizer for cabinets, fridge, pantry or bathroom to keep neatly
3. Spice Drawer Organizer

Flat trays that hold spice jars label-up in a drawer run about $39 and solve the only real problem with counter racks: you stop scanning every level to find the cumin.
The drawer hides the visual clutter completely, though you need at least a 3-inch drawer height to fit standard jars standing, and the organizer itself costs more than most wall-mounted alternatives.
If you already own a bamboo expandable silverware tray at $30, that works almost as well.
The dividers adjust to jar widths, and the shallow walls keep labels readable from above. Round jars rock slightly in slots meant for forks, so you give up the snug fit of a purpose-built spice tray.
I would pick the dedicated organizer for a drawer I open ten times while cooking, and repurpose the silverware tray only for backup spices I reach for monthly.
The $9 difference buys speed when your hands are wet and you need turmeric without thinking.
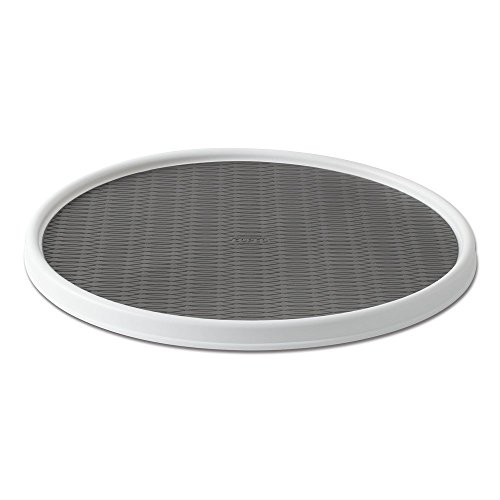
ORGANIZE EVERY SPACE IN YOUR HOME: Organize everything-perfect for organizing your kitchen, your refrigerator, your craft or hobby room or even your bathroom cabinets.

ORGANIZE EVERY SPACE IN YOUR HOME: This 18 in rotating lazy susan turntable brings order to your kitchen cabinets, pantry shelves, refrigerator, bathroom vanity, craft room, and more - maximizing storage in any space

𝐏𝐑𝐄𝐌𝐈𝐔𝐌 𝐌𝐀𝐓𝐄𝐑𝐈𝐀𝐋: Our farmhouse lazy susan made of natural solid wood, sturdy, durable, and premium quality. It will be beautiful and a completely food-safe way to decorate your food. It is known for its durability, strength, and aesthetic, as well as it can handle heavy use and resist wear and tear.
4. Sliding Pan and Lid Organizer

Vertical pull-out racks change how you use deep base cabinets. Instead of lifting three pans to reach the one on the bottom, you slide the whole rack forward and take what you need.
The dividers keep surfaces from scratching, which matters more for enameled cast iron or anything with a non-stick coating.
Most of these need 8 inches of cabinet depth behind the face frame, so measure the box, not the door opening.
The shallow lid organizer that mounts on the same pull-out or the cabinet door is the natural pairing. Lids stored flat steal shelf space; stored vertically in a slim rack, they disappear.
Wire bases let crumbs and moisture fall through, but small lids can tilt and slip between the rungs.
Solid bases catch drips and hold anything, though they need wiping. I would take solid for lid storage and wire for pans that go back into the cabinet still slightly damp.
Either way, check that the track hardware clears your hinge swing; some European-style hinges eat more space than the template suggests.

IMPORTANT NOTICE - This spice drawer organizer needs at least 3 inches deep drawer space to fit in when you add jars on; PLEASE MAKE SURE YOUR DRAWER IS AT LEAST 3" DEEP

Important Notice: This bamboo spice drawer organizer requires at least 3.1 inches of drawer depth to fit properly when you place jars in it. Please make sure your drawer is deeper than 3.1 inches before buying.

Perfect Size: Spice rack organizer for drawer MIN size: 14.57" wide x 15.8" deep x 2.75" high, standard 4 oz spice jars fit easily into the drawer sliding and closing completely.please measure your drawer before ordering!
5. Over-the-Door Utility Rack

An adjustable basket rack that hangs inside a pantry or cabinet door turns the six to eight inches of dead air behind that panel into real storage.
Most of these systems hold 15–20 pounds total across all tiers, which is plenty for oils, vinegars, or a full spice collection but not for a shelf of canned goods.
The brackets that hook over the door top are the easiest install, though they add visible hardware on the kitchen side.
For renters who would rather not explain that to a landlord, Command hooks stuck to the door interior work if the rack itself is light enough, a trick I have seen owners on Reddit use when their unit came with no over-door option.
The real limit is depth.
Anything over 4 inches bumps the frame when you close the door, so measure the gap with the door shut before you buy. A shallow three-basket rack at 3.5 inches clears fine; a deeper wire shelf meant for cleaning supplies will not.
I would skip the deep models for pantry doors entirely and save them for a broom closet or garage instead, where a half-inch of gap matters less.

Maximize Your Space: Our Black 9-Tier over the door pantry organizer is designed to make the most of your storage space, allowing you to store more items in a smaller area such as spice and some jars. Perfect for small kitchens or those with limited storage space.

2-in-1 Wall or Door Mount Design: Install as an over-the-door organizer or wall-mounted rack. Fits most standard doors and includes all mounting hardware for easy setup.

【Effortless 3M No-Drill Installation—Unfold, Stick, and Organize in Minutes】Dreading complicated assembly with a bag of loose screws or damaging your door frame with permanent hooks? This 8-tier over-the-door organizer arrives fully assembled—simply unfold and secure with the included heavy-duty 3M adhesive strips. No drilling, no tools, and no tedious piece-by-piece setup. The adhesive creates a strong, stable bond without scratching paint or leaving residue. Go from box to fully organized in under five minutes. Perfect for renters, dorm dwellers, and homeowners who want instant storage without the commitment or damage.
6. Stackable Corner Shelf Risers
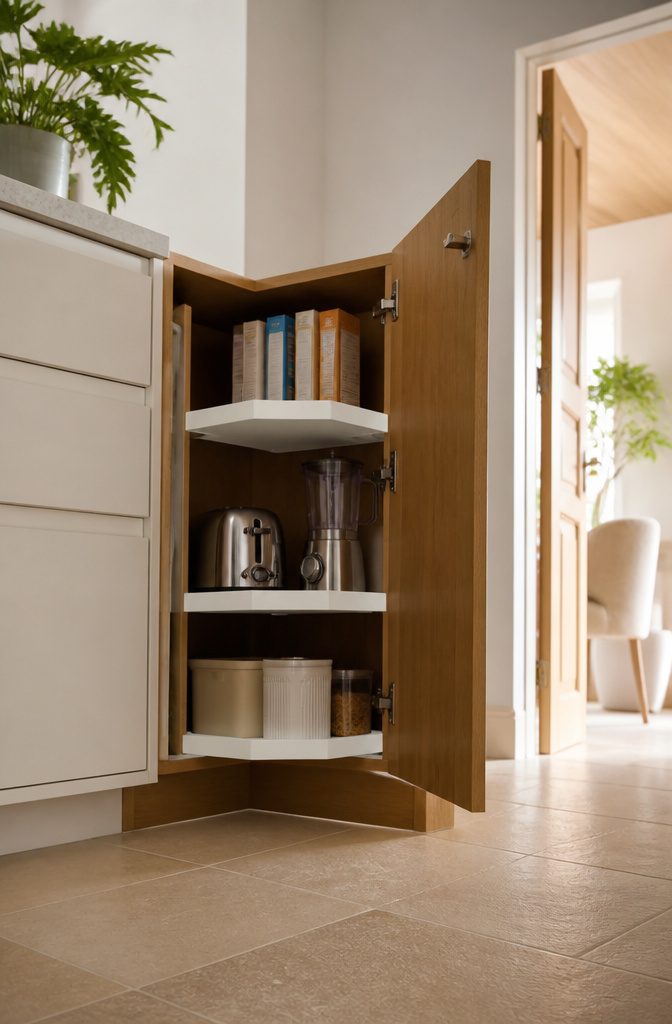
Triangular risers turn the dead zone of a blind corner cabinet into usable real estate.
A 10-inch base width fits most standard cabinet openings, while a 12-inch base gives you an extra inch of depth that matters for cereal boxes or small appliances.
I would pick the 12-inch if your cabinet allows it; the footprint barely changes but the storage gain is real.
Stacking a third tier sounds efficient until you try to use it. Two tiers is the practical ceiling; add a third and the back row vanishes in shadow, and you end up pulling everything forward to see what you own.
Quarter-circle shapes work better on open counter corners where light reaches from the side, but inside a blind cabinet the triangle profile wastes less depth against the back wall.
I would skip the quarter-circle for cabinet interiors and save it for the counter by the coffee maker, where you want the front edge clean and the back curve fills the gap.

Kitchen Storage Solution: stove top shelf add extra storage and display space instantly by our shelf for stove. keep your seasonings like spice jars, salt and pepper grinder, sauce bottle handy, no longer worry about things falling behind the stove

[Maximize Kitchen Space] Instantly transform your unused stove top into a functional storage hub. Keep spices, oils, and essentials within reach while decluttering your countertops.

STRONG MAGNETIC ADSORPTION: This magnetic stove top shelf has large magnets on the back that provide powerful magnetic attraction to ensure secure installation. Simply place this magnetic spice rack for stove on the top of the stove and you are done, no more traditional installation of drilling holes or gluing. Note: Suitable for flat top cookers ONLY
7. Two-Tier Sliding Cabinet Organizer
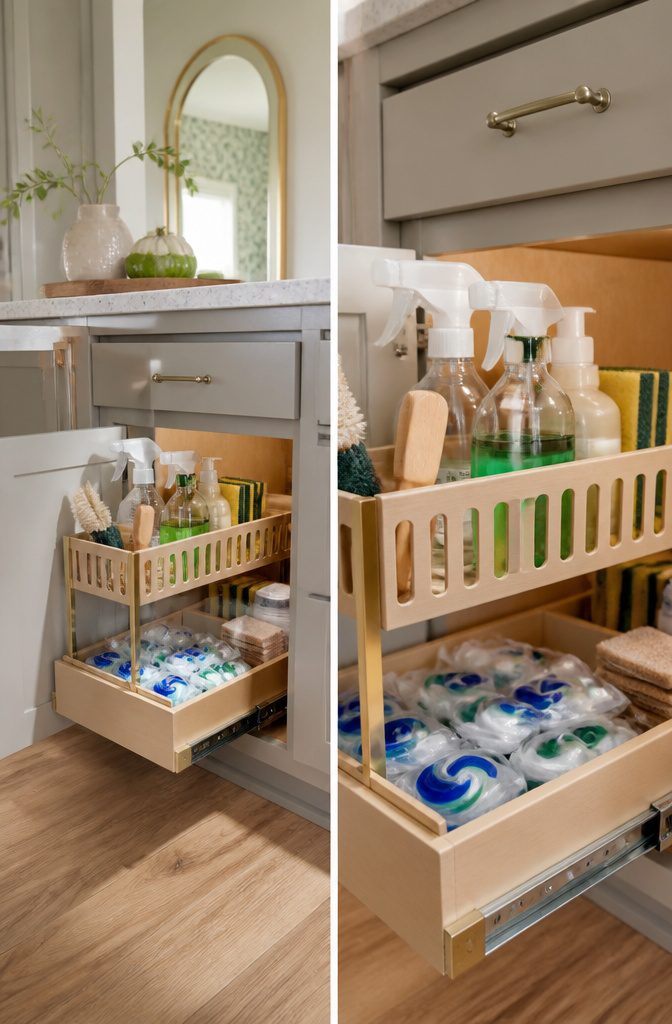
Two-tier sliding organizers turn a single base-cabinet drawer into double-decker storage by pulling forward to reveal a second shelf recessed behind the first. I would put one under every sink I own, but the plumbing is the gatekeeper.
Most units need 6 inches of clear vertical space below the drain pipe for the rear tier to pass underneath, which means measuring before buying, not after.
The top tier comes as either an open wire basket or a solid tray, and that choice matters more than it looks.
A basket lets water and crumbs fall through, which I prefer for cleaning supplies and spray bottles that drip.
A solid tray catches everything, so it works better for stacked sponges, dishwasher pods, or anything you do not want rolling off the back edge.
You see less of what sits on a solid tray until you pull the whole unit clear.
For a rental with standard builder cabinets, I would skip the tray and go basket on top, tray on bottom if the kit allows mixing.
If your P-trap hangs low and steals that 6 inches, this whole category is off the table no matter how good the reviews are.


MATERIAL Durable - The Lazy Susan is made of 304 stainless steel for years of usewith a durable rustproof surface

360 Rotation: Spinning feature allows you to see everything at once, makes it easy to reach any spices or cooking oils
8. Adhesive Bins on Cabinet Doors

Small stick-on bins turn the inside of a cabinet door into storage for dish gloves, sponges, or the odd tool that never earns a real drawer.
I like them for things that drip or smell, because the bin comes off for a scrub instead of the whole door needing attention.
Weight limits matter more than the package admits: most hold a pound or two before the adhesive softens in kitchen humidity, and anything near an oven runs hotter than the glue is rated for.
Owners on Reddit mention bins peeling within weeks above the stove, so I would keep them to the sink side or a pantry door where the air stays cooler.
If you own a drill and have twenty minutes, the better spend is a DIY under-cabinet storage rack for hanging utensils. It costs under $10, frees the door entirely, and puts tools where your hand already reaches.
It needs a cabinet with clearance underneath and a surface you can screw into, which rules out most rental doors. For renters, stick with the adhesive bins, but check them monthly.

PREMIUM MATERIAL: Our farmhouse lazy Susan organizer is made of natural solid oak wood and strong metal, sturdy, durable and premium quality. This wooden turntable organizer is a game-changer for keeping your kitchen organized. The farmhouse oak finish gives it a rustic, charming look that will fit perfectly with your kitchen decor.

VARIOUS UTILITY USES: The rotating swivel lazy susan turntable works great for Scrabble Board; Flat Panel MONITORS: computers, TV screens; CRAFTING AND ACCESSING STORAGE: kitchen cabinet (a good cabinet organizer), cake making or decorating, pottery making, floral designs; HEAVY ITEMS: Statues, large house plants, bonsai tree, Christmas tree, stereo speakers, and anything that needs to rotate objects scenes.

NOTICE❗Since this lazy susan is from Natural Acacia Wood, so each of their patterns is different, our pictures for reference only.
9. Airtight Dry Goods Containers

Square canisters earn their shelf space faster than round ones because they sit flush against each other and against the cabinet wall, leaving no taper gaps.
I use them for flour, sugar, and the short pasta shapes that otherwise disappear behind boxes.
The seal matters more than the material: a silicone gasket paired with a locking clip keeps sugar from bricking and pasta from tasting like the pantry.
That gasket compresses permanently after about eighteen months, so I buy sets knowing the first replacement is part of the cost.
The same principle scales down. A glass spice jar set runs about $33, and it solves the half-empty McCormick problem that makes drawers rattle and labels peel.
I would skip the ceramic canisters that look better on Instagram than they function; the clip-lock square ones at $5 to $8 each do the actual work.

Product Dimensions: This set includes 8 independent bamboo spice racks. Single rack: 13"W x 4.75"D x 1.5"H. Fully laid out size: 26"W x 19.25"D x 1.5"H. This product is NON-EXPANDABLE

Complete Set: 4-tiers drawer spice rack, 28 square bamboo-lidded empty glass spice jars with 2-in-1 lid, 216 Spice labels, 25 non-slip rubber.

SMART EXPANDABLE STORAGE: This adjustable bamboo spice organizer expands and contracts to fit snugly in different-sized kitchen drawers or on countertops - accommodating up to 32 standard spice jars across four tiered rows for a clutter-free kitchen
10. Pots and Pans Organizer

A 12-inch cast-iron skillet sitting on a wire rack will bow the rungs inside a year.
The weight concentrates at two points instead of spreading across a frame, so the rack starts to sag and the pan tilts. Vertical dividers solve this by standing the cookware on edge and letting the cabinet floor carry the load.
Freestanding units drop into a base cabinet and need no hardware, which makes them the better pick for renters or anyone who might rearrange later.
Mounted versions bolt to the cabinet sides and stay put when you pull a heavy Dutch oven; I would go this route only if I owned the place and had already mapped where everything lives.
The sliding version covered earlier wins for daily-use pans you grab while cooking. Fixed dividers work better for the backups, the roasting pan that comes out twice a year, the stockpot that only sees Thanksgiving.
Keep the total height under 18 inches or you will lose usable depth at the back of a standard base cabinet.
Either way, skip anything with plastic feet; the ones I have seen flatten and crack under real weight inside two years.

Great organizer for your purse, wallets, letters, keys, coats, hats, scarves, belts, towels and accessories...

12 Quart Bottle Capacity: Stores up to twelve quart bottles of oil or other fluids, keeping essentials organized and easy to access

Versatile Installation: Mount on the wall or hang over any door 22 inches or wider. Ideal for kitchens, pantries, and apartments—fits seamlessly into any home.
11. Sink Caddy

A weighted base wins over suction cups for sink caddies. The suction kind peels off in humid kitchen air, usually within a week or two, and then you are fishing it out of the basin.
A low, heavy base sits still on the counter and does not need re-sticking every morning.
I would skip the over-faucet hanging style unless your sink is set into an island with no backsplash wall. It blocks the view through the window and collects hard water drips on the faucet stem.
Open wire or slatted designs dry faster than solid trays, which matters because a wet sponge breeds that sour smell in about three days.
Your scrub brush and soap bottle stay in plain sight, so the caddy never looks as tidy as a lidded box.
For material, silicone beats coated wire.
The coating chips at the weld points, and rust blooms underneath within a season. Solid silicone can go through the dishwasher when the grime builds up, and it does not grow mold in the corners the way porous plastics do.
I would pick a matte gray or white silicone caddy with a drain slot and a base that weighs enough to stay put when you grab the sponge in a hurry.
12. K-Cup Carousel

A 6-inch diameter carousel holds about 30 to 40 K-Cups in a footprint barely larger than a coffee mug, which is why I keep one on the counter instead of letting pods disappear into a drawer.
The vertical trade-off is real: it adds 8 to 10 inches of height that low cabinets or appliance garages will swallow whole, so I measure before I buy.
The math favors the carousel only when you brew daily and want flavors visible at a glance.
A drawer insert spreads the same 35 pods across 12 by 18 inches of flat space, which I would pick for a kitchen where every counter inch is already claimed.
Stacking the original boxes in a cabinet costs nothing and works fine until you are digging behind breakfast blends to find the dark roast, which is exactly the friction these carousels solve.
The 30-count size suits a single coffee drinker; the 40-count makes sense for two people with different morning routines.
I would skip the 35-count unless you already own one, since the price gap between sizes is usually small enough that the extra capacity pays for itself.
13. Wooden Tea Bag Organizer

A wooden tea bag organizer sits inside a drawer or on a counter at roughly 8 by 6 inches, with small compartments that separate individual bags into 8 to 12 varieties.
For most households, that range covers the daily rotation without crowding. If you keep fifteen or twenty blends on hand, the box starts to feel like a puzzle you solve every morning.
I prefer this to the carousel approach for one reason: visibility. Every label faces up in its own slot, so I see the chamomile before I reach past it for the Earl Grey.
The carousel spins, which is satisfying for about a week, then the bag you want settles to the bottom and you rotate through four others to lift it out. The organizer stays still and lets me scan in one glance.
It takes up counter space. The carousel uses vertical space; the organizer spreads flat and needs its own real estate, either drawer depth or counter area you were already struggling to protect.
Bamboo runs $15 to $25, solid hardwood twice that. I would buy bamboo and spend the difference on better tea, since the box itself does not touch the water.
14. Snack Organizer

A clear bin with a front-facing lip turns a messy snack pile into something you can read at a glance.
Stand the bags upright on their edges, like files in a drawer, so the label faces you. Stacked flat, everything becomes a guessing game; on edge, you see the pretzels, the granola bars, the fruit snacks without digging.
I sort by type, not by kid. One bin for salty, one for sweet, one for bars keeps restocking simple and lets anyone grab without upending the whole system.
The same setup works for adult snacks, protein bars, and tea bags; the kid-centric marketing on most of these organizers undersells how useful they are for any household that buys individual packs.
Plastic bins with straight sides waste less space than rounded baskets. I would skip anything with a fabric liner; crumbs collect in the seams and eventually smell.
A bin that fills the drawer front to back, with just enough height to keep contents from tipping, gives you the most usable volume without creating a second layer you cannot see into.
15. Produce Keeper
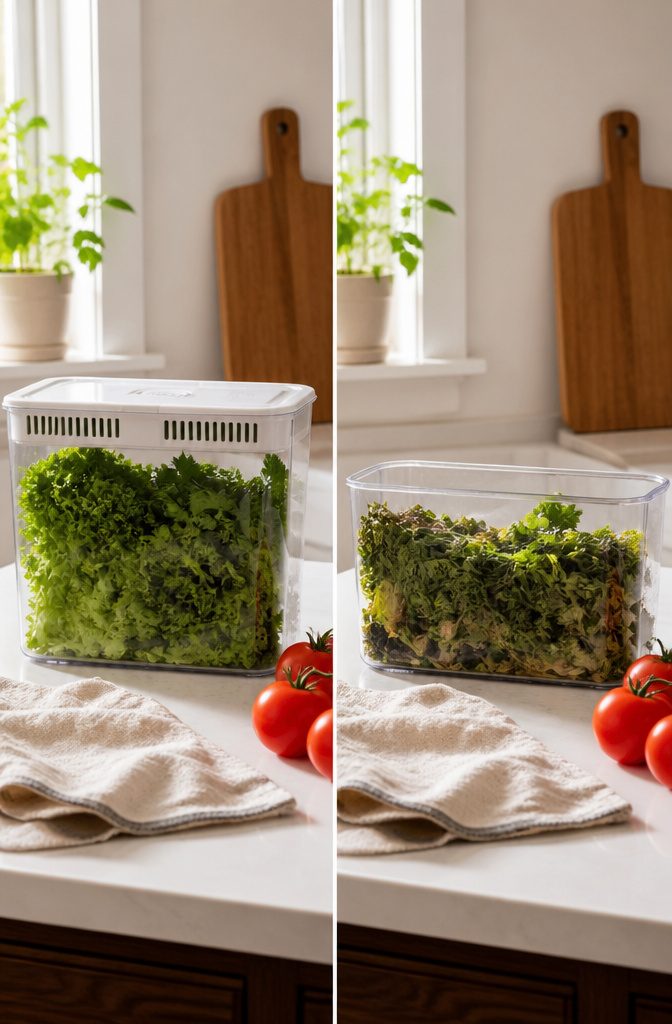
The OXO produce keeper with its ventilated lid and removable water tray is the only container I have found that actually changes how long herbs and delicate greens survive.
You slide the vent to match what is inside, and the small well underneath keeps cut stems hydrated without turning the whole drawer into a swamp.
Leafy greens stay crisp about three to five days longer than they would in the plastic bag they came in, and berries gain roughly two days before the mold sets in.
That difference matters if you shop once a week and hate throwing out what you meant to eat.
For most other produce, a perforated bag in the crisper drawer does the same job for pennies. I would skip the dedicated container entirely for root vegetables, citrus, or anything with a skin tough enough that it barely notices humidity.
The OXO earns its shelf space only for the things that wilt or mold fast enough to ruin dinner plans.
Vertical Storage

Most cabinets leave a foot or more of dead space above the top shelf, and that gap is where vertical storage starts.
I stack plates and bowls in two tiers on a single shelf when the pieces are flat-bottomed and stable; a wire riser lifts the back row so you can see what you own without pulling half the cabinet down.
Where the items are all the same, say a set of cereal bowls, a simple stack is faster to unload from the dishwasher and costs nothing.
Risers earn their place when you are mixing heights, like short spice jars behind tall oil bottles, or when the shelf is deep enough that the back row disappears.
The 80-inch reach rule matters more than people think. Anything above that line needs a step stool, so I reserve the top foot of a cabinet for once-a-year items and keep daily tools between the counter and my shoulders.
Stability is the other non-negotiable. A stack that wobbles when you pull the middle bowl is a stack that will avalanche; I would rather give up one shelf of height than fish porcelain out of the sink.
Drawer Organization

A bamboo expandable silverware tray at $30 is the safest starting point for most renters. It fills the width of the drawer without commitment, and if you move, it moves with you.
Expansion joints loosen over years of opening and closing. Fixed bamboo dividers at $24 run cleaner for drawers you know you will keep.
Before you order either, measure the drawer interior.
The lip, the slide hardware, and any corner braces eat space that product photos ignore. I would rather leave a half-inch gap than force a tight fit that bows the sides.
Expandable trays win when your silverware collection is still shifting. Fixed dividers win once you know exactly how many slots you need and where.
I have seen people buy the adjustable kind, expand them to max width, and never touch the adjustment again. If that is your plan, the fixed version saves the trouble and holds its shape better.
Pantry Organization

Turntables earn their spot in a small pantry by solving the one problem shelves can’t: the black hole at the back of a deep corner.
A 12-inch lazy Susan brings oils and vinegars forward with a spin, and owners on Reddit mention that tall bottles with sides stay upright instead of tipping every time you reach past them.
Tiered risers do the same job for canned goods, lifting the second row above the first so nothing hides behind something else.
Everything visible gets used is the rule that makes both tools worth buying; the can you can’t see is the can you buy twice.
The over-the-door utility rack with adjustable baskets costs no shelf space at all.
It hangs on the back of the pantry door and holds snacks, wraps, or cleaning supplies you’d otherwise stack in front of something else. For a pantry with 18 inches of depth total, that door is storage you already own.
Under-Sink Storage

The space under a kitchen sink is rarely as usable as it looks.
A P-trap and supply lines eat the center of the cabinet, cleaning bottles pile up where they drip, and the floor of that cabinet takes more water damage than anywhere else in the kitchen.
I would start with a silicone mat on the cabinet floor to catch leaks and wipe clean, because particleboard swells fast and replacement is not a weekend job.
For the plumbing gap itself, the two-tier sliding organizer is the option that actually earns its footprint, but only if you measure first.
The lower basket needs roughly 10 inches of vertical clearance to slide past a standard P-trap; anything less and the track binds or the basket tilts.
Adhesive bins on the cabinet doors work better than I expected for the smaller stuff, though owners on Reddit note they hold up best when you limit them to light items like sponges and trash bags rather than full spray bottles.
The weight pulls the adhesive over time, and a bin dropping behind the drain line is more trouble than the space was worth.
Labeling

Labels earn their keep in three places: dry goods containers, spice jars, and pantry bins.
Everywhere else, a label is usually decoration pretending to be function. I learned that after labeling every shelf in my first apartment and watching half the tags peel off while I still remembered where the mugs lived anyway.
The containers that actually need labels are the ones that hide their contents. Flour, sugar, and rice look nearly identical through frosted plastic, so a name on the front saves you from opening four lids to find the arborio.
Spice jars are smaller and more numerous, which makes the time cost of a wrong grab higher.
I write the purchase date on every spice label, not just the name. Ground spices lose potency fast, and "cinnamon" tells you nothing about whether it still tastes like anything.
Pantry bins for packets and pouches benefit from a single label on the front face, since the contents inside shift constantly.
The label should name the category, not list every item. "Pasta & grains" works; an inventory of every shape inside becomes a lie the moment you buy something new.
Expiration dates belong on the label too. I add them with a fine-tip dry-erase marker on laminated labels, or a grease pencil on glass.
The original packaging with its printed date almost always gets thrown out first, and guessing whether that bag of quinoa is from 2022 or 2023 is not a game worth playing.
Frequently Asked Questions
How do I organize a small pantry?
Use turntables and tiered risers to bring items forward and keep everything visible. A 12-inch lazy Susan works well for oils and vinegars, while risers lift the back row of cans above the front.
The over-the-door utility rack costs no shelf space at all and holds snacks or wraps on the pantry door interior.
What are some clever kitchen organization hacks?
Use magnetic stove shelves to reclaim dead space behind the burners without drilling, and stick adhesive bins inside cabinet doors for sponges or gloves.
Store snack bags upright on their edges like files so labels face you, and add a silicone mat under the sink to catch leaks before particleboard swells.
How can I keep my kitchen drawers organized?
Start with a $30 bamboo expandable silverware tray if your collection is still shifting, or switch to fixed bamboo dividers at $24 once your slot needs are set.
For spices, a flat drawer organizer that holds jars label-up runs about $39 and hides visual clutter completely. Measure the drawer interior first, since lips and slide hardware eat space that product photos ignore.
How to store in a small kitchen?
Maximize vertical space with stackable corner shelf risers and wire risers that lift the back row of plates or jars.
Reserve the top foot of cabinets for once-a-year items and keep daily tools between the counter and your shoulders. Magnetic stove shelves and over-the-door racks turn dead zones into storage without sacrificing counter area.
What is the 3×4 kitchen rule?
It does recommend the 80-inch reach rule: anything above that line needs a step stool, so store daily tools below shoulder height and once-a-year items higher up.
What should not be stored in kitchen cabinets?
It does suggest keeping heavy cast-iron skillets on vertical dividers rather than wire racks that bow under weight, and storing wet pans on wire bases rather than solid ones that trap moisture.
What are some effective IKEA kitchen organization hacks?
Its general principles apply across brands: measure cabinet depth behind face frames before buying pull-out organizers, check that door-gap depth stays under 4 inches before installing over-door racks, and verify at least 6 inches of vertical clearance below the P-trap for two-tier under-sink units.