
You end up with a pantry where every shelf rolls forward into reach, not the usual back-row archaeology, and the build takes one weekend and between $150 and $300 in materials.
The stage people get wrong is the very first measurement: they measure the cabinet opening and cut to that number, forgetting that ball-bearing slides eat up half an inch per side.
Subtract the hardware from your opening before you touch a saw, or the drawer binds or rattles loose.
1. Measure the Cabinet Opening
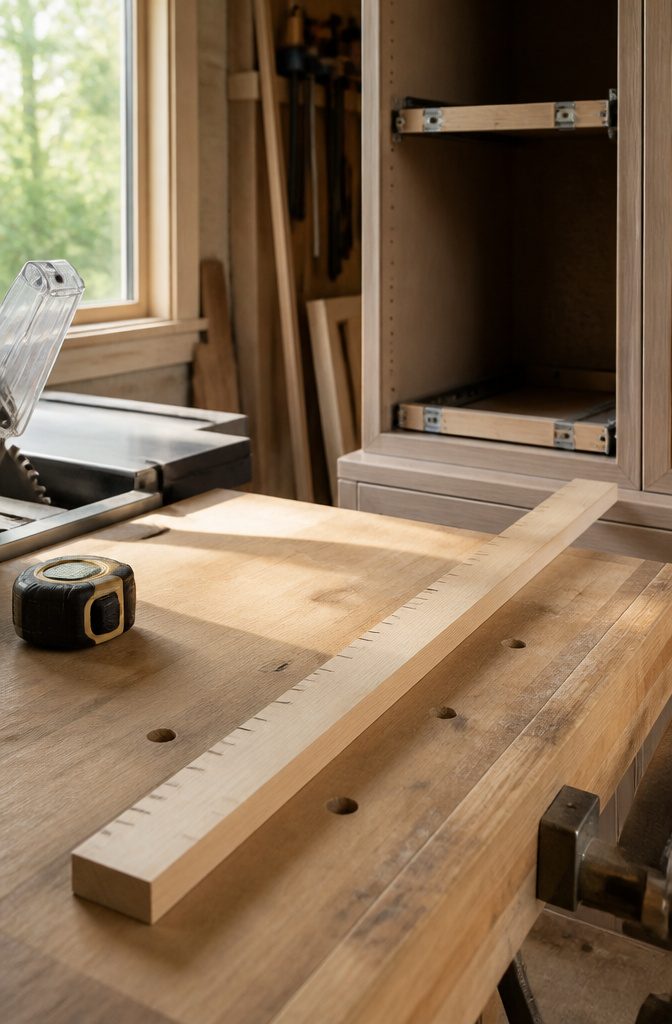
The width of your drawer box is the opening measurement minus the hardware, not the opening itself. Subtract the total slide width from your cabinet opening to get the actual drawer width.
Ball-bearing slides usually eat up about 1 inch total, half an inch per side, while roller slides take slightly less. Check your specific slide instructions before you cut anything; the half-inch rule is common but not universal.
Depth and height need the same careful treatment. Depth should match your slide length, a 22-inch slide for a standard 24-inch cabinet, or 28 inches if you are working with a deeper custom space.
Height is simpler, just measure the opening and decide how many drawers you want stacked inside it.
I like the story-stick method over raw numbers on paper. Mark your opening width, your slide clearance, and your target drawer size on a scrap of wood.
It sits in the shop while you work, and you are not walking back to the kitchen to double-check whether you already subtracted that half inch or not.
One marked stick prevents the mistake of building a drawer that wedges tight against the slides or rattles loose because the math got reversed somewhere between measuring and cutting.

Compatibility Note: This pull out cabinet drawer is for frameless cabinets only (not for cabinets with door frames). Drawer size: 13.8"W x 21"D x 3.1"H. For optimal fit, ensure your cabinet width exceeds 15" and depth exceeds 22".

IMPORTANT NOTICE: Our cabinet pull out shelves are not suitable for cabinets with lips.Before ordering, please measure your cabinet dimensions correctly using the method shown in the picture.If your deep cabinet has a lip, please choose from our other drawers options designed for cabinets with a lip available in the store

[🔝 WARM TIPS]: Please note that this pull out cabinet organizer suitable for cabinets with internal width exceeding 13" and depth exceeding 21". This pull out drawer for cabinets with Upgraded Raising Pads are compatible with both frameless cabinets and framed cabinets with edge heights up to 0.4 inches. It is essential to carefully measure your cabinet's dimensions before installation to ensure compatibility.
2. Cut the Plywood Base and Sides

3/4 inch plywood is the standard for drawer boxes that will hold up under the weight of canned goods and bulk items without sagging.
I would skip the half-inch material some plans suggest; it saves a few dollars but forces you into pocket screws and more fussy joinery just to keep the box square.
MDF is an acceptable alternative if cost or scrap availability drives the choice.
It machines cleanly and paints well, though it runs heavier than plywood and swells the moment moisture reaches an unsealed edge. For a pantry that sees occasional spills, I would weigh that trade-off carefully.
Upper drawers work best at 3–4 inches tall, shallow enough that you can scan spice jars or sauce cans at a glance while still keeping them from tumbling out when the shelf rolls forward.
Lower drawers, where you store bags of rice or stacks of heavier items, need the depth: around 10 inches gives you the volume without making the box so tall that it binds on the cabinet opening.

[Choose The Size Wisely] To ensure you select the correct size for your dresser drawer slides, measure the depth of your drawer and make sure there is an extra 0.5 inches of space on both sides for mounting. These slides are suitable for drawer depths ranging from (depth range)
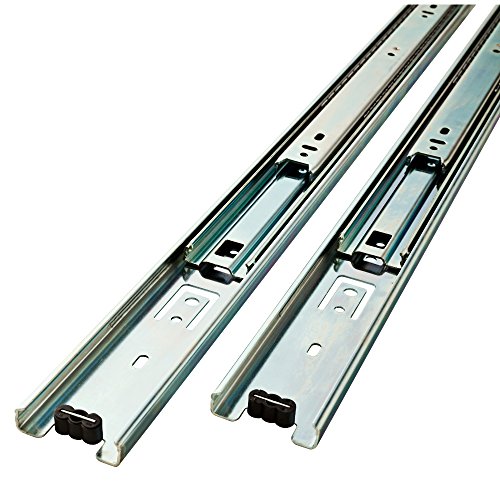
Made from stamped steel with a zinc plated finish
[Choose The Size Wisely] To ensure you select the correct size for your dresser drawer slides, measure the depth of your drawer and make sure there is an extra 0.5 inches of space on both sides for mounting. These slides are suitable for drawer depths ranging from (depth range)
3. Assemble the Drawer Box

A Kreg jig turns pocket-hole joinery from a fussy skill into something you can nail on the first try, and for a first-timer building rolling pantry DIY pull out shelves, that matters more than fancy joints.
I still run a bead of wood glue along every edge and drive screws home; the glue does the real holding, the screws just buy you time while it sets. Butt joints are plenty here.
No rabbets, no dovetails, no showpiece joinery. The box lives behind a cabinet door where nobody studies your corners.
Low sides around 3 inches keep canned goods and spice jars easy to read and quick to grab.
Taller drawers benefit from sides that slope slightly outward; the wider footprint at the bottom adds stability when the box is loaded and rolling. If you kept the original cabinet shelf, use it as your drawer bottom.
Less cutting, less buying, and the fit is already proven. Glue it all around, screw from underneath where the holes stay hidden, and call the box done.
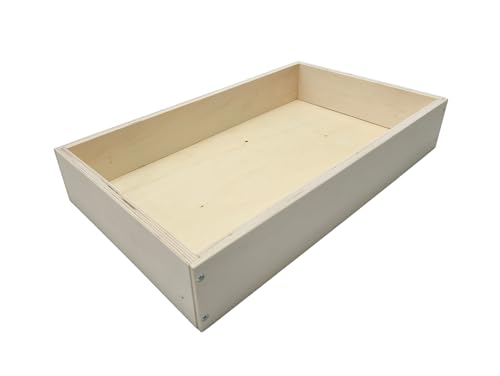
【What You Get】 – 19" deep replacement kitchen drawer box made of durable plywood, designed for cabinets with 19–21" drawer slide depth. Ships unassembled with pre-cut panels and pre-drilled holes for fast setup. Screws included. Assembly typically takes about 5 minutes.

【Modern Concealed Design for a Cleaner Look】- The slides stay completely hidden beneath the drawer, creating a sleek and modern appearance. Perfect for kitchen cabinets, dressers, closets, storage cabinets

FULLY CUSTOM DRAWER BOX SIZE: Built to your exact width, depth and height in 1/32 in increments for side mount or undermount slides, frameless or face frame. Send your cabinet opening measurements and we cut the box to fit.
4. Attach the Drawer Slides

Drawer slides mount to the sides of the box, not the bottom, and the hardware you choose changes how much of the shelf you can actually reach.
Roller slides run $5–15 per pair, carry 35–100 lbs, and extend about three-quarters of their length.
That last quarter stays buried in the cabinet, which means bags of rice or stacked cans sit in shadow. Ball-bearing slides cost $15–40 per pair, handle 75–200 lbs, and pull out fully.
For the bottom drawer where I store heavy stockpots and bulk goods, I would spend the extra on ball-bearing every time. The full extension matters more down low because bending and reaching into a half-open cavity gets old fast.
Second-rate slides and rollers can sag or seize up under sacks of flour and pots and pans.
That sag is what sends a loaded shelf off its tracks six months in.
For upper drawers holding spices or wraps, roller slides save money without much penalty; you are not lifting much, and you can see the back row easily.
Build the drawer box 1/32 in. smaller than the opening, then shim the slide with masking tape if the fit is loose. A drawer that is too wide is a headache you cannot tape your way out of.

Premium Home Improvement: This pocket-hole jig is a portable carpentry tool that makes strong joints

Easy Woodworking Tools: Kreg pocket-hole joinery is the fast, strong, easy way to join wood-drill, drive, and done

Premium Mini Pocket-Hole Jig: Creates precise pocket holes with steel-enforced drill guide holes
5. Install the Slides Inside the Cabinet

The cabinet-side halves of the slides are where precision pays off or the whole build binds.
I set each bracket about a quarter inch back from the front edge of the face frame, which leaves just enough clearance so the drawer front sits flush without catching.
A spacer block cut to the exact height you want the shelf saves the measurement battle. I hold it against the cabinet wall, rest the rear bracket on top, and drill.
Both sides must sit level and parallel across the full width, or the drawer box racks and the slides groan every time you pull it out.
A scrap of wood the full width of the cabinet, laid across with a level on top, catches the spots where the cabinet itself isn’t square.
If you’re working with existing shelves, you can often convert rather than starting from scratch. The original shelf board becomes the pull-out base; you just add a front rail and side cleats, then mount the drawer-side slide halves to that.
It saves plywood and a build step, and for a weekend project that matters more than perfect joinery.

IMPORTANT NOTICE - This spice drawer organizer needs at least 3 inches deep drawer space to fit in when you add jars on; PLEASE MAKE SURE YOUR DRAWER IS AT LEAST 3" DEEP

【Sturdy and Durable Spice Organizer】: Our spice rack is made of high quality transparent acrylic material, which is strong and durable, has a long service life. The L-shaped structure can firmly support jars of different weights.

【100% High-quality Bamboo Drawer Organizer】 Unlike other wooden drawer organizer, Bambloom drawer organizer is made of 100% bamboo (including the base of box) - solid structures, durable, beautiful and eco-friendly. The bamboo Utensil organizer is a perfect solution for organizing your messy drawer.
6. Test Fit and Adjust

Slide the drawer onto the mounted slides and run it through a few full cycles. Smooth travel with no catching means the hardware is doing its job, but most first builds need at least one tweak before they feel right.
If the drawer tilts or drops on one side, the slides are not sitting at identical heights.
A tape measure against the cabinet wall catches this fast; even an eighth of an inch off will show up in the motion. Shim the low side with a washer or thin strip of plywood behind the bracket, then retest.
Sticking usually traces to a screw head proud of the surface or a slide twisted slightly out of plane.
Run your finger along the slide before the drawer goes back in; anything that catches skin will catch the roller. A twisted slide loosens with its screws, gets tapped straight, and locks down again.
A slight wobble in roller slides is normal and not a sign you built wrong.
Ball-bearing models run tighter, but the budget roller hardware most pantry projects use has engineered play that keeps it rolling under load. Chasing zero movement here wastes time and can over-tighten the whole assembly into binding instead.

Important Measurement Reminder: Please ensure your cabinet’s internal width exceeds 13" and depth exceeds 21", excluding hinges, pipes, or obstructions. Note the usable drawer space is slightly smaller than the listed exterior dimensions.

ACCESSING ITEMS IN DEEP CABINETS IS NO LONGER DIFFICULT:With our pull out drawers,you won't need to dig through dark and deep cabinets or remove all items to reach those in the back.Simply slide out drawers for easy access to your items.The depth of the drawers is adjustable.Our kitchen cabinet pull out shelves fit very deep cabinets,such as17ches,18inches,19 inches,20 inches,21 inches,22 inches,23 inches,and 24 inches

IMPORTANT NOTICE:Our cabinet pull out shelves are not suitable for cabinets with lips.Before ordering,please measure your cabinet dimensions correctly using the method shown in the picture.If your deep cabinet has a lip,please choose from our other drawers options designed for cabinets with a lip available in the store
7. Finish With Paint or Oil

Paint gives you a cabinet-matched finish that hides everything, but it adds thickness. If you built your rolling pantry diy pull out shelves to tight tolerances, leave yourself a sixteenth or so for the build-up, or the drawers will bind.
Stain is the middle path: it lets the grain read through and forgives minor scratches better than paint, though it still needs a clear topcoat for a kitchen that sees moisture and oil.
I tend to skip both when I want something fast and honest.
Danish oil goes on with a rag, dries to a hand-rubbed low sheen, and when it starts looking tired in a year or two you scuff with fine-grit paper and wipe on another coat.
No stripping, no brush marks, no matching sheen between old and new. For a pantry that rolls in and out of sight, that renewability matters more than showroom perfection.

【Package Includes】 -- 2PCS x 12 inch Drawer Slide, Mounting screws are includes. Please make sure you double check the type and dimensions before you purchase.

[Choose The Size Wisely] To ensure you select the correct size for your dresser drawer slides, measure the depth of your drawer and make sure there is an extra 0.5 inches of space on both sides for mounting. These slides are suitable for drawer depths ranging from (depth range)

【Heavy Duty 100 lb Capacity】 BAIDICE full extension drawer slides are built with 1.0mm cold-rolled steel and dual industrial-grade ball bearings, supporting up to 100 lbs—40 lbs more than standard slides. The precision ball bearing mechanism ensures smooth gliding even under heavy loads, while the built-in rubber crash pad keeps operation as quiet as 35 decibels.
Why Pull-Out Shelves Beat Fixed Ones

A pantry deeper than 20 inches puts the back wall outside reliable arm reach, which is where the trouble starts.
Fixed shelves in that depth create a 24-inch "black hole" where cans migrate to the rear and stay there, sometimes years past their date.
One owner who emptied a cabinet of that depth found a can of pumpkin four years expired, proof that if you cannot see or reach it, you will not use it.
Pull-out shelves reverse the geometry.
The storage rolls toward you, so the back wall becomes the front wall for the thirty seconds you need it. Sources consistently report the same result: usable space roughly doubles because nothing hides in shadow, and the duplicate purchases stop.
The wasted food and redundant spice jars are not a personality flaw; they are the predictable output of a cabinet design that asks you to mine for dinner.
I would not bother with this conversion in a shallow cabinet you can already sweep with one arm. But once depth passes that 20-inch threshold, the effort-to-reward ratio tips fast, and the weekend of work pays back in daily convenience.

Self-Adhesive Edge Trim: This U channel edge trim can be installed directly without glue as it's self-adhesive trim; The glue on the edge trim is easy to remove and does not corrode the product, no marks will remain on the product after removing the edge trim
【What You Get】 – 19" deep replacement kitchen drawer box made of durable plywood, designed for cabinets with 19–21" drawer slide depth. Ships unassembled with pre-cut panels and pre-drilled holes for fast setup. Screws included. Assembly typically takes about 5 minutes.

Size - Cutting diameter: 3/4"; shank diameter: 1/2"; cutting depth: 21mm / 0.83"; overall length: 65mm / 2.56"; dovetail angle: 14 degree.
What the Build Costs
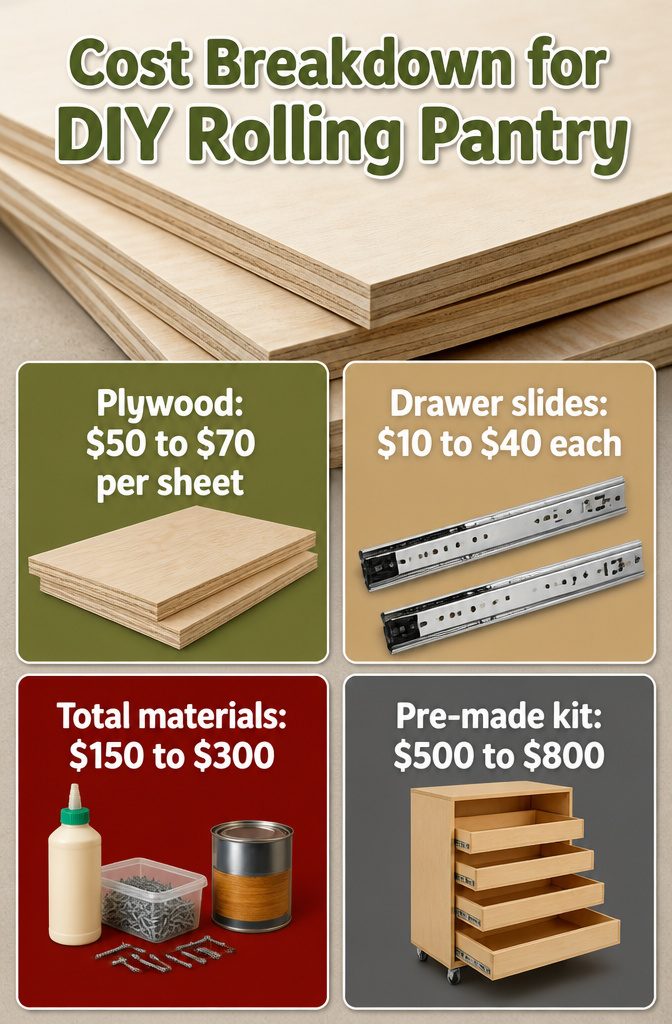
Plywood runs about $50 to $70 per sheet right now, and a full pantry with four to six pull-out shelves usually needs one to two sheets depending on how you cut it.
Drawer slides are where the price spreads: basic side-mount pairs start around $10, while soft-close or full-extension ball bearing slides climb toward $30 or $40 each.
Add wood glue, screws, and whatever finish you prefer, and the whole material list for a typical rolling pantry lands between $150 and $300.
That same setup in a pre-made kit runs closer to $500 to $800, so the savings are real if you have the tools or can borrow them.
I would skip the pre-finished birch plywood unless you are planning to leave it exposed; the cheaper grade takes paint or Danish oil just as well and the money goes further toward better slides.
The one cost I would not trim is the slide quality, since the pantry gets opened a dozen times a day and the cheap ones start sagging inside a year.

Easy Woodworking Tools: Kreg pocket-hole joinery is the fast, strong, easy way to join wood-drill, drive, and done

Premium Home Improvement Tool: Take the guesswork out of drawers with the Drawer Slide Jig; easily create level drawers that slide smoothly

Reliable Kreg Pocket-Hole Jig: The Pocket-Hole Jig 720 PRO is the easiest to use, most innovative jig for lightning fast, surefire pocket holes
Tools That Make It Easier

A miter saw or circular saw handles the plywood cuts, and a drill/driver drives every screw. Those two are the floor; everything else is a time-saver or a finish upgrade.
- Kreg jig for pocket holes: worth it if you want drawers that stay square under a load of canned goods. Pocket screws and wood glue make joints that hold. You can butt-joint and just glue and screw from the outside, but the face shows the fasteners.
- Brad nailer: speeds assembly and holds pieces flush while the glue sets. A clamp and patience do the same job.
- Tape measure and level: the level keeps your drawer slides parallel, which is where most first builds go wrong. A phone app level works in a pinch, but a real bubble level is faster to trust.
- Impact driver: nice if you own one, since you are not swapping drill bits for driver bits. I skip it on a one-off build.
I would buy the Kreg jig before the nailer. Pocket holes fix the structural problem; nails only fix the wait.

Interlocking & No More Overlapping: The Famhap spice drawer organizer set consists of 36 individual interlocking drawer inserts, accommodating up to 36 spice jars. With the interlocking design of the Famhap spice inserts, you no longer have to worry about the frustrating overlapping experienced with other expandable products. This ensures that the spice drawer inserts stay flat and organized in your drawer, maximizing every inch of space.

IMPORTANT NOTICE - This black spice drawer organizer needs at least 3 inches deep drawer space to fit in when you add jars on; PLEASE MAKE SURE YOUR DRAWER IS AT LEAST 3" DEEP

IMPORTANT NOTICE - This white spice drawer organizer needs at least 3 inches deep drawer space to fit in when you add jars on; PLEASE MAKE SURE YOUR DRAWER IS AT LEAST 3" DEEP
DIY Against Store-Bought

Pre-made rollouts run anywhere from $10 for a basic wire basket to $100 for heavier-duty steel, and that spread is where the decision starts.
I would DIY any standard cabinet opening because store-bought units rarely fit the depth and width exactly; you lose an inch here or there to their fixed dimensions, and that inch is the difference between a shelf that slides smooth and one that catches on the face frame.
Ball-bearing slides extend fully while roller slides stop at three-quarters, but pre-made sets often pair cheaper slides with lighter-gauge wire that bends under canned goods. Building your own with half-inch birch plywood and choosing your own hardware eliminates that gamble.
The trade is time.
A pre-made rollout installs in a Saturday morning. A proper DIY build takes a weekend between measuring, cutting, pocket-screw assembly, and fitting the slides so the box clears the frame by exactly the right margin.
For odd cabinet dimensions or a rental where you want to take the shelves with you when you leave, I would buy and shim rather than build custom.
The cost of materials for DIY usually lands below mid-range pre-made once you factor in the better slides and sturdier box you get for the labor.
Converting Existing Shelves
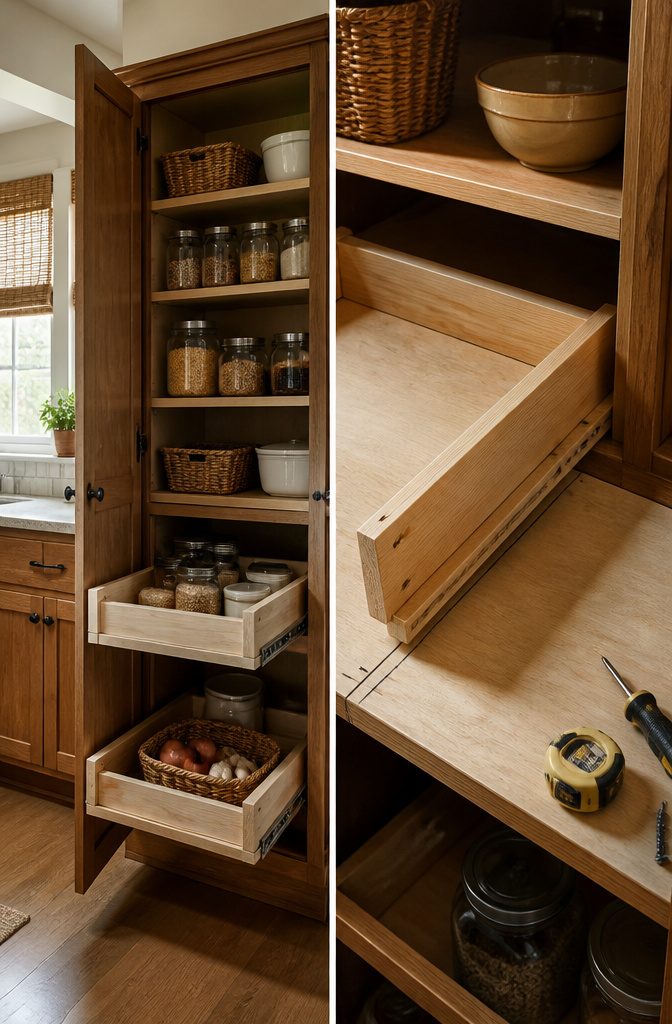
Fixed shelves can become rolling pantry diy pull out shelves without tearing the cabinet apart.
The existing shelf becomes the drawer bottom; you add front and side rails to form a box, then mount slides underneath. You cannot adjust the shelf thickness, so your slide placement has to be precise the first time.
I would rip the original shelf down slightly to clear the slides, then build up with scrap MDF or whatever I have on hand.
This saves buying new plywood, but you will need to work around whatever thickness the builder installed. Face frames intrude about 3/4 inch into most cabinet openings, so a spacer block on each side is usually non-negotiable anyway.
I would build a slide framework the full depth of the cabinet, back wall to face frame, and set my slide height there rather than measuring inside the cabinet itself.
That keeps the job repeatable if I am doing more than one shelf.
Frequently Asked Questions
Can you add pull-out shelves to existing cabinets?
Yes.
Rip the existing shelves slightly smaller to clear the drawer slides, then build a box on top and add the hardware. The original shelf board becomes the drawer bottom, which saves buying new plywood and skips one cutting step.
What is the best wood for DIY cabinet pull-out shelves?
3/4 inch plywood is the standard choice because it holds up under canned goods and bulk items without sagging. MDF works if cost or scrap availability drives the decision, though it is heavier and swells when moisture reaches an unsealed edge.
How do you measure for pull-out shelves?
Measure the cabinet opening, then subtract the total slide width to get the actual drawer box width.
Ball-bearing slides usually eat up about 1 inch total, half an inch per side. Depth should match your slide length, and height depends on how many drawers you want stacked.
How can I convert my pantry shelves into pull-out drawers?
Remove the fixed shelves, rip them down to clear the slides, and build front and side rails on top to form a box.
If your cabinet has a center stile down the face frame, remove it so the drawers can roll out freely; you can attach that stile to the back of one drawer if you want the original look when closed.
What is the recommended spacing for pull-out shelves in a pantry?
Upper drawers work best at 3–4 inches tall for spices and small jars you scan at a glance. Lower drawers for rice, flour, and heavier items need around 10 inches of height for volume without binding on the cabinet opening.
Can I make my own cabinet roll-out shelves?
Yes, and for standard cabinet openings it is usually worth it.
Store-bought units rarely fit depth and width exactly, so you lose space to their fixed dimensions. Building your own lets you choose sturdier plywood and better slides than the lighter wire sets typically include.
Are pull-out pantries a good idea?
They are in any pantry deeper than 20 inches.
Fixed shelves at that depth create a black hole where cans migrate to the back and expire unseen. Pull-out shelves roll the back wall toward you, roughly doubling usable space and stopping duplicate purchases.