

The best kitchen counter organization costs nothing to install and everything in daily habit. Vertical space, zone discipline, and a weekly ten-minute reset matter more than any container you buy.
The real test is whether you still reach for the old tool after two weeks of trying the new one; if the air fryer needs a wipe before it works, it does not deserve the real estate.
1. Get As Many Things Off the Counters As Possible
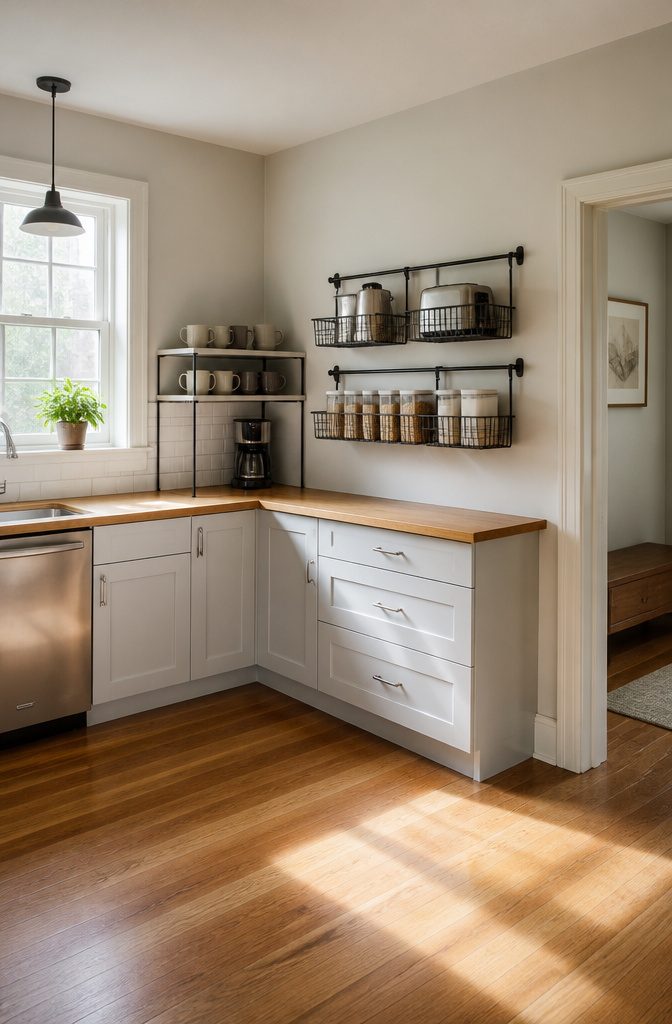
Wall-mounted rails, tiered shelving, and hooks are where functional kitchen counter organization actually starts. Vertical space is the most underused real estate in most kitchens, and reclaiming it costs less than a dinner out.
A simple U-shaped shelf riser above your coffee station doubles the usable area in that footprint, letting mugs stack above while the maker stays accessible below.
Only daily-use appliances earn the right to stay on the counter.
The coffee maker that fuels your morning stays; the air fryer you run twice a month goes. Everything else needs to prove its place or move upward.
Wire baskets mounted to the wall corral small appliances and bulky dry goods that would otherwise colonize the surface, while a magnetic knife strip or spice rack on the backsplash frees drawer and counter space simultaneously.
Before you buy a single tray or container, look up.
Vertical storage keeps counters visually clean without the pre-gathering shove-everything-into-cabinets panic. Shelf risers and wall-mounted racks create depth without clutter, which makes a small kitchen feel more open and more considered.

10s QUICK INSTALLATION: Our fruit basket for kitchen features a 4 step quick installation process , just fold up the basket with build-in snaps, then put on the lid and mount on the wall, and we have offered a installation manual for you.

★Please Note - Read the dimensions of the basket before ordering in case it does not meet your needs or space size!

🍎【Sturdy wire baskets that can hold 50 pounds】 These baskets are made of durable steel wire with durable anti-rust and anti-corrosion coating, as well as wall-mounted hardware and hooks, which can hold 50 pounds. (Note: If you use non-marking paste instead of screws, the basket can hold 11 pounds)
2. Create Designated Areas for Everything

Countertop clutter usually starts because small items never got a proper assignment.
The fix is three zones: prep, cooking, and staging. Each zone holds only what serves that function, and nothing else.
Prep stays clear for cutting boards and mixing bowls.
Cooking keeps oils, spices, and utensils within reach of the stove. Staging is where finished plates wait or guests set down drinks.
Coffee makers and toaster ovens get daily use but do not need prime prep real estate; a corner near an outlet, ideally with a stackable shelf above for mugs, keeps them accessible without crowding the workspace.
The real work is the return.
Every piece goes back to its spot after use. A 3-minute reset each evening prevents accumulation from turning into a project that requires a full afternoon.
Run a 10-minute version before hosting. When every item has one of these proper places, the whole counter feels calmer, and that calm carries over into the way you cook.

Multifunctional Countertop Organizer:2 tier counter shelf rack can be used in different places,such as living room, bathroom, bar counter, kitchen, and office desktop. Wooden desk shelf can organize coffee accessories, tea bags, snacks, office supplies, makeup,spice jars,and small plants etc.

Large Size, High Load Capacity: 17 x 9 x 7 Inches large size, allowing you to place more things, 2cm thick panel and 4 legs with a diameter of 2.5cm, sturdy and durable
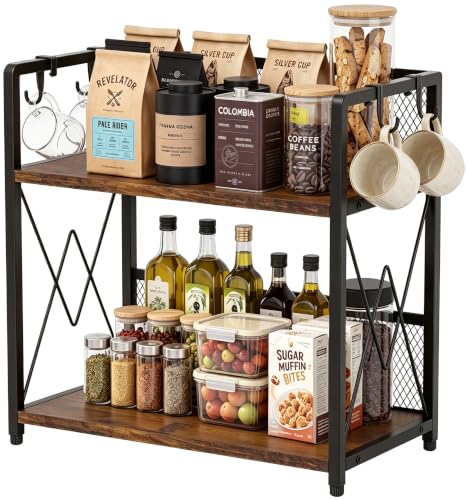
【2-Tier Design with 4 Hooks – Maximize Your Counter Space】This 2-tier coffee bar organizer doubles your vertical storage without taking extra counter space — the bottom shelf holds coffee canisters and mugs, while the top tier keeps spices and tea bags within easy reach. Four included S-hooks let you hang up to 4 mugs or small tools, turning unused vertical space into organized storage.
3. Use Trays to Group Things and Stop Clutter From Spreading

A tray on the counter works like a fence for your stuff. It sets a hard boundary that mail, keys, and the odd hardware store receipt cannot cross without looking obviously out of place.
I have watched clutter drift across open surfaces for years, and the difference with a tray is that you spot the violation immediately.
Sizing matters more than style here. A tray that swims around its contents, with inches of empty surface showing, becomes the new clutter surface.
The right size leaves just enough room to lift items out without shuffling, which for most kitchen bits means roughly 12 by 18 inches or smaller.
A compact hot drinks station or a few oil bottles and a crock fit fine in that footprint.
Go larger only if you are corralling a full coffee setup, and even then, mark the edges. Brass, wood, resin, or a cutting board stood on its side: the material is secondary to the fact that it ends.

【Acacia Wood & Super Strong Magnet】HOSHANHO magnetic knife strip is made from top-quality acacia wood and built-in two rows of powerful magnets running through the entire strip, stronger adsorption force allow even your largest knives to hang safely and securely, ultra sturdy and easy to clean up.

★Powerful Magnetic Knife Bar: This modern magnetic knife bar is made from strong magnets and covered in elegant, satin finished, high grade stainless steel, accenting any kitchen décor.

Heavy Duty and Solid magnetic knife holder: Our knife magnetic strip contains powerful magnets and has an extremely strong grasp for holding kitchen knives, utensils securely and evenly. Best magnetic knife holder for wall with no risk of the knives falling off, even for heavy cleaver and knives with heavy handles. Great magnetic knife block to help with your kitchen organization and storage. WARNING:Please keep the magnetic knife strip more than 3 feet away from the pacemaker.
4. Use Lazy Susans to Keep Useful Items Within Easy Reach

A 10–12 inch diameter Lazy Susan sits right on most kitchen counters without swallowing the workspace, and that is the size I would buy for everyday cooking.
I keep mine next to the stove, loaded with the oils, vinegars, and salt I reach for every night. The turntable spins and the bottle I need faces me; no digging behind a row of half-empty containers.
Weight is the real limit. A Lazy Susan loaded with every oil in the pantry turns into a fixed pedestal, because the bearings under a standard kitchen model are not built for bulk.
I leave breathing room, four or five items at most, and the thing actually rotates.
Two-tier models exist, but I skip them for counter use; the extra height blocks sight lines and the lower tier collects drips you will not notice until they have turned sticky.

Flexible Adjustable:This mug rack features an innovative telescopic design, adjustable from 12.40 to 24.01 inches, making it easy to fit into various spatial needs. Whether it’s a tight corner or a spacious area, it fits perfectly without requiring installation.

Maximize Counter Space: This 3 tier coffee mug display shelf helps organize mugs vertically, making full use of limited kitchen countertop, coffee station, and cabinet space while keeping your area neat and stylish.

Simple and rustic designed coffee mug organizer:suitable for storing mugs,coffee accessories,spices,and more. It can match any tabletop in your coffee station,living room,or kitchen,etc.It can not only store items but also become an elegant home decor.
5. Get a Large, Stylish Utensil Holder

A single large utensil holder beats a cluster of small cups every time.
One vessel keeps wooden spoons, spatulas, and tongs together within arm’s reach of the stove, and 8–12 tools should fit without crowding. Multiple containers spread across the counter only create more visual noise and more surfaces to clean.
Material matters more than most people expect. Ceramic gives you weight and stability, so the holder stays put when you drop a heavy slotted spoon in at the end of cooking.
Stainless steel takes abuse and wipes clean, though it reads colder in a kitchen that already runs utilitarian. Wood softens the look and feels warmer under your hand, but it will show water rings and oil spots over time.
I would pick ceramic for a rental where you want one piece to ground the whole counter, or stainless if you cook hard and fast most nights.
Wood works best if the rest of your kitchen already leans warm, think butcher block or open shelving. Whichever you choose, keep it close enough to the stove that you never cross the kitchen mid-stir.

⭐ Beautiful Acacia Wood: Our Wooden Risers for Decor are made of high quality natural Acacia wood and well made, These handmade counter trays add a touch of modern and farmhouse style to your decor.

Compact Design: Measuring just 15" L x 11" W x 5.9" H, this space-saving dish drying rack is perfect for small kitchens or apartments—keeps up to 10 plates, bowls, and cups neatly organized without taking over your countertop
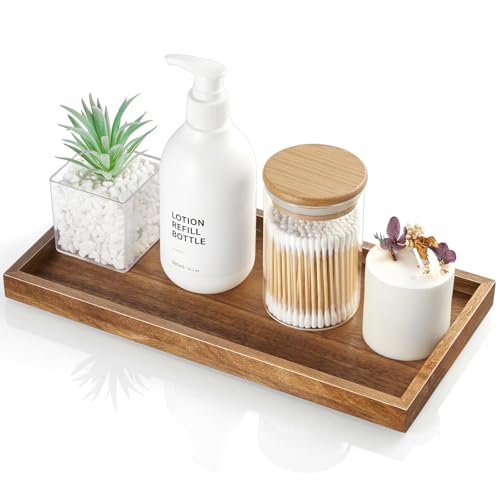
FOR KITCHEN SOAP DISPENSER SET - Use this kitchen soap tray to store and display your soap bottles, sponge or scrub brush, keep your kitchen countertop organized and uncluttered so you can easily reach them when needed.
6. Decant Staples Into Clear or Labeled Containers
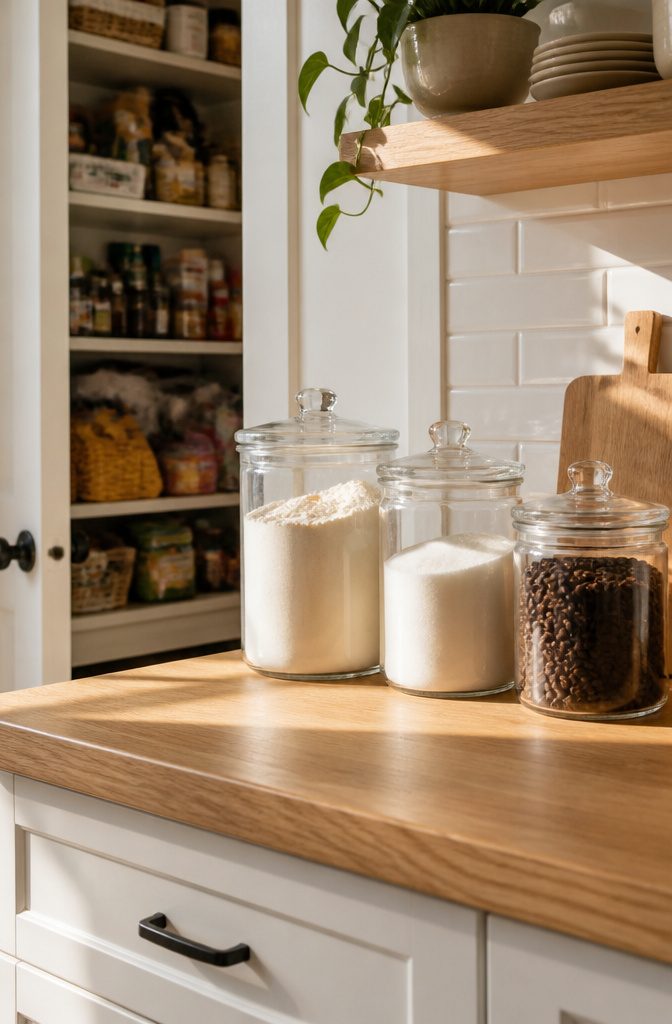
Clear containers earn their counter space by keeping staples visible, accessible, and contained all at once.
The alternative, half-empty flour bags and creased coffee pouches, creates the kind of visual noise that makes a kitchen feel cluttered before you’ve even started cooking.
What stays on the counter depends on routine, not aspiration. Flour and sugar belong out if you bake weekly; coffee deserves a canister if you brew daily.
Everything else migrates to the pantry. Glass or acrylic canisters let you see exactly how much remains, which means fewer mid-recipe discoveries that you’re down to a quarter cup.
Labels become the deciding factor when containers aren’t see-through. A matching set of ceramic or stainless canisters looks uniform, but without labels you’re lifting lids to find the sugar.
For renters especially, the clear container with no label beats the opaque one with no label, because guessing wastes time every single morning.
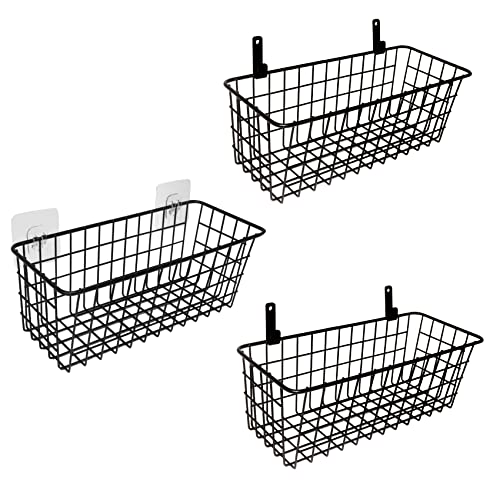
🍎【Sturdy wire baskets that can hold 40 pounds】 These baskets are made of durable steel wire with durable anti-rust and anti-corrosion coating, as well as wall-mounted hardware and hooks, which can hold 40 pounds. (Note: If you use non-marking paste instead of screws, the basket can hold 10 pounds)

Flexible Home Use: From kitchen produce to craft tools, this vintage wire basket wall mount keeps items visible, accessible, and stylish in a wide variety of rooms

Wall Mount&Use in Flat: Every piece of metal wire basket can be wall mounted. Easy to hang on the wall or slatwall with pre-drilled holes and included accessories. Also, you can just place basket on flat surface, like work counter, kitchen counter, table top or desk.
7. Get an Attractive Fruit Bowl
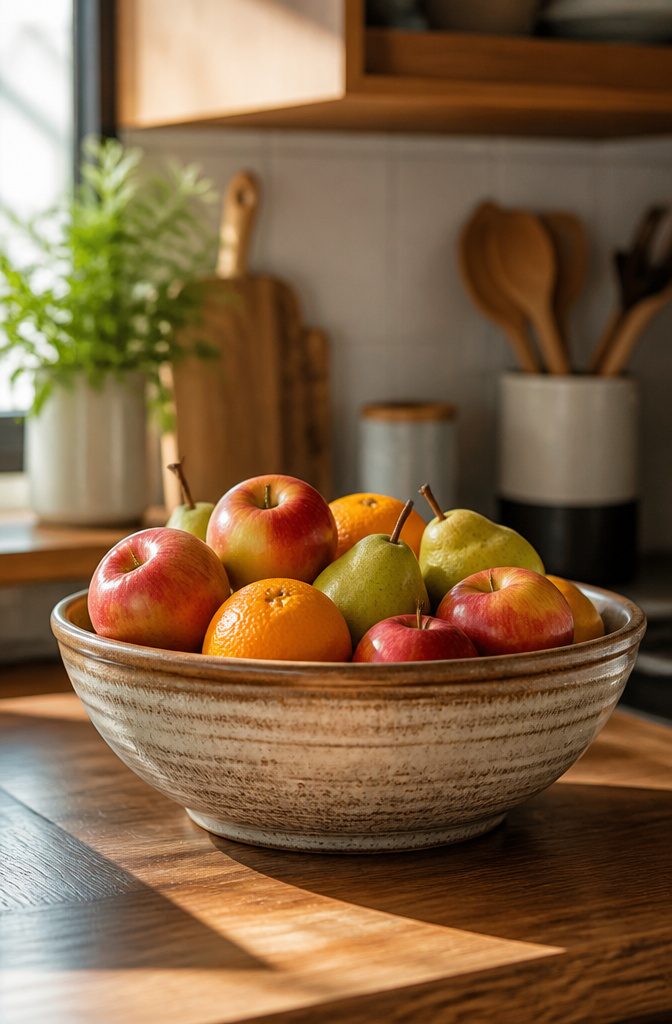
A fruit bowl is the single fastest way to give your counter a sense of order. One open vessel, and suddenly apples and oranges have a visible home instead of rolling around beside the cutting board.
Ceramic or wood both work here, though I lean toward ceramic for its weight.
A lightweight bowl slides when you dig in for a peach. 10–14 inches in diameter is the range that actually holds a standard household’s weekly produce without looking like a staging area for a still life.
Under 10 inches, and you get overflow onto the counter by Wednesday. Over 14, the bowl becomes a magnet for keys, mail, and the random hardware that migrates across flat surfaces.
I would skip anything with a lid.
Out of sight means out of mind, and produce rots faster in the dark. The point of the bowl is that you see what you have, which means you eat it before it turns.
A shallow profile beats a deep one. Fruit stacks, it doesn’t bury, and a bowl with too much vertical space wastes the real estate you’re trying to reclaim.

🌿 Natural Bamboo Sturdy Material: Crafted from premium bamboo, this 2-tier organizer is highly durable, water-resistant, and naturally sturdy. The renewable bamboo material offers a warm, rustic aesthetic while supporting long-term use without warping or degradation

PERFECT COFFEE BAR ORGANIZER: Elevate your coffee setup with our 2-tier carefully crafted coffee bar accessories organizer and storage. Perfect for neatly arranging all coffee essentials in one stylish space. Wooden shelves paired with iron racks seamlessly merge natural rustic and industrial style. Ideal for both casual coffee lovers and skilled baristas, providing a backdrop for your brewing creativity.

Natural Solid Wood : 100% natural solid acacia wood , premium quality wood shelf riser for home kitchen countertop with solid structure, add a touch of rustic beauty to your home
8. Use Baskets to Group and Contain Items

Baskets do the work trays cannot: they hide what you do not need to see. I keep onions, spare dishcloths, and the odd packet of coffee filters in woven seagrass on my counter.
The opacity is the point. Where a tray displays, a basket contains.
Natural fibers look warmer but swell and soften in kitchen humidity. A damp sponge set down nearby will warp rattan over a season.
Synthetic weave, tight polypropylene or coated wire, holds its shape near the sink and wipes clean with a cloth. I still prefer seagrass or unbleached cotton for dry zones, the pantry end of a long counter where steam never reaches.
Size matters more than material. A basket that sits proud of the shelf lip catches hips and elbows; one sized to slide flush against the back wall disappears until you need it.
Measure your depth, subtract an inch for finger room, and buy to that number. Anything deeper becomes an obstacle you will eventually move to a closet.

Heavy Duty and Solid magnetic knife holder: Our magnetic knife holder for refrigerator contains powerful magnets and has an extremely strong grasp for holding kitchen knives, utensils securely and evenly. Best knife magnet strip with no risk of the knives falling off, even for heavy cleaver and knives with heavy handles. Great magnetic knife holder for fridge to help with kitchen organization and storage. Not compatible with non-austenitic stainless steel or other non-magnetic materials. Please test your knives with a magnet before purchase.
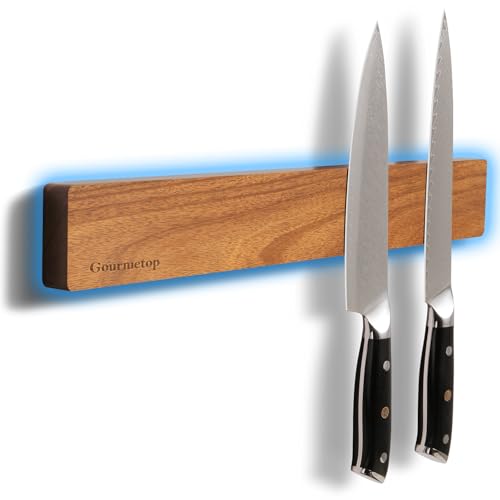
Securely Hold without Slipping: Built with dual-row powerful knife magnets strategically positioned across the 16-inch knife holder, this knife magnetic strip keeps heavy cleavers, Damascus knives, chef knives and kitchen shears securely in place without slipping — no dead zones, no weak spots. Powerful magnets keep kitchen knives firmly in place, yet make them easy to grab with a smooth pull whenever you need them

Full-Length Magnetic Hold — Full-length magnets keep everyday knives, kitchen shears, and small metal tools visible, organized, and easy to grab during daily cooking.
9. Use Space-Saving Kitchen Products
A collapsible colander that folds flat against a cabinet door sounds like a win until you drain a pound of pasta through it and feel the walls flex.
If you reach for the old solid one the next time, the space-saver has failed.
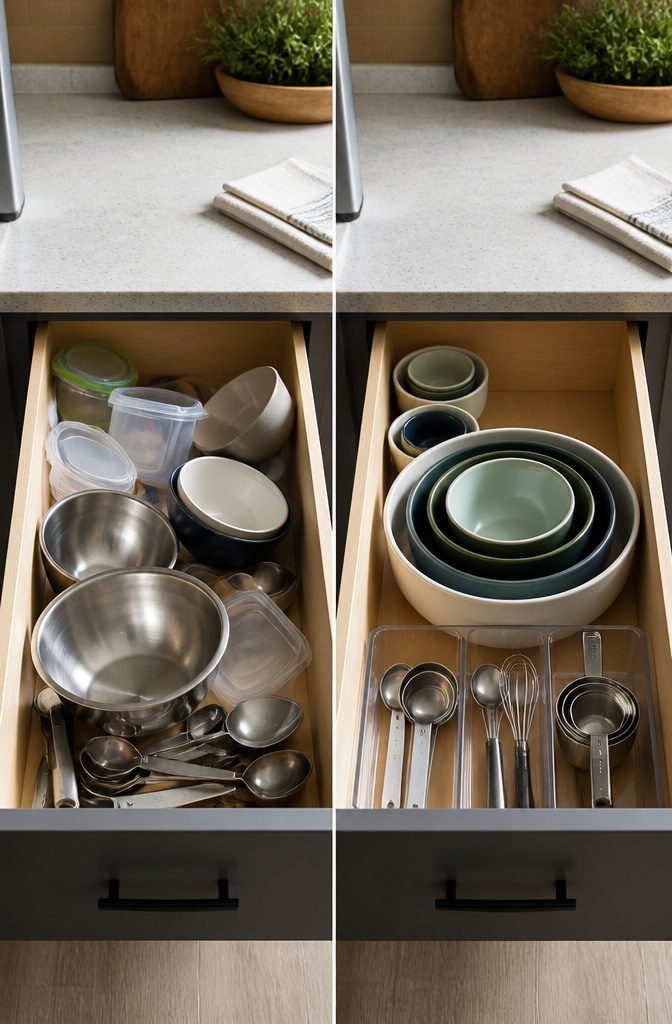
Nesting bowls and stackable measuring sets work the same way: they earn their spot only when the one you need performs identically to its full-size equivalent.
I look for silicone over thin plastic on collapsible tools; the thicker walls hold shape under weight and spring back after years of compression. Nesting bowls should have flat rims that sit steady when stacked and separate without a fight.
The test is simple: use the new tool for two weeks straight, and if you find yourself digging through the drawer for the old standby, return it or relegate it to camping.
The real space savings come from what you stop buying. A single nesting set of five bowls replaces a mismatched pile that never stacked anyway, and that is where the counter space actually comes back.

Rustic Elegance with Modern Appeal:The combination of particle boards and iron frames delivers a charming rustic vibe that enhances the look of your home.Complements a variety of styles, from modern minimalism to traditional coziness, adding sophistication and warmth to your living space.

Floating Shelf with Mug Holder: The top shelf can display or organize your favorite things, and the hook is suitable for hanging coffe mug cups, cooking utensil, towel, and so on. Size: The Mug Holder measures 17''W x 6.3''D x 3.5''H

【Excellent Workmanship Decent Shelves】Choosing high quality pine wood, the floating wall shelf is sturdy and heavy duty, instead lightweight wood; and industrial metal bracket of the mug rack processed with matte finish features a rustic style, matches with almost any wall.
10. Store Less Attractive Items in Opaque Containers

Visual clutter costs more than counter space.
A sponge left out, a scrub brush by the sink, a bulk packet of coffee filters, a charging cable snaking toward the outlet: each item demands a split second of attention every time you walk past.
Multiply that by a dozen objects and your kitchen starts to feel like work before you’ve even started cooking. Opaque containers hide that load.
Knowing what belongs inside them takes the most thought. Bread in its original bag, cooking utensils that clash with everything else, the practical tools you need but do not need to see: these are the candidates.
A lidded ceramic jar or a simple box keeps the function close while the form stays calm.
Out of sight can become out of mind, though, so the container itself needs a system.
One jar for sponges and scrub brushes, another for bulk dry goods, a third for cables and small tools: label them or commit the contents to memory, because a pretty box full of forgotten supplies is just clutter in a costume.
Under-the-sink storage is a godsend that can help you clear your counters. Sliding shelves or stacked shelving can double space for storing cleaning products, and a door caddy works for smaller supplies, such as sponges and scrub brushes.
That same logic applies above the counter.
A door caddy or shallow bin inside a cabinet keeps the ugly stuff accessible without letting it colonize your workspace. The container wins when it earns its spot by what it removes, not by what it adds.
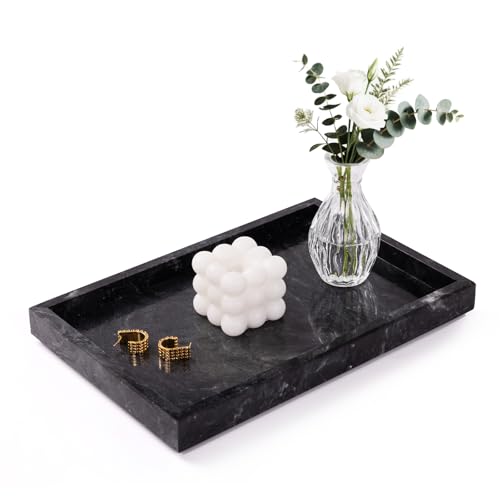
Premium Natural Marble Material: This elegant bathroom tray is crafted from high-quality natural marble, providing a smooth surface. Perfect as a jewelry tray or as a perfume tray, this rectangle marble tray adds luxury for home decor aesthetic

【Prominent Design】 Our kitchen sink organizer tray thickened the edges by 40% and the bottom by 30%, making the tray more thick and durable.Our silicone sponge holder has 21 rounded raised designs for easy cleaning and quick drying of soap or sponge.Raised edges prevent water or other spills, keeping the counter dry and tidy.The non-slip bottom design keeps the silicone tray stable on the sink or countertop and won't slide around.

Size & Material: Includes 2 solid acacia wood trays: Large (11.43" x 4.13") & Small (7.43" x 4.13"). Please measure your space before ordering. These compact wooden trays maximize storage without cluttering
The Coffee Station Exception

A coffee station is the one counter setup I will defend against the clear-everything rule, but only when it earns its footprint through the zone principle.
Every supply, the grinder, the mugs, the filters, the spoon, lives inside a single compact footprint, typically 12–18 inches of counter depth front to back.
The moment a sugar bowl drifts toward the stove or a mug tree starts blocking the prep area, the exception collapses and the station becomes ordinary clutter.
I have seen the zone fail in small kitchens where the coffee maker sat too close to the wall, forcing the user to pull it forward to fill the reservoir, which then left drips across the counter that never got wiped.
That bleed into adjacent space is what kills it. A proper station has clearance on all sides for operation, and the supplies store underneath or beside the machine, not scattered toward the sink.
For renters, this matters because a contained coffee zone needs no installation and moves with you.
The judgment call is the machine itself. A bulky automatic espresso maker demands more depth than the 12-inch minimum and tends to sprawl with its own tamping station and knock box.
I would skip it unless the counter is deep enough to absorb that footprint without impinging on the work triangle. A simple pour-over setup or compact drip machine respects the boundary, and that self-containment is what makes the exception valid.
What Stays and What Goes

The only items that earn permanent counter space are the ones you touch every single morning without thinking.
For most kitchens, that means the coffee maker, a toaster or toaster oven, and maybe one prep tool like a stand mixer. Everything else needs to pass a harder test than you think.
I run appliances through two frequencies: actual use and aspirational use.
The air fryer feels like a daily tool when you unbox it, but if it runs twice a month, it belongs in a cabinet. Same for the bread maker, the pasta attachment, the second blender.
Be honest about which cord you actually plug in versus which one gathers dust beside the backsplash. If it needs a wipe before it can work, it does not deserve the real estate.
The one-year rule works for tools and small appliances alike. If you have not used it in twelve months, it does not belong within arm’s reach.
Seasonal items, the holiday waffle iron or summer ice shaver, can rotate into an appliance garage or upper cabinet when they are not in active rotation.
Counters are workspace, not storage, and every item sitting there makes the ones you do use harder to access.
The Weekly Reset

Counter organization lives or dies in the ten minutes before you unpack new groceries. I run a sweep then because the fridge is still full, so I can see exactly what accumulated against the system that week.
I walk the counter end to end and relocate strays to their zones: mail to the desk pile, school papers to the backpack hook, that one coffee mug back to the cabinet.
Anything that isn’t a daily-use tool, an active ingredient, or a container in its designated spot goes into a basket for proper sorting or straight back home.
The wipe takes about ninety seconds with a damp cloth across the full surface, just enough to lift crumbs and the oil film that builds near the stove.
This is also where I assess what broke down. Air fryers creep back out after a busy week; staging zones fill when the fruit bowl shrinks against summer melons.
If the same item drifts to the wrong spot three resets in a row, the system needs adjusting, not more willpower.
The air fryer might earn counter rights, or the bowl gets swapped for something wider. Skip this audit and the clutter stops being temporary; it becomes the new normal.
When Decorative Becomes Distracting

A tray can corral clutter into a single visual block, which is exactly why it becomes invisible.
The first week, you lift it to wipe underneath. By week three, the coffee ring and crumbs sit where the tray meets the counter because moving the whole vignette feels like disturbing a display.
That shift, from tool to decor object, is the warning sign: when you start cleaning around the container instead of under it, the tray has stopped working for you.
Bowls of lemons and cake stands for condiments follow the same arc.
They read as intentional, which makes the clutter they hold look staged rather than messy. One bowl for loose produce stays useful; three bowls collecting mail, keys, and chargers become a pile you stop seeing.
The fix is stricter than the styling blogs suggest. Pick the tray or bowl that actually moves daily, not the one that matches your hardware.
If you would not lift it to wipe the counter tonight, it is already decorative. I would rather see a cheap plastic tub that gets emptied weekly than a brass platter that turns crumbs into part of the look.
Vertical Storage That Actually Works
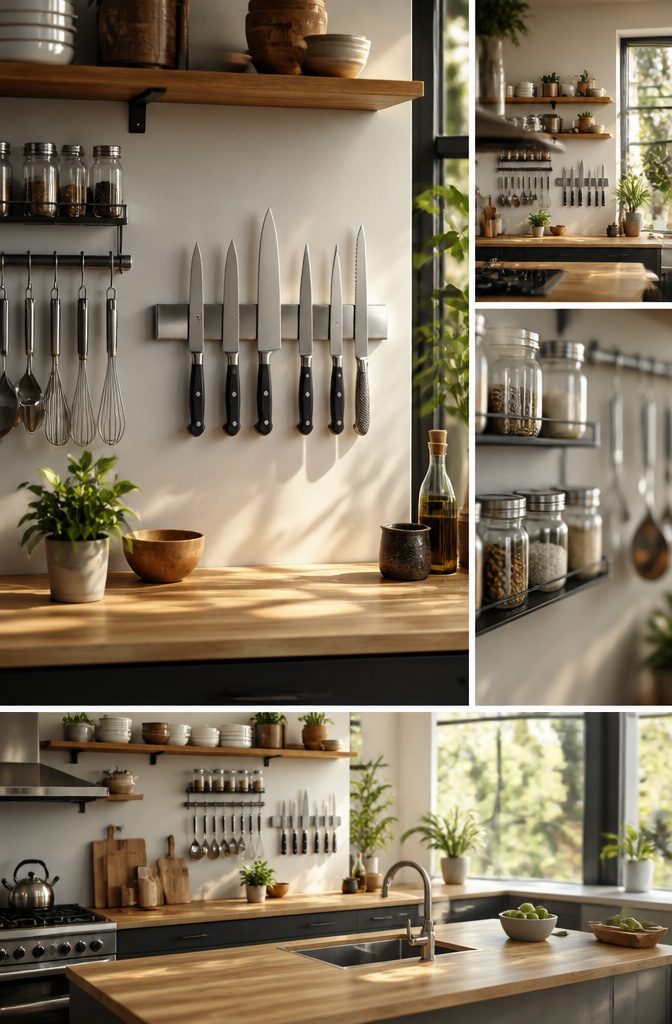
Wall space is where most kitchens hide their easiest wins.
A magnetic knife strip mounted on the backsplash clears the block off the counter and keeps blades within reach, though the magnet needs real strength; a weak strip lets knives slide, and a dirty one dulls the edge over time.
Under-cabinet rails work the same way for mugs, freeing shelf space below while the cups hang dry.
For renters, tension rods inside cabinets hold small trays or cleaning bottles without a screw. Removable adhesive hooks rated for 5–10 pounds handle lightweight tools or a single dish towel; check the weight rating before trusting one with a cast-iron pan.
Freestanding shelf risers double cabinet layers without touching a wall, and under-shelf wire baskets slide onto existing shelves to catch loose wraps or spice jars.
Access and visibility pull in opposite directions. Wall-mounted tools look tidy until you cook in a rush and need them off the strip one-handed.
I would pick a magnetic strip for knives and skip it for anything I grab hourly. For the rest, under-shelf baskets win on a weekend install with no landlord conversation required.
Frequently Asked Questions
How do I keep my kitchen counters clutter-free?
Assign every item to one of three zones: prep, cooking, or staging.
Return each piece to its spot after use, then run a 3-minute reset each evening to stop accumulation from becoming a weekend project. A 10-minute version before hosting keeps the counters guest-ready without the shove-everything-into-cabinets panic.
What appliances should stay on the counter?
Only appliances you touch every single morning without thinking. For most kitchens, that means the coffee maker, a toaster or toaster oven, and maybe one prep tool like a stand mixer.
The air fryer you run twice a month belongs in a cabinet; if it needs a wipe before it can work, it does not deserve the real estate.
How do you organize a kitchen counter with limited cabinet space?
Use vertical solutions on the counter itself.
Shelf risers double usable footprint above coffee stations, wall-mounted rails and hooks lift tools off the surface, and under-shelf wire baskets slide onto existing shelves to catch wraps or spice jars. Freestanding risers need no installation, which matters for renters.