
Two weekend afternoons and about a hundred dollars per cabinet gets you full-extension pull-out drawers that end the kneeling-and-reaching ritual in deep base cabinets.
The step that destroys more plywood than any other is the width cut: most side-mount slides eat half an inch per side, so a drawer built to the raw opening binds hard or refuses to fit at all.
That subtraction, done before the saw starts, separates finished drawers from firewood.
1. Assess the Cabinet

Open the cabinet and check whether the shelves lift out.
Most do, but a fixed shelf at mid-height turns one tall cavity into two short ones, and that changes every cut that follows. While the shelves are out, look at the front edge of the box.
A face frame cabinet has a hardwood border, usually 3/4 to 1 inch thick, that overhangs the interior walls. That overhang blocks drawer slides from mounting flush, so you will need to install spacers inside first.
The typical overhang is 1 1/8 inches, and your spacers need to match or slightly exceed that thickness so the slides sit square. Laminated thin plywood works; whatever scrap you use, the dimension matters more than the species.
Frameless cabinets, sometimes called European style, have no front frame at all. The box sides run straight to the edge, which means the slides mount directly to the interior walls with no spacer needed.
I would take thirty seconds with a tape measure now rather than discover the mismatch after the lumber is cut.
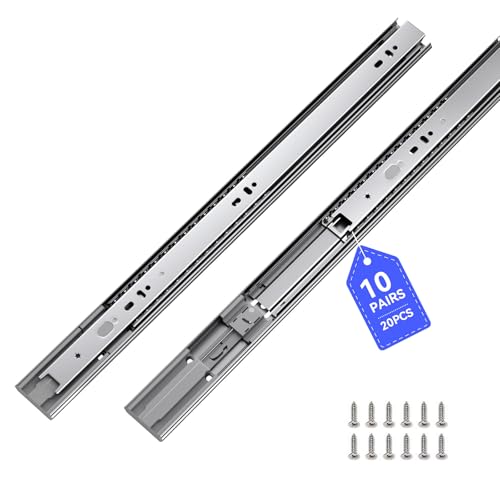
※ Soft Close: The drawer slides equipped hydraulic damper which allows the slides achieve soft close effect. Double spring design make less noise when close and open, create a warm and quiet family environment for you.

【Heavy Duty 100 lb Capacity】 BAIDICE full extension drawer slides are built with 1.0mm cold-rolled steel and dual industrial-grade ball bearings, supporting up to 100 lbs—40 lbs more than standard slides. The precision ball bearing mechanism ensures smooth gliding even under heavy loads, while the built-in rubber crash pad keeps operation as quiet as 35 decibels.

Premium Soft-Close for a Quiet Home: Equipped with a metal hydraulic damper for durability and a gentle, self-closing action. The double spring design effectively minimizes noise, creating a peaceful and quiet environment for your family
2. Gather Tools and Materials

A weekend pull-out drawer project lives or dies in the material you pick at the store. I start with the frame: 1×3 Premium Pine or Poplar keeps the box light and straight enough for kitchen duty.
For the bottom, standard 1/4 inch plywood works, though Baltic birch plywood runs about $65 for a 4 x 8-ft. sheet against $50 for standard hardwood plywood and gives you cleaner edges with no voids in the core.
Worth the upgrade if your budget has the room.
Slides are where I make the real choice. Roller slides run cheap, install in two minutes, and carry 35 to 100 lbs., but they only extend three-quarters of their length.
That back corner of the drawer stays buried in shadow. Ball-bearing slides cost roughly three times as much, extend fully, and handle 75 to 200 lb. versions at about $40 a pair.
They are fussy to install, so I build my drawer boxes about 1/32 in. smaller than the opening and shim with masking tape if I need to.
If all of this sounds like too much sorting, a pre-made kit skips most of it. You will trade some customization for speed, which is the right call for a first project or a rental kitchen you do not own.

【Thick Upgrade up to 200lb】VITERLYNX 51mm width slide rails are made of high-strength Q235 thick steel plate ( Solid upgrade up to 200lb capacity) thicker and more load-bearing than other. Comes with M4 screws, one-stop shopping.
【Heavy Duty 100 lb Capacity】 BAIDICE full extension drawer slides are built with 1.0mm cold-rolled steel and dual industrial-grade ball bearings, supporting up to 100 lbs—40 lbs more than standard slides. The precision ball bearing mechanism ensures smooth gliding even under heavy loads, while the built-in rubber crash pad keeps operation as quiet as 35 decibels.

📏 INSTALLATION NOTES — Slide Length:12"(300mm)📐. Fully Extended length:24"(600mm)🚀. Quantity: 1 pair(2 pieces)🧩. Installation clearance: 0.5"(Each)⚡. Suitable for drawers with an internal depth of ≥ 13"-15"📏. The space between drawer and cabinet wall need to be 0.5in each at left and right side,total 1in ( inside cabinet width - outside drawer width= 1in )⚖️, Mounting screws included🔩
3. Prepare the Cabinet

Existing shelves have to come out before anything else can go in. If yours are screwed to cleats, a driver makes quick work of it.
If they are glued, this is the step that takes the longest; working a putty knife along the joint and patience will save the cabinet sides from gouges.
Most kitchens built in the last few decades are face-frame cabinets. The frame overhangs the box inside by about ¾ inch to 1⅛ inches, which puts the drawer slides in the path of the door or its hinges.
Spacers fix this. Laminate thin plywood to the thickness you need, or rip down the old shelf itself into strips and glue or screw them to the side walls.
Drill pilot holes first so the wood does not split, and countersink the heads so the slides sit flush on top.
The cavity I picture here is 23 inches deep, 30 inches wide, and 34½ inches tall.
That leaves reasonable room for two pull-outs, maybe three if you keep the fronts low. Vacuum out the grit and wipe down the sides before you mount anything.
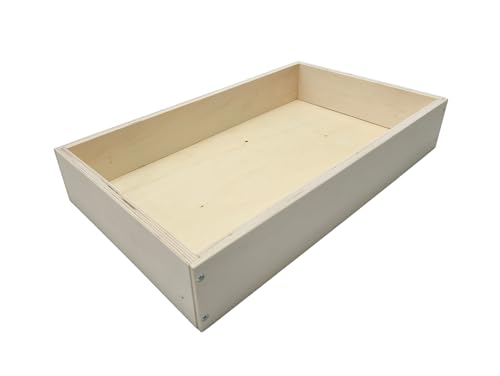
【What You Get】 – 19" deep replacement kitchen drawer box made of durable plywood, designed for cabinets with 19–21" drawer slide depth. Ships unassembled with pre-cut panels and pre-drilled holes for fast setup. Screws included. Assembly typically takes about 5 minutes.
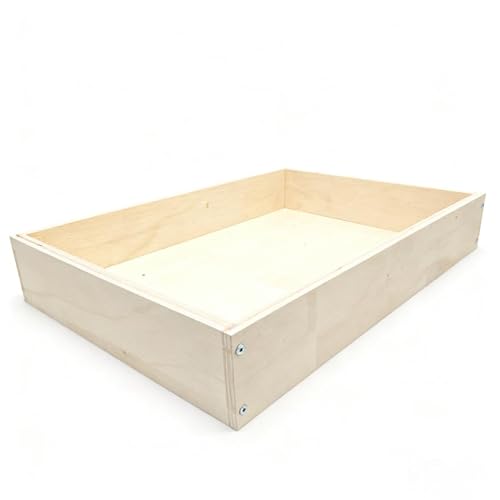
【What You Get】 – 14"W x 19"D x 3 1/2"H replacement kitchen drawer box made of durable plywood. Thickness of side panel: 1/2 inch (12mm). Ships unassembled, but all panels are pre-cut with pre-drilled holes for quick setup. Screws are included. Assembly is straightforward and takes about 5 minutes.

【Size Check First】Before ordering this pullout drawers for cabinets, carefully measure and record your cabinet opening's width, depth, and height. The right fit ensures smooth sliding and proper function. Measure twice, order once
4. Measure and Cut Drawer Components

The width of your drawer box is not the width of the cabinet opening. Measure between the cabinet walls or any spacers you have already installed, then subtract the combined thickness of both drawer slides from that total.
Most side-mount slides are about 1/2 inch thick, so you would typically remove 1 inch from the opening width to arrive at the final drawer width.
This is the calculation that ruins more pull-out drawers than any other; forget to account for the slide thickness and your drawer will bind or refuse to fit at all.
For the height, I would build the sides to about 2.5 inches for a general-purpose kitchen drawer holding utensils, spice jars, or smaller items.
That gives you enough wall to keep contents contained without wasting the vertical space that a full-depth drawer would consume.
Cut your front, back, and side pieces from 1×3 or similar stock, and plow a 1/4 inch groove near the bottom edge of each piece to receive the plywood bottom.
A table saw set to the exact groove depth makes quick work of this, and moving the fence over 1/8 inch after the first pass will widen the slot to the full 1/4 inch your bottom panel needs.
Depth formulas vary by slide model, so check your specific slide specs for the exact clearance required at the back.
The math is simple once you have the right numbers, but only your slide manufacturer can give you the right numbers.

External measurements: 9" wide x 3" long x 2.4" high

Package includes: 2 piece of natural wood storage box with unfinished surface and light wood color ,ready for your hobby crafts project,each box also come with 3 small drawers fun for your small staff collections

Solid Wood Structure: Constructed from high-quality solid pinewood, this twin bed frame with drawers offers durability and a natural wood grain appearance that complements any decor
5. Assemble the Drawer

Wood glue and brad nails or screws hold the sides, front, and back together just fine for a kitchen drawer that slides out on tracks.
I clamp the joints, check for square by measuring the diagonals, and adjust before the glue sets. If the numbers match corner to corner, the box stays square; if they do not, I rack it straight and reclamp.
Dovetail joinery is stronger, no argument there, but a dovetail jig adds cost and a learning curve that most weekend projects skip. I would put that money toward better slides instead.
The bottom is 1/4 inch plywood.
It either sits in grooves cut into the sides or gets face-nailed to the bottom edge. A groove gives more support and hides the end grain; face-nailing is faster and works if your saw setup is basic.
I dry-fit the bottom first, then run a bead of glue along the grooves or the lower edges, set the panel, and tack it with brad nails while the glue dries.
Check square one more time after the bottom goes in; the panel locks the shape in place and fixes any small racking you missed.

Perfect Size for Drawer Bottom Replacement: Each plywood sheet measures 16.54 x 11.8 x 0.12 inches, fitting most standard drawer bottoms for quick and easy repair.

Perfect for Restoring Old Drawers:Designed for replacing worn or broken wooden drawer slides, ideal for old drawers, dressers, and vintage furniture repair projects.

FINGER PULL PROFILE: Designed to cut a precise bevel and arc finger grip profile, ideal for drawer fronts, wardrobe doors, and cabinet-type doors.
6. Install Drawer Slides

Ball-bearing slides demand more precision than roller slides, but you get full extension that reaches the very back of deep cabinets.
I start with the cabinet member, never the drawer, because the cabinet is the fixed reference everything else builds from.
A spacer block cut to the exact height you need keeps both sides identical without measuring twice; clamp it in place, set the slide on top, and drive the first screw.
Front-to-back alignment matters more than most people think. Even a slight twist binds the drawer or lets it rock.
I check both cabinet members with a straightedge across the opening before I touch the drawer box, and I leave the last screw loose on each side until I can confirm the pair matches.
Drawer members go on the box sides so they mirror each other, one left, one right, both oriented to pull the same direction. That sounds obvious until you install one backwards and the drawer fights you all the way out.
Roller slides forgive a little wobble; ball-bearing slides do not.
The reward is smoother travel under heavier loads, which matters once you load up on canned goods or cast iron. Tighten fully only after the drawer moves freely from front to back with no catch.

★ 10 pairs of 22 inch,mounting screws included (extra screws offered for spare use). Attention: the mounting brackets are not included,please buy separately if need it.

[4 pairs Full Extension Drawer Slides]:You will get 4 pairs(8pcs) full extension drawer slides ,14 inch.And each pair matchs with 12pcs screws.Sulawskys full extension drawer slides designed with 3-fold full extension, enabling them to fully open for easy access. You won't need to reach under the lip of your cabinet to access anything in the drawer.Ball bearings ensure smooth and quiet performance that offer less noise at closing and opening creating a silent life environment for your family.

Direct Replacement for Worn or Broken Slides: Designed as a perfect, hassle-free replacement for your existing drawer slides. The common industry dimensions and standard sizing make swapping out old, damaged slides straightforward, restoring smooth drawer operation immediately
7. Test the Drawer

Slide the drawer in slowly and listen.
Scraping means a twist in the slide mounting, and tilting usually means one side sits higher than the other. A small shim behind the higher slide fixes most binding without pulling the whole thing apart.
I keep a few strips of masking tape on hand for this, since layers of tape build up in 1/32-inch increments and let me fine-tune without re-drilling.
Watch for the back of the drawer hanging up on protruding hinges or a door that swings inward, the kind of obstacle that only shows up once the box is moving.
Ball-bearing slides are fussy about this, a hair too wide and they fight you every inch; roller slides forgive more but still only extend three-quarters of their length, so the back quarter of the drawer stays buried in the cabinet either way.
If the cuts came out clean and the slides went in level, this test takes ten minutes. If you are still learning the saw, count on a second afternoon of fitting.

【High quality, more durable】 The drawer slides is made of 1.2mm thickness high quality cold rolled steel and industrial solid steel ball,which take 100,000 times push-pull tests without damage. The maximum load weight is up to 100lbs. REGUDA is committed to produce sturdy and durable drawer slides .Besides the quality,we also focused on after-sales service,any quality or installing problem please feel free to contact us.

Soft-Close Mechanism with Hydraulic Damper & Noise Reduction: Equipped with a built-in hydraulic damper for gentle, silent self-closing action. The double spring design minimizes operational noise during opening and closing, ensuring a quiet and comfortable home environment
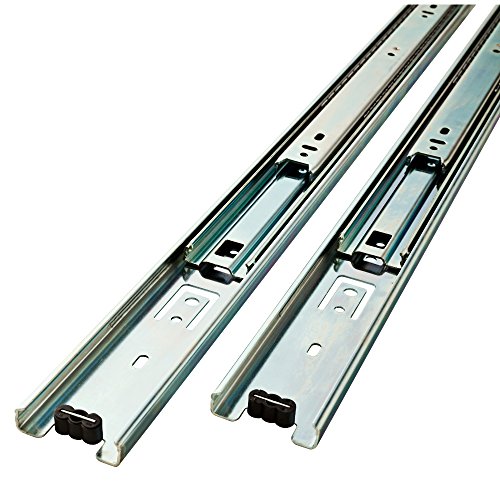
Made from stamped steel with a zinc plated finish
Drawer Slide Types Compared
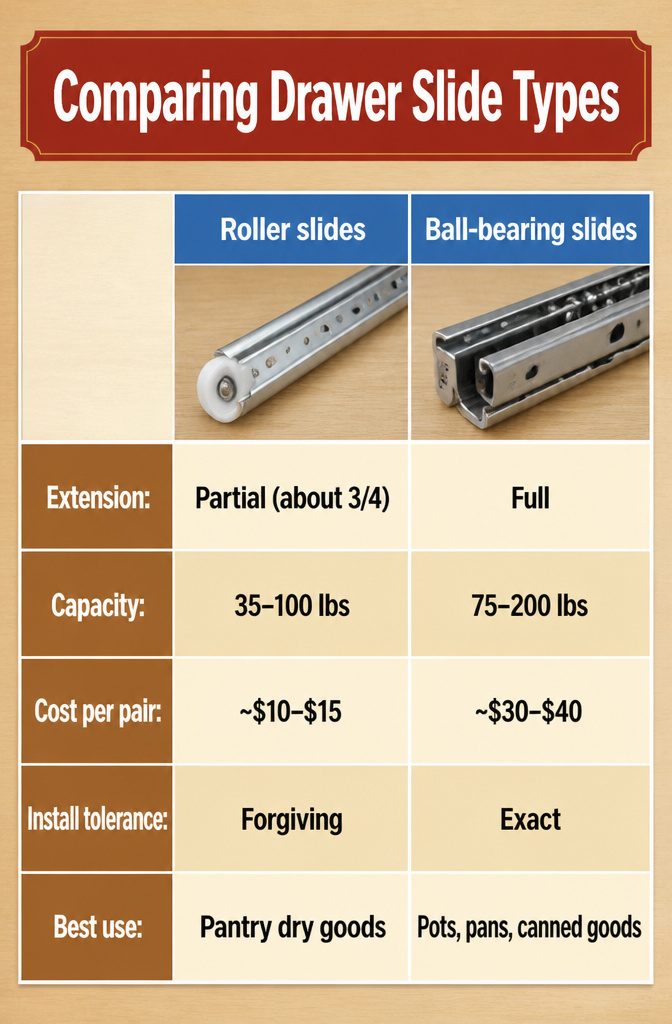
Roller slides run on plastic wheels and cost about a third of what ball-bearing hardware does. Installation takes roughly two minutes per slide, and the loose tolerances forgive a drawer box that is not perfectly sized.
Most extend only three-quarters of their length, so the back quarter of the drawer stays buried in the cabinet. They are also lighter duty, with ratings between 35 and 100 lbs depending on the model.
Ball-bearing slides glide on steel bearings and carry 75 to 200 lbs per pair.
They extend fully, which means no lost jars or lids at the rear, but they demand exact alignment. A drawer that is a hair too wide binds; one that is a hair too narrow rattles.
I build kitchen boxes 1/32 in. smaller than the opening and shim behind the slide with masking tape if needed, because shaving a drawer down after assembly is a headache I would rather skip.
| Roller slides | Ball-bearing slides | |
|---|---|---|
| Extension | Partial (about 3/4) | Full |
| Capacity | 35–100 lbs | 75–200 lbs |
| Cost per pair | ~$10–$15 | ~$30–$40 |
| Install tolerance | Forgiving | Exact |
| Best use | Pantry dry goods | Pots, pans, canned goods |
For kitchen cabinets, I pay the extra install time and buy ball-bearing. Full extension matters more when you are wrestling a Dutch oven out of a deep base cabinet.
Roller slides are fine for a pantry holding cereal boxes and spice jars, where the load is light and reaching the back is not the battle it is below counter height.

[🔝 WARM TIPS]: Please note that this pull out cabinet organizer suitable for cabinets with internal width exceeding 13" and depth exceeding 21". This pull out drawer for cabinets with Upgraded Raising Pads are compatible with both frameless cabinets and framed cabinets with edge heights up to 0.4 inches. It is essential to carefully measure your cabinet's dimensions before installation to ensure compatibility.

Package Includes: This slide set includes 3 pairs (6 pieces) of durable plastic replacement drawer slides, complete with self-adhesive tape for easy installation. These adhesive sliders for cabinets transform storage bins into convenient sliding drawers, helping you create an organized space in your dresser, closet, or wardrobe.

The double-tier Shelves can be pulled out independently: Organizing your cabinet space just got easier with the 2-tier slide out cabinet organizer. Now you can make the most of cabinet space and easily access all your pots, pans, small kitchen appliances, cleaning products, canned goods, and other items.
Wood and Materials
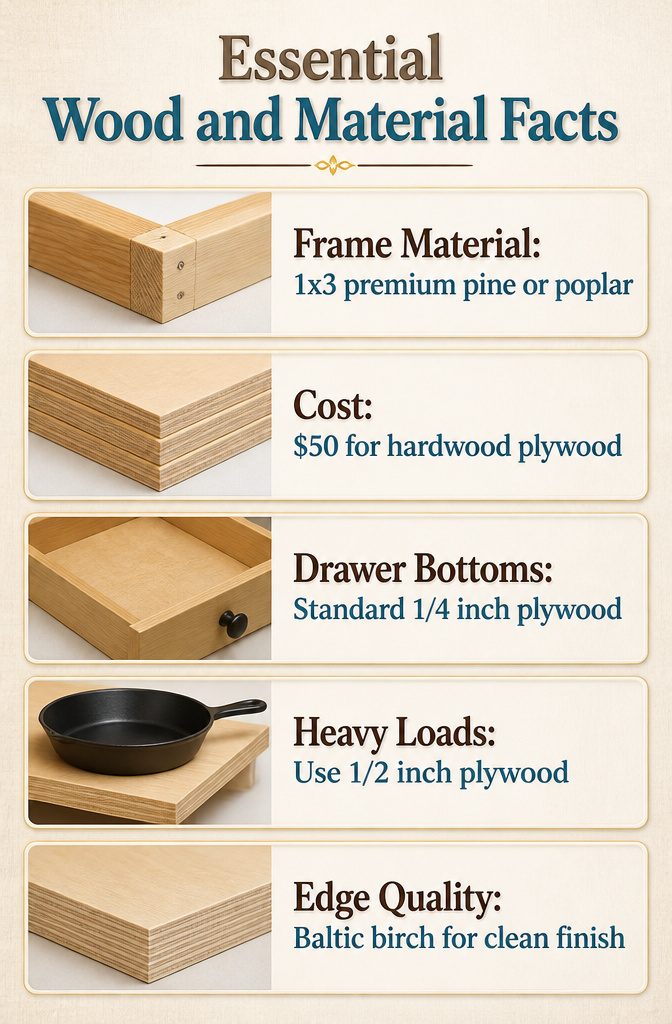
For the frames, 1×3 premium pine or poplar is the cheap route that takes paint well. It dents if you drop a heavy pot on the corner, but hidden behind a cabinet door, that flaw never shows.
Baltic birch plywood runs harder and costs more, around $65 for a 4 x 8-ft. sheet against $50 for standard hardwood plywood, though you may have to hunt past the home center to a lumberyard to find it.
The edge shows no voids, so I reach for it when the drawer face stays visible and I want a clean stain or clear finish.
Drawer bottoms are standard 1/4 inch plywood, which is fine for the usual mix of utensils and spice jars.
If you are storing cast iron or a stand mixer, 1/2 inch plywood keeps the bottom from sagging over time. I dry-fit every bottom before gluing, running a bead of wood glue in the groove and clamping it square.
A few brad nails hold it while the glue sets, and that is enough. The real choice is what shows and what does not: pine where the cabinet door hides everything, Baltic birch where the wood itself is the finish.
What Pull-Out Drawers Fix
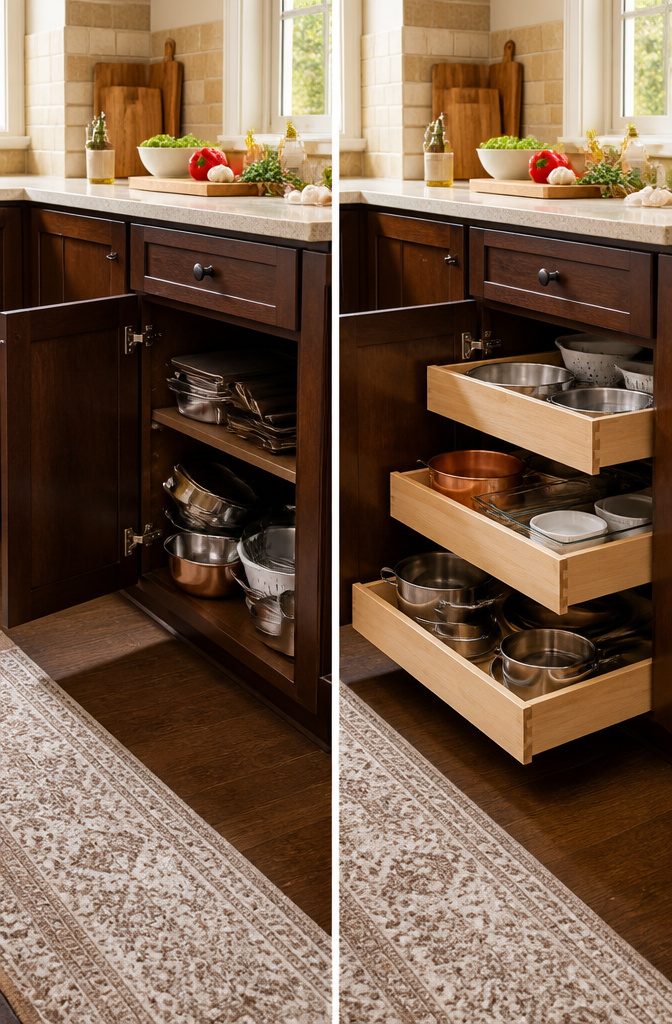
The 23-inch deep standard base cabinet is where the problem is worst.
Anything past the first six inches disappears into shadow, and retrieving it means kneeling, reaching, and shuffling half the contents onto the floor. Pull-out drawers fix this by bringing the entire depth out to you in one motion.
That same depth is what makes base cabinets the priority in my own projects.
The bending and crouching those depths demand takes a toll that upper cabinets simply do not, so I convert bases first and tackle uppers only if I have leftover material.
Defined drawer boundaries also help: instead of a single cavern where items migrate and bury each other, you get separate zones with hard edges that keep categories from bleeding together.
The most useful rollout shelves and drawers are the ones closest to the floor since these eliminate the most awkward bending and crouching. If you want to limit your time and money investment, you’ll get the most bang for your buck by retrofitting these areas first.
For a weekend project with a few hundred dollars, this means start with the base cabinets under your primary prep area and work outward.
The strain reduction alone justifies the effort, and the organization follows naturally once you stop fighting the depth.

VERSATILE COMPATIBILITY: Works smoothly with various materials including hardwood, softwood, plywood, MDF, chipboard, particle board, multilayer board,and engineering plastics etc

VERSATILE COMPATIBILITY: Works smoothly with various materials including hardwood, softwood, plywood, MDF, chipboard, particle board, multilayer board,and engineering plastics etc

FINGER PULL PROFILE: Designed to cut a precise bevel and arc finger grip profile, ideal for drawer fronts, wardrobe doors, and cabinet-type doors.
Mistakes That Waste Material

The width mistake is the one that costs you a whole sheet of plywood. You measure the opening, cut the drawer box to fit, and only then remember the slides themselves take up space.
Most side-mount drawer slides run ½ inch thick per pair, so the drawer front needs to come in a full inch narrower than the cabinet opening.
I have forgotten this twice, once on each side of the same Saturday. Now I write the subtraction on the wall in pencil before I touch the saw.
A drawer that measures square but does not sit square will bind even on straight, level slides.
The assembly stage is where this happens. A clamped story stick, or even a scrap of the same plywood set in the corner as you glue, catches the gap before it hardens.
I check diagonals with a tape measure; matching numbers mean the box is square, and a square box is what lets the slides do their job.
Height mismatches between left and right slides are harder to spot and just as damaging.
The drawer tilts, the front corner digs, and you blame the slides. A single clamped level, or a block cut to the exact mounting height, fixes this before the first screw goes in.
Full-extension slides feel like the premium choice, but they are wasted money on any cabinet where a door frame or hinge blocks that last inch of travel.
Standard extension costs less and gives you the same usable reach; the extra hardware only shows off when the door is open anyway.
Frequently Asked Questions
What tools do I need to install pull out drawers?
You need a table saw or circular saw, power drill, clamps, wood glue, and drawer slides. A spacer block or clamped level helps keep the slide mounting height identical on both sides, and masking tape works for fine-tuning shims.
How do I measure for pull out drawers?
Measure between the cabinet walls or installed spacers, then subtract the combined thickness of both drawer slides from that total. Most side-mount slides are about 1/2 inch thick, so remove 1 inch from the opening width to get your final drawer width.
Can I use pre-made drawer kits?
Yes, pre-made kits skip most material sorting and trade some customization for speed. They are the right call for a first project or a rental kitchen you do not own.
What type of wood is best for drawer construction?
1×3 premium pine or poplar works well for painted frames, while Baltic birch plywood at about $65 for a 4 x 8-ft. sheet gives cleaner edges with no voids for visible or stained finishes.
Standard hardwood plywood runs about $50 for the same size.
What to build cabinet drawers out of?
Build the frame from 1×3 pine or poplar and the bottom from 1/4 inch plywood, upgrading to 1/2 inch plywood if you are storing cast iron or heavy stand mixers. Baltic birch plywood costs more but hides no voids at the edges.